
CRCA 150 mm patch rule to stop torch on seam leaks in Coquitlam strata
CRCA 150 mm patch rule to stop torch on seam leaks in Coquitlam strata
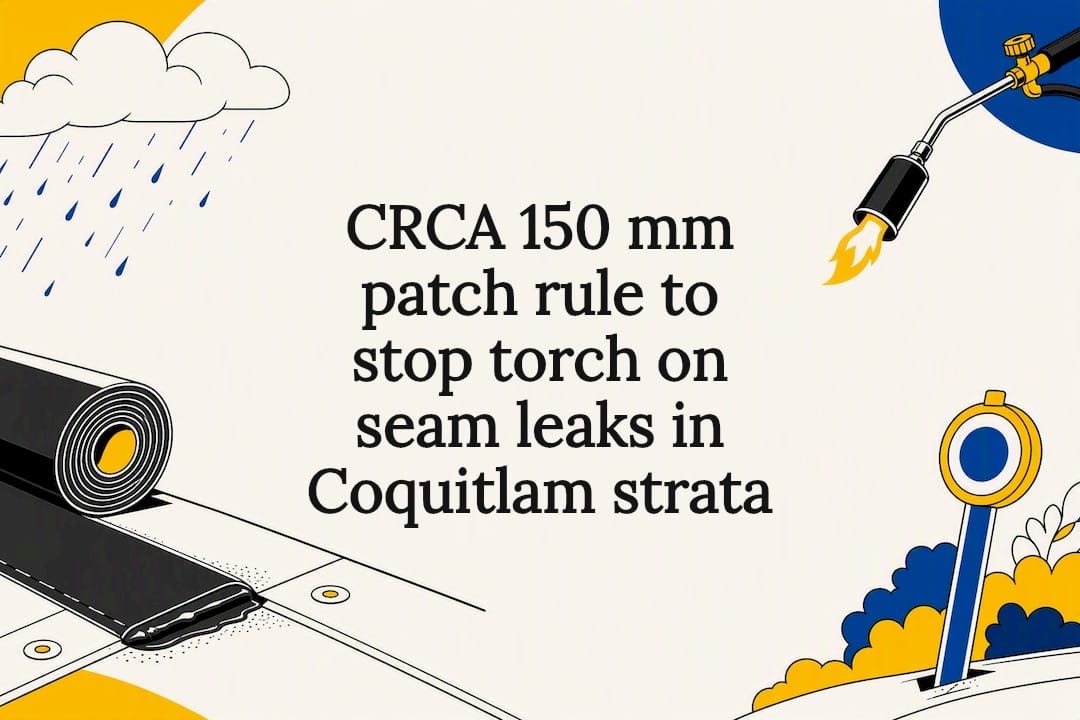
If your flat roof is leaking in Coquitlam, a failed torch-on seam is the likely culprit, not a punctured membrane. Stop walking on the wet membrane, clear the nearest roof drain, put a bucket under the interior stain, and photograph everything before you call a qualified torch-on roofer. Seam repair is usually possible, but it only holds long term when it follows CRCA-aligned procedure, not a quick tar smear.
TL;DR:
- Proper torch-on seam repairs must show continuous bleed-out along every lap, which confirms a quality bond and prevents future leaks.
- Inspections should focus on visual signs such as lifted laps, blistering, and granule loss, especially around drains and seam lines, before interior signs appear.
- Patching is effective only if less than 25 to 30 percent of the roof shows lap failure; larger issues typically require membrane replacement for long-term durability.
- Using experienced torch-on crews with proper techniques and verifying quality checks like bleed-out visibility can significantly reduce leak recurrence.
- Regular seasonal inspections, drain clearing, and drainage corrections are key to preventing seam failure rather than relying solely on patch repairs.
Table of Contents
- What causes torch-on seam failures in Coquitlam roofs
- How to inspect a Coquitlam roof for a failed torch-on seam
- How to fix a failed torch-on seam: the professional repair sequence
- Preventing torch-on seam failure: maintenance and installer standards
- Safety and permitting for torch-applied roof repairs in BC
- When to call a professional roofer in Coquitlam
- Paragon Roofing BC’s experience with torch-on seam repair in Coquitlam
- Why most seam failure advice misses the point
- Get your torch-on seam issue inspected properly
- Sources
- FAQ
What causes torch-on seam failures in Coquitlam roofs
Seam failure almost always traces back to one of two things: a bad weld the day it was installed, or years of thermal stress pulling on a lap that was never quite sealed to begin with. Coquitlam’s climate accelerates both.
A properly bonded SBS seam shows a continuous bead of melted asphalt squeezing out along the lap edge, typically 1/4 to 1/2 inch wide. That bleed-out is the physical proof the membranes fused into one waterproof layer instead of just lying on top of each other. When a crew moves the torch too fast, or works in cold weather without adjusting technique, that bead never forms properly. Roofers call it a “cold lap,” and it is invisible on installation day. It might hold through one dry summer and then open up the following winter when the membrane contracts.
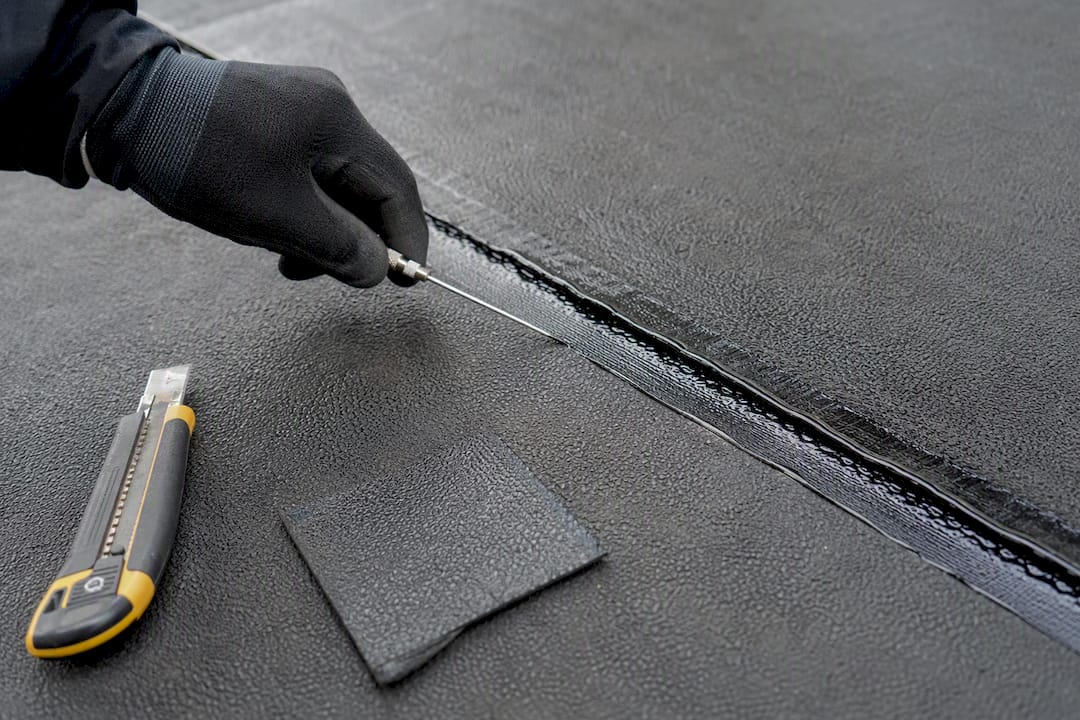
Pro Tip: If you’re commissioning new torch-on work, ask to see the bleed-out before the crew packs up for the day. A continuous molten bead along every lap is the single easiest quality check a non-roofer can actually perform.
Here is what typically drives seam failure on Coquitlam flat and low-slope roofs:
- Cold laps and insufficient bleed-out from rushed torch application or installation during cold, damp conditions.
- Thermal cycling and freeze-thaw stress , which flexes lap edges thousands of times over a roof’s life and eventually fatigues a marginal bond.
- Missing granule embedment at end and side laps, an install-day shortcut that shows no symptoms for years before the lap quietly delaminates.
- Ponding water sitting directly over seams because of clogged drains or a low spot in the deck, feeding water into any weak point under sustained pressure.
- Material ageing mismatched to the climate , particularly where APP-modified membranes were used in a system that regularly sees near-freezing nights.
Granule embedment deserves special attention because it is the failure mode nobody notices until it is too late. Application guidelines call for granules to be pressed into the lap area with a hot trowel before the next roll arrives, and delaying that step risks overheating the end lap. Skip it, and you get a lap that looks fine, passes a casual glance, and starts leaking three or four winters later with no obvious trigger.
Coquitlam sits far enough inland to escape some of the wind-driven rain that hammers West Vancouver, but it still gets the freeze-thaw whiplash of the Fraser Valley combined with heavy rain events. That combination is rough on ageing lap seams. APP membranes tend to get brittle under repeated freeze-thaw cycling and need UV protection to avoid premature ageing, while SBS membranes stay more flexible in cold weather but can still suffer lap delamination if the crew applied them below the minimum recommended application temperature. If your building’s roof was installed during a cold snap, that history matters more than the age of the membrane itself.
How to inspect a Coquitlam roof for a failed torch-on seam
Confirming seam failure starts with your eyes, not a moisture meter. Most seam failures announce themselves visually long before water finds its way inside.
Walk the perimeter and look for lifted lap edges, blistering along seam lines, or granule loss concentrated in a strip rather than scattered across the field. A lifted “fishmouth” at a lap corner is one of the clearest signs a seam has opened. Missing or thin bleed-out at a lap you can still identify from the original install is another giveaway, especially if it runs the same direction as water flow toward a drain.
Interior signs usually show up before you ever get on the roof. A soffit stain, a ceiling tile ring, or a damp patch near an interior wall almost always traces back to the nearest roof penetration or seam uphill of that spot, not straight down from where the stain appears. Water travels along the underside of the deck before it drips, so the visible stain is rarely directly below the actual defect.
- Clear every roof drain and scupper , then watch how the water moves during the next rain. Ponding that sits for more than 48 hours over a seam is a red flag.
- Photograph and timestamp every defect you find, including wide shots for context and close-ups of lap edges, blisters, and stains.
- Trace interior stains back to their likely roof source by measuring from a known reference point (a parapet, a vent stack) rather than guessing straight down.
- Avoid walking directly on wet or blistered membrane. Standing on a compromised lap can widen a small split into a larger tear.
- Bring in a professional for a moisture scan if staining is spreading, the deck feels soft underfoot, or you cannot locate an obvious surface defect.
A non-destructive moisture scan is worth the cost once a leak has been active for more than a season, because saturated insulation under an intact-looking membrane will not show on a visual inspection. If a scan flags a large wet zone, that usually triggers an invasive inspection, meaning a small section gets cut open to confirm how far the moisture has spread before anyone commits to a repair plan. For a broader walkthrough of tracing interior leaks back to their roof source, our roof leak detection guide covers the process in more detail.
How to fix a failed torch-on seam: the professional repair sequence
A seam repair is only as good as the prep work underneath it, and cutting corners here is exactly how you end up paying for the same patch twice. The standard sequence follows CRCA guidance from start to finish.
Preparation comes first. The roofer cuts away any fishmouth or ridge at the defect, then flattens or removes any section of membrane that has lost its bond to the substrate. Patching over an unbonded area without cutting it out first just traps the problem under a new layer.
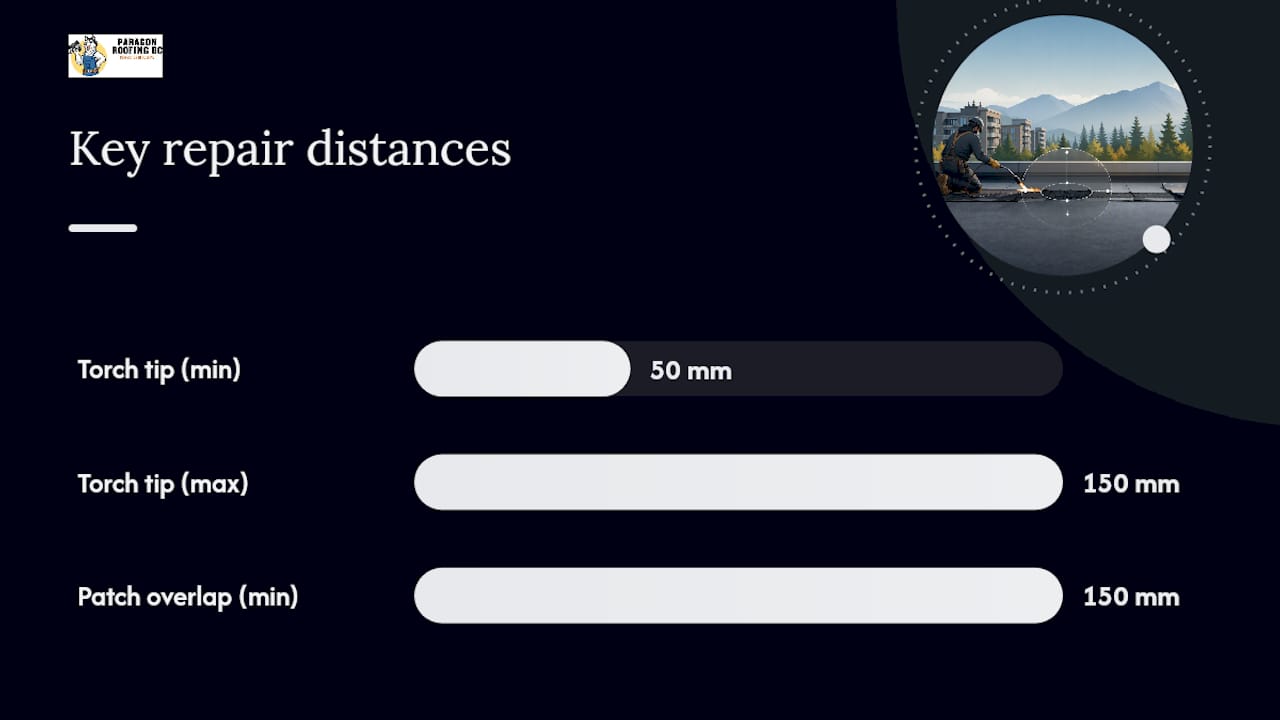
Patch sizing follows a fixed rule, not a judgment call. CRCA guidance calls for cutting out the unbonded portion and installing a compatible SBS patch overlapping the defect by a minimum of 150 mm (6 in) in every direction , with rounded corners to prevent the patch itself from lifting at a sharp edge. Square-cornered patches are a known weak point because corners concentrate stress the same way a torn piece of paper starts a rip from a straight edge.
Here is the step-by-step most experienced torch-on crews follow when repairing a seam defect:
- Isolate and dry the area. Clear standing water and let the substrate dry before applying heat, since trapped moisture under a patch will boil and blister the new weld.
- Cut out the defect. Remove fishmouths, ridges, and any section that has visibly separated from the deck or the ply beneath it.
- Cut the patch with rounded corners , sized to overlap the cleaned defect by at least 150 mm on every side.
- Heat-weld the patch using a compatible SBS membrane, or adhere it with a manufacturer-specified adhesive where torching isn’t practical.
- Confirm continuous bleed-out along every edge of the new patch before the crew leaves the roof.
- Water-test the repaired area and the nearby drain to confirm flow is restored and no ponding sits over the new work.
Torch technique is where the repair actually succeeds or fails, and it is worth understanding even if you’re not the one holding the torch. CRCA guidance recommends keeping the torch tip 50 mm to 150 mm (2 to 6 in) in front of the roll , moving it continuously in a side-to-side motion rather than holding it still. Hold the flame too close or too long in one spot, and you scorch the reinforcement mat, which weakens the membrane exactly where you need it strongest. Move too fast, and the asphalt never melts enough to bond, which recreates the original cold lap problem in the new patch. Hot asphalt applications carry the same caution: the mix needs to stay within its rated temperature range, and torching should be gradual so the reinforcement never scorches.
Pro Tip: Ask your contractor to show you the bleed-out on the finished patch before they leave. If they hesitate or the edge looks dry and dull instead of glossy and wet, that patch has not fused properly and will likely fail again within a season or two.
When being a patch stop enough? If more than roughly 25 to 30% of a roof section show lap failure, or if the underlying insulation has absorbed water across a wide area, patching individual seams turns into a losing game of whack-a-mole. At that point, the more cost-effective move is replacing the affected cap ply, or in worse cases the full membrane system, rather than chasing leaks one seam at a time. This is a judgment call best made after a moisture scan, not a guess from the ground. Our commercial roof repair guide walks through how that decision plays out on larger flat-roof buildings.
Quality confirmation is the last step, and it is the one homeowners and property managers most often skip. A repair is only proven once you’ve watched water actually drain away from the repaired area during or after a rain event, not just when the crew says the work is done.
Preventing torch-on seam failure: maintenance and installer standards
The cheapest seam repair is the one you never need, and prevention here comes down to two things: catching small problems before they spread, and demanding better workmanship the next time anyone works on your roof.
A basic seasonal cadence catches most developing failures before they become interior leaks:
- Spring inspection , after the wettest months, checking for lifted laps, blistering, and any granule loss along seam lines.
- Fall inspection , before freeze-thaw cycling starts, with particular attention to drains and gutters clogged by falling leaves.
- Post-storm checks after any significant windstorm or heavy rain event, since debris and wind uplift both stress laps directly.
- Annual drain and scupper clearing , ideally tied to one of the seasonal inspections rather than left until water is visibly backing up.
Strata councils and property managers get the most value from turning this into a written checklist tied to a specific person’s responsibility each season, because “someone should check the roof” is how inspections quietly stop happening.
Ponding water is the other half of prevention, and it is often a drainage design problem rather than a membrane problem. Fixing it can mean re-sloping a low spot with tapered insulation, correcting an undersized internal drain, or repositioning a scupper that was never quite in the right place to begin with. For Coquitlam’s heavy-rain conditions, correcting drainage generally delivers longer-term protection against seam failure than patching the same low spot every year, since a chronic low spot will keep stressing whatever seam sits under it no matter how many times you patch it.
If you’re procuring new torch-on work or a major repair, put these requirements in the contract, not just in a verbal conversation:
- Visible bleed-out at every lap, confirmed before the crew leaves the job site.
- Granule embedment pressed in with a hot trowel at every end and side lap, not left to the next roll.
- Staggered end laps between base and cap sheets, offset by at least 18 inches so no single leak path runs continuously through both plies.
- Experienced torch crews with a track record on SBS systems in coastal BC conditions, not a generalist crew doing torch-on for the first time this season.
Material choice matters too. SBS membranes generally hold up better than APP in a climate with frequent near-freezing nights, since SBS stays flexible where APP tends to stiffen and crack. A protective UV coating on top of either system extends its working life, particularly on south-facing sections that see the most direct sun. For more on how these climate-driven failure patterns show up across the region, see our guide to roof leak causes in BC.
Safety and permitting for torch-applied roof repairs in BC
Open-flame torch work is not a job for a general handyman, and any contractor who treats it casually is a red flag before they even open their toolbox. A propane torch running at roofing temperatures can ignite insulation, old roofing debris, or even the membrane itself if left in one spot too long, which is why trained mechanics run these tools, not apprentices working unsupervised.
Before torch work starts, a competent crew checks:
- Hose couplings and regulators for wear, leaks, or damage that could cause an uncontrolled flame.
- Torch tip distance and motion , keeping to the continuous, controlled technique described earlier rather than holding a static flame.
- Fire watch requirements , since many municipalities and insurers expect an assigned person watching for smouldering material for a set period after torching stops, often an hour or more.
- Nearby combustibles , including anything stored on or near the roof that could ignite from radiant heat.
Municipal hot-work permits and fire-watch protocols vary by jurisdiction, so confirm what Coquitlam and your specific building require before work begins rather than assuming your contractor has already sorted it. WorkSafeBC governs the training and safety standards for workers doing this kind of hot work, and a reputable contractor should be able to show proof of that training along with current liability insurance without you having to ask twice. Our page on roofing safety standards and compliance in BC breaks down what documentation you’re entitled to see before a crew sets foot on your roof.
When to call a professional roofer in Coquitlam
Some seam problems can wait for a scheduled inspection. Others cannot.
Call immediately if you have an active interior leak during rain, ponding water sitting over a section of roof deck that feels soft or spongy underfoot, or a large area where laps are visibly lifting or delaminating across more than a small patch. Any of those point to water already inside the building envelope, and delay just adds to the eventual repair bill.
When vetting a torch-on contractor, ask specifically about their SBS torch experience, not just general roofing background, since torch technique is a distinct skill from shingle or metal work. Request references from similar buildings, ideally strata or commercial properties with comparable flat-roof systems, and confirm current insurance and WorkSafeBC clearance before anyone climbs a ladder.
- Confirm the scope in writing , including exactly which seams or areas will be repaired versus inspected.
- Request dated photos of the defect before and after repair, not just a verbal confirmation the work is done.
- Get warranty terms in writing , including what voids the warranty and how long it runs.
- Schedule a post-repair inspection for the next heavy rain, and build ongoing maintenance into your annual budget rather than treating this as a one-time fix.
Pro Tip: A contractor who won’t commit to a written warranty on seam work is telling you something about their confidence in that repair. Treat that hesitation as information.
For a full residential leak-tracing walkthrough before you make that call, revisit the diagnostic steps in the roof leak detection guide above.
Paragon Roofing BC’s experience with torch-on seam repair in Coquitlam
Paragon Roofing BC works across Coquitlam and the wider Lower Mainland, and torch-on seam and flashing failures are a recurring call type on the strata and commercial properties we service. Flat and low-slope roofs are common on Coquitlam townhouse complexes and multifamily buildings, and seam failure at aging laps is consistently one of the most common reasons those roofs start leaking.
We’ve applied the same CRCA-aligned diagnostic approach across related problem types, including step flashing checks on sloped sections and chimney flashing repairs where torch-on membranes tie into masonry penetrations. Strata party-wall inspections on townhouse complexes often turn up the same underlying issue: a seam or lap that was never quite sealed properly at installation and finally gave out years later.
For a failed torch-on seam specifically, our process covers:
- On-site inspection and documentation , including photos and, where warranted, a moisture assessment before recommending a repair scope.
- CRCA-aligned patch repair , following the same 150 mm minimum overlap and heat-welding procedure detailed above.
- Drainage correction where ponding is contributing to the failure, not just patching the symptom.
- Follow-up maintenance scheduling so the repaired area gets checked again at the next seasonal inspection rather than forgotten until it leaks again.
Our detailed torch-on roofing installation guide covers the surface preparation and multi-ply sequencing we follow on new installs, which is the same standard we hold repair work to.
Why most seam failure advice misses the point
Most articles on this topic treat seam failure like a material defect, something wrong with the membrane itself. It rarely is. The CRCA’s own guidance keeps pointing back to workmanship: bleed-out width, torch distance, granule embedment timing. Every one of those is a technique problem, not a product problem.
That reframes the real question homeowners and strata councils should be asking a contractor. It’s not “what membrane do you use,” it’s “how do you control your torch, and will you show me the bleed-out before you leave.” Conventional advice spends too much time on material comparisons and not enough on verifying the install itself.
If I had to prioritize one thing from everything covered here, it’s this: demand to see the quality checks, don’t take them on faith. A visible bead of bleed-out and properly embedded granules cost nothing extra to verify and prevent the majority of the callbacks I’ve described above. Prevention beats patching, every time.
— Harman
Get your torch-on seam issue inspected properly
If you need a torch-on seam problem diagnosed and repaired to CRCA standard without a quick fix that fails again next winter, choose a qualified roofing contractor. We handle everything from a single failed lap on a townhouse complex to full strata roof planning, and we document every repair with photos and a follow-up maintenance plan so you’re not guessing whether the fix actually held.

If you’re dealing with an active leak or suspect a seam has opened somewhere on your flat roof, our residential roofing services page covers inspection and repair for homeowners, while strata councils and property managers can go straight to our strata and multifamily roofing services page to book an inspection across a whole complex. Commercial building decision makers dealing with membrane issues on a larger flat roof can start with our commercial roofing services page. Get in touch with a roofing professional to have the problem inspected before the next heavy rain occurs.
FAQ
What is the lifespan of a torch-on roof?
A well-installed torch-on (modified bitumen) roof typically lasts several decades, but individual seams can fail well before that if the original weld had insufficient bleed-out or missing granule embedment at the laps.
Why is my roof leaking at the seams?
Seam leaks almost always come from a cold lap, thermal fatigue at a lap edge, or ponding water sitting over a weak seam. Check for lifted laps, missing bleed-out, or granule loss along the lap lines described in the diagnosis section above.
Who is the biggest roofing company in Canada?
There isn’t one single roofing company that dominates the entire Canadian market since most roofing work is handled by regional and local contractors rather than one national provider. For Coquitlam and the Lower Mainland specifically, Paragon Roofing BC focuses on local torch-on, flat roof, and strata work rather than operating as a national brand.
What are the downsides of torch-on roofing?
Torch-on roofing requires skilled, WorkSafeBC-trained crews and open-flame work, which raises both the safety stakes and the installation cost compared to some other systems. Poor technique during installation, specifically insufficient bleed-out or missing granule embedment, is the leading cause of premature seam failure.
How much does seam repair cost compared to a full re-roof?
Costs vary by scope and access, and current pricing is available directly through Paragon Roofing BC’s service pages rather than a fixed rate here. As a rule of thumb, isolated patch repairs following the 150 mm overlap standard cost far less than a full membrane replacement, but if lap failure affects a large portion of the roof or insulation has absorbed significant water, replacement often becomes the more cost-effective option.
Recommended
Our Roofing Blog
Have more questions about roofing?
Check out our FAQs or give us a call today to speak to an expert roofer in Vancouver Lower Mainland, BC. We're here to help our neighbours make educated decisions about their roof. For our team, we value helping clients save money while making their roofs last.
