
North Vancouver roof deck rot: spot it, fix it, stop it
North Vancouver roof deck rot: spot it, fix it, stop it
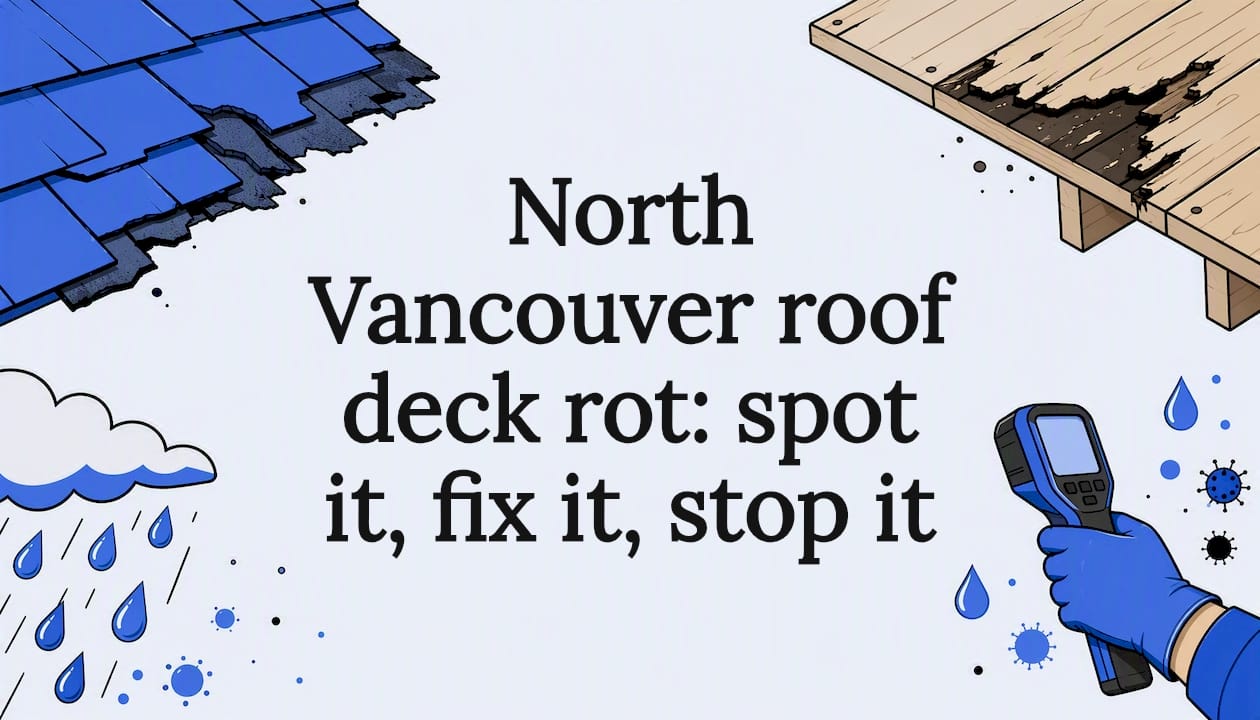
If your North Vancouver home has soft spots underfoot when you walk the roof, brown ceiling stains spreading after a rainy stretch, or a musty smell drifting down from the attic, you likely have roof deck rot. The single most important thing you can do right now is book a licensed on-site inspection before the next wet season adds another layer of damage.
Roof deck rot, technically called sheathing decay, is the biological breakdown of the plywood or OSB panels that form the structural base of your roof. It is not a cosmetic problem. Once decay fungi colonise the wood fibres, the sheathing loses structural integrity, and every rainstorm pushes the damage further.
Act now if you notice any of these:
- Soft, spongy, or springy areas when you press on the roof surface
- Water stains or bubbling paint on interior ceilings, especially after rain
- A musty or earthy smell coming from the attic
- Rusty nail tips visible from inside the attic space
- Visible mould or dark staining on attic rafters
Temporary steps while you wait for an inspection:
- Place a bucket under any active drip and photograph the location
- Secure a tarpaulin over the affected area using sandbags or weighted boards — never penetrate the roof surface with additional fasteners
- Note the date you first noticed each sign and photograph everything from inside and outside
Paragonroofingbc provides on-site inspections with a full photographic report so you have documented evidence for strata boards, insurers, or future buyers. Check 12 signs you need a professional roof inspection to confirm whether your situation warrants an urgent call.
Pro Tip: Do not walk on a roof you suspect has decking rot. Soft sheathing can give way without warning. Stay on the ground, use binoculars for a visual check, and let a licensed roofer do the surface inspection.
Key takeaways
North Vancouver roof deck rot progresses faster than in most Canadian climates because sustained coastal rainfall keeps wood moisture content above the decay threshold for months at a time, and fixing only the visible damage without correcting the underlying failure path leads to recurrence within one to two seasons.
| Point | Details |
|---|---|
| Spot it early | Ceiling stains, musty attic odours, and rusty nail tips often appear before exterior signs are visible. |
| Climate drives urgency | Annual precipitation exceeding 1,300 mm on the North Shore keeps sheathing moisture above the decay threshold for months each year. |
| Drying alone is not enough | Decay fungi can tolerate drying and reactivate; mechanical removal to sound wood is the reliable fix. |
| Match repair to damage extent | Localised patches suit 1–4 panels; partial or full re-deck is needed when damage covers a defined zone or exceeds roughly 40% of the deck. |
| Paragonroofingbc inspection | On-site inspection with a photographic report confirms whether you need a patch, a partial re-deck, or a full replacement. |
Table of Contents
- Why does North Vancouver roof deck rot happen so fast?
- How do you spot roof deck rot before it gets serious?
- What does a licensed roofer check during a North Vancouver inspection?
- What are your repair options for roof deck rot in North Vancouver?
- How do you prevent roof deck rot in North Vancouver’s climate?
- What Paragonroofingbc typically finds on North Shore inspections
- How to get ready for your inspection and protect your home in the meantime
- What I’ve learned from inspecting North Shore roofs
- Paragonroofingbc’s North Vancouver roof deck services
- Sources
- FAQ
Why does North Vancouver roof deck rot happen so fast?
North Vancouver sits at the base of the North Shore mountains, where orographic lift squeezes moisture from Pacific air masses year-round. Local construction guidance notes annual precipitation exceeding 1,300–1,500 mm in some North Shore locations, and that rain does not arrive in tidy seasonal bursts — it shows up in October and often does not let up until May. That sustained wet period is exactly what wood decay fungi need.
The biology is unforgiving. According to the Canadian Wood Council’s biodeterioration research, wood decay fungi require sustained moisture content above roughly 19% for weeks to months to colonise sheathing. North Vancouver’s climate delivers that threshold reliably every autumn. Worse, some decay species tolerate drying and can reactivate when the next wet season begins — meaning a deck that “dried out” over summer may already be hosting dormant fungi waiting for October.
The climate is the backdrop. The actual failure almost always starts with one of these specific paths:
Shingle and flashing failures
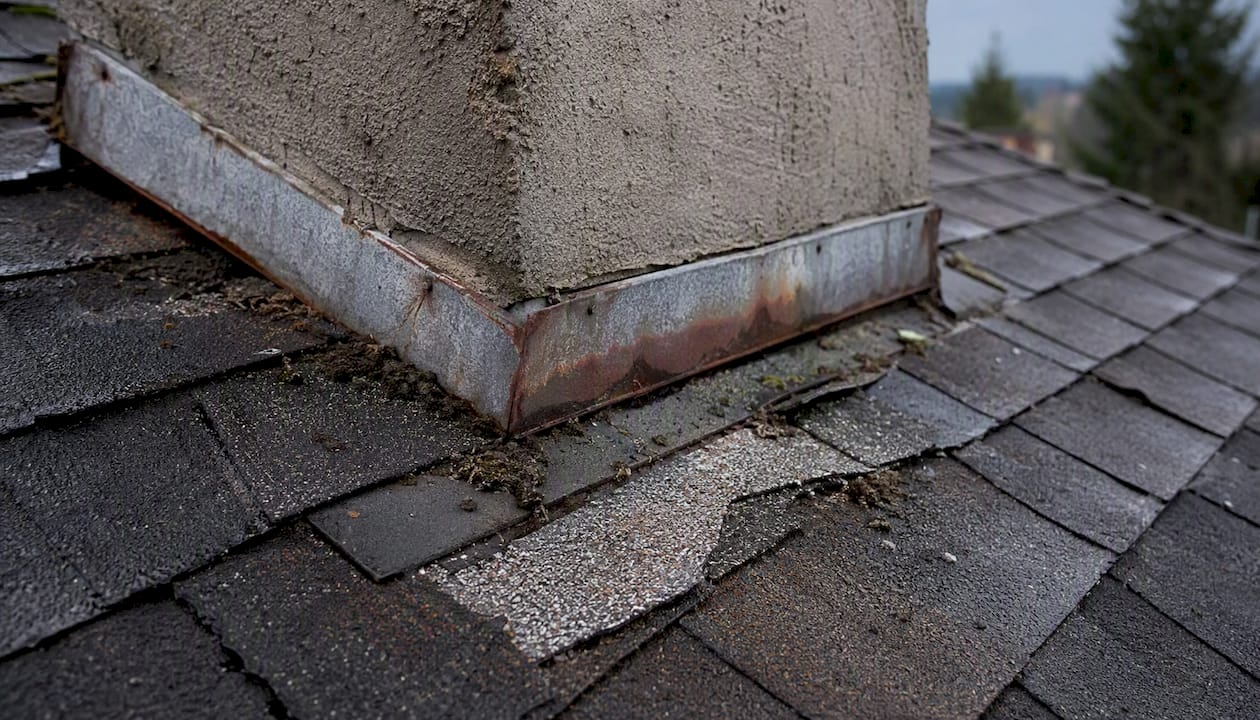
Cracked, curling, or missing shingles let water reach the underlayment. Improperly lapped or corroded flashing around chimneys, skylights, and parapet walls creates a direct channel to the sheathing below. On the North Shore, wind-driven rain hits these details at angles that standard flashing details sometimes do not anticipate.
Poor attic ventilation and condensation
When warm, humid interior air rises into an under-ventilated attic, it condenses on the cold underside of the sheathing. This is a slow, invisible process that can raise wood moisture content above the decay threshold without a single drop of rain ever penetrating the roof surface. Coastal weather patterns on the North Shore make this condensation cycle more persistent than in drier inland climates.
Blocked drains and ponding water
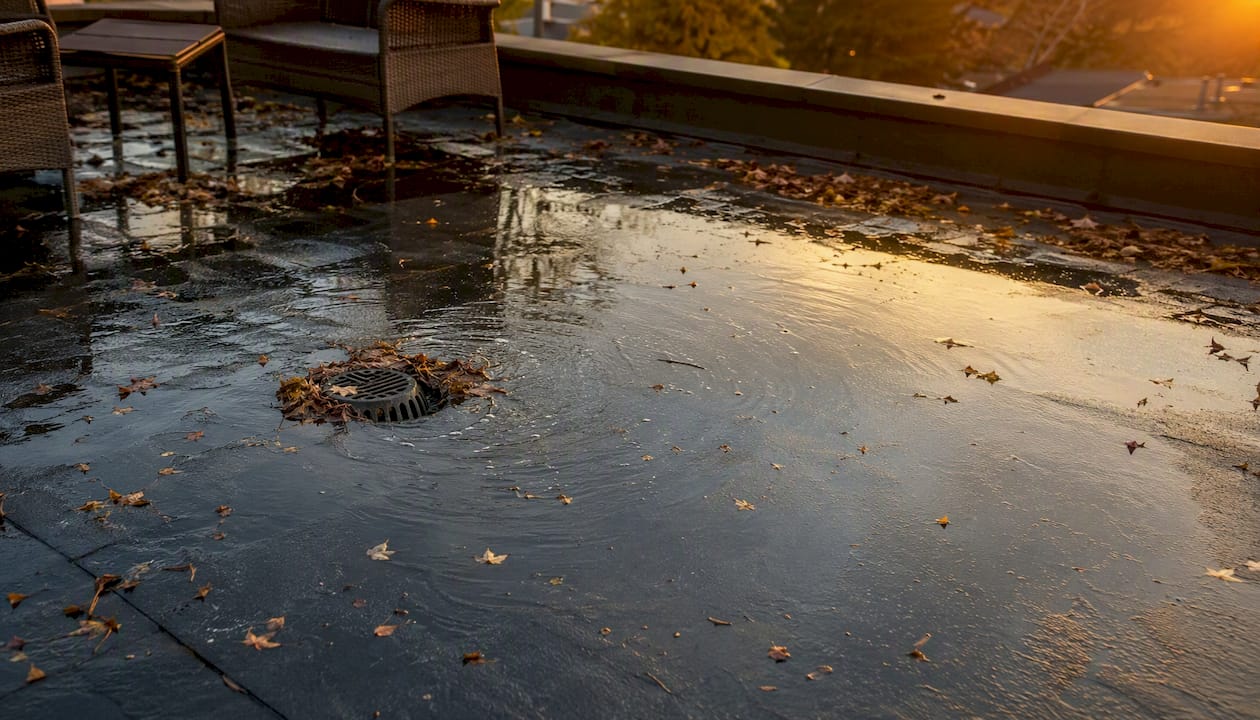
Flat or low-slope roof decks with blocked scuppers or internal drains hold standing water. Even a 25 mm pond sitting on a membrane for 48 hours after a storm creates hydrostatic pressure that works water into seams and penetrations. On roof decks used as outdoor living space, patio furniture, planters, and pavers often block drain paths entirely.
Ice damming at eaves
North Vancouver does not get heavy snowfall every winter, but freeze-thaw cycles at lower elevations are common. Snow melts from the warm roof field, runs to the cold eave overhang, and refreezes. The resulting ice dam backs liquid water under shingles and into the sheathing edge — one of the fastest ways to start localised rot at the eave line.
Material and construction decisions
OSB sheathing absorbs moisture at its edges faster than plywood and swells noticeably when wet. Older North Shore homes built with 3/8-inch plywood sheathing are often under the current minimum thickness for re-nailing schedules. BC Housing guidance on decks and balconies draws a clear distinction between open decks, balconies, and roof decks, each requiring different waterproofing and drainage details. Treating a roof deck like a simple open deck — without a proper waterproofing membrane and positive drainage slope — is a specification error that shows up in our inspections regularly.
| Failure vector | Primary driver | Typical location on roof |
|---|---|---|
| Shingle/flashing failure | Wind-driven rain, age | Field, penetrations, parapets |
| Condensation from attic | Poor ventilation, interior humidity | Underside of sheathing, ridge |
| Ponding / blocked drains | Flat slope, debris, planters | Low points, scuppers, drains |
| Ice damming | Freeze-thaw at eaves | Eave edge, first section |
| OSB edge swelling | Moisture absorption, no edge seal | Perimeter, valleys, hips |
Pro Tip: If your roof deck is used as a patio or outdoor living space, lift planters and furniture at least once a year to check the membrane underneath. Trapped moisture under a planter is one of the most common causes of localised deck rot we find on North Shore properties.
How do you spot roof deck rot before it gets serious?
Catching decay early is the difference between replacing two sheets of sheathing and replacing an entire roof deck. The signs split into three zones: inside the home, in the attic, and on the exterior.
Interior signs
- Brown or yellowish water stains on ceilings, particularly spreading rings that reappear after rain
- Paint bubbling or peeling on ceiling drywall near exterior walls
- A persistent musty or earthy smell in upper-floor rooms or the attic hatch area
- Wet or clumped insulation batts visible from the attic hatch
These interior signs often appear before the roof surface shows anything obvious. Paragon Roofing BC’s diagnostic guidance lists ceiling stains, musty odours, and rusty nail tips as the primary interior indicators used during initial assessments.
Attic inspection checklist (safe steps for homeowners)
- Use a bright headlamp and stay on the attic hatch ladder — do not walk on attic joists unless you are certain they are safe.
- Look for dark staining or black discolouration on the underside of sheathing panels.
- Check for daylight visible through seams or nail holes — any visible light means a gap that lets in water.
- Look for rusty nail tips poking through the sheathing; rust indicates sustained moisture at that point.
- Check insulation for clumping, compression, or wet spots directly below the sheathing.
- Note any rafters with dark staining or soft, fibrous wood texture — that is active decay.
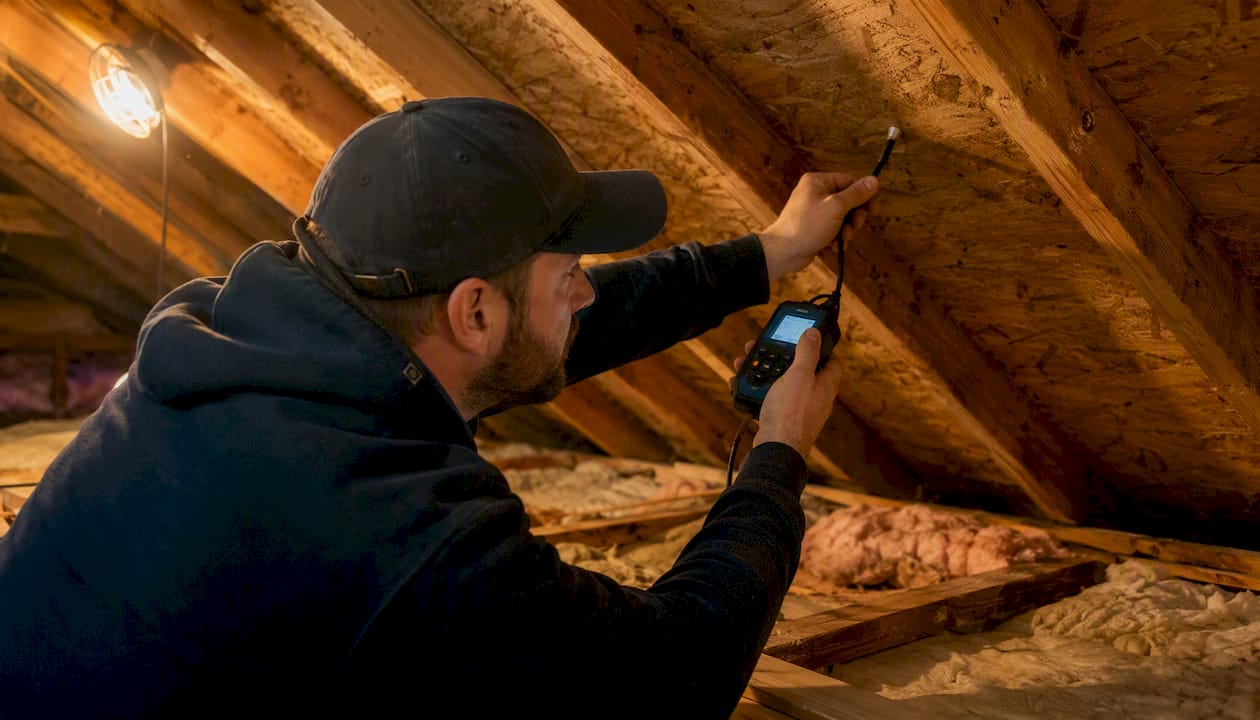
A moisture meter can confirm elevated readings, but most consumer-grade meters only read the surface layer. A professional uses a pin-type meter to probe deeper into the sheathing thickness. The Stop Construction Falls roof deck integrity assessment tool includes validated probe steps and visual checks for depressions, delamination, and rot indicators that go beyond what a basic moisture meter reveals.
Exterior and roof-surface signs
- Spongy or springy feel underfoot when walking the roof (if safe to do so)
- Visible sagging or dipping between rafters when viewed from the ground
- Curling, cupping, or missing shingles concentrated in one area
- Persistent moss or algae growth, especially in valleys and at the eave line
- Standing water visible on a flat or low-slope deck after rain has stopped
Urgent action is warranted when you see sagging, daylight through the attic, or active water entry. A scheduled inspection within two to four weeks is appropriate for ceiling stains without active dripping, moss growth, or curling shingles in a single zone.
What does a licensed roofer check during a North Vancouver inspection?
A thorough inspection covers the roof surface, the attic, and every transition point where water could enter. Here is what a qualified contractor should document, and what you should expect to receive afterward.
The inspection sequence
- Exterior roof walk: The roofer walks the entire surface, pressing for soft spots, checking shingle condition, and examining all flashings at chimneys, skylights, vents, and parapet walls.
- Gutter and drain check: Gutters are inspected for debris, slope, and secure attachment. On flat decks, scuppers and internal drains are checked for blockage and proper membrane termination.
- Attic access: The roofer enters the attic to check sheathing from below, inspect rafter condition, assess ventilation adequacy, and probe any suspect areas with a pin-type moisture meter.
- Fastener and edge inspection: Nail patterns, edge clips, and H-clips between panels are checked for corrosion and pull-through, which indicate sheathing movement from moisture cycling.
- Membrane and underlayment examination: On flat or low-slope decks, the membrane is checked for blistering, seam separation, and lap failures.
What separates a useful inspection from a cursory one is the photo report. Every soft spot, stain, failed flashing, and moisture reading should be photographed and mapped to a roof diagram. For strata properties, this documentation becomes part of the building’s maintenance record and can support insurance claims or depreciation reports. A verbal “looks okay” is not an inspection.
The roof maintenance and inspection services at Paragonroofingbc include a written photographic report delivered after each inspection, with repair options ranked by urgency.
Timeline and permit triggers
Most inspections take one to two hours on-site. A written report with photos and repair recommendations typically follows within two to three business days. If the inspector finds sheathing replacement covering more than roughly 40% of the deck area, or if the existing sheathing is below current minimum thickness, a building permit is likely required for the repair work. Structural engineer referral is warranted when rafter damage accompanies the sheathing decay, or when a load-bearing parapet or beam shows signs of moisture infiltration.
Pro Tip: Ask your inspector to mark soft spots with chalk or spray paint during the inspection walk. Those marks become the cutting guide during tear-off and prevent guesswork about which panels to replace.
Inspection findings typically map to four repair categories: cosmetic only (no structural action needed), localised patch (one to four panels), partial re-deck (a defined zone), or full re-deck (widespread damage or code-triggered upgrade).
What are your repair options for roof deck rot in North Vancouver?
The right repair depends on how much sheathing is affected, whether the underlying cause has been fixed, and whether the existing assembly meets current code. Here is how the options stack up.
Localised patch repair
Replacing one to four individual sheathing panels is appropriate when rot is confined to a single zone, the surrounding panels test dry, and the cause (a failed flashing, a single cracked shingle) has been corrected. The new panel must match the existing thickness and be nailed to the same schedule as the surrounding deck. Industry data suggests that during reroof tear-off, contractors typically discover 5–15% of decking requiring replacement on average, which usually falls into this patch category.
One caution: because some decay fungi tolerate drying and can reactivate, the Canadian Wood Council’s biodeterioration research is clear that surface treatments rarely guarantee eradication. Mechanical removal to sound wood is the reliable fix. If the edges of a “dry” panel show any softness or discolouration, cut wider.
Partial re-deck
When rot covers a defined zone — a valley, an eave section, or the area around a blocked scupper — replacing that entire zone is more reliable than patching individual panels. This approach also allows proper drainage and flashing corrections to be made at the same time. For the repair-versus-replace decision in Vancouver’s rainy climate, partial re-decking often makes sense when the rest of the roof has useful life remaining.
Full re-deck and waterproofing
Full replacement is appropriate when damage exceeds roughly 40% of the deck area, when the sheathing thickness is below current code minimums, or when the entire membrane assembly on a flat roof deck needs replacement. For roof decks used as outdoor living space, a full re-deck is also the opportunity to install a proper waterproofing membrane, positive drainage slope, and paver or tile surfacing over a drainage mat. BC Housing’s guidance on building safe, durable decks specifies the detailing and drainage requirements that distinguish a roof deck assembly from a simple open deck.
For flat roof deck drainage specifics, managing rainwater on flat roofs in Vancouver covers internal drain and scupper sizing that applies directly to roof deck assemblies.
| Repair scope | When it applies | Key cost drivers | Main risk if skipped |
|---|---|---|---|
| Localised patch | 1–4 panels, isolated cause fixed | Labour, matching sheathing, underlayment strip | Fungi reactivate in adjacent panels |
| Partial re-deck | Defined zone, cause corrected | Zone size, new membrane, flashing reset | Boundary panels decay within 1–2 seasons |
| Full re-deck | Over ~40% affected, code upgrade needed | Full tear-off, permit, new membrane, surfacing | Structural failure, failed permit inspection |
| Membrane/resurfacing only | Deck sound, membrane failed | Membrane material, drain/scupper work | Water re-enters at seams within months |
Pro Tip: When replacing sheathing panels, match the existing panel thickness exactly. Going thinner to save money can trigger a permit-required nailing schedule upgrade for the entire deck, turning a small repair into a full re-deck project.
How do you prevent roof deck rot in North Vancouver’s climate?
Prevention on the North Shore is not a once-a-year task. The rainfall volume and duration mean that a blocked drain or a failed flashing seal can cause meaningful damage within a single wet season. A repeatable schedule is the practical answer.
Seasonal maintenance schedule
- Spring (April/May): Clear all gutters, scuppers, and internal drains of winter debris. Inspect flashings at all penetrations and reseal any cracked caulking. Check attic ventilation — soffit vents blocked by insulation are a common post-winter find.
- Pre-winter (September/October): Remove moss from the roof surface using a soft brush or low-pressure wash. Inspect shingles for curling, cracking, or missing tabs. Confirm all drain paths are clear before the heavy rain season begins. Preparing your Vancouver roof for winter covers this pre-season checklist in detail.
- Post-winter (February/March): Walk the perimeter from the ground and check for any sagging, visible damage, or new moss growth. Check the attic after the first warm week for any condensation staining that developed over winter.
Design fixes that reduce long-term risk
- Ensure flat and low-slope roof decks have a minimum slope of 1:50 toward drains or scuppers — zero-slope decks pond water by design.
- Install a high-performance waterproofing membrane (torch-applied modified bitumen or a liquid-applied system) under any paver or tile surfacing, with a drainage mat between the membrane and the pavers.
- Size scuppers and internal drains for the roof area they serve; undersized drains are the single most common cause of ponding on North Shore flat roofs.
- Use plywood rather than OSB for sheathing replacement in high-moisture zones — plywood’s cross-laminated structure resists edge swelling better under repeated wet-dry cycling.
Dos and don’ts for strata and property managers
- Do contract a professional inspection every two years at minimum, and annually for flat roof decks used as outdoor living space.
- Do keep inspection reports and repair invoices in the strata’s maintenance file — these documents support depreciation reports and insurance claims.
- Do include roof deck condition in your annual maintenance budget, not just the reserve fund.
- Don’t allow tenants or owners to install planters, hot tubs, or heavy furniture on roof decks without a membrane and drainage assessment first.
- Don’t accept a verbal “all clear” from a contractor without a written report with photographs.
Pro Tip: Moss is not just cosmetic. Moss roots work into shingle tabs and membrane seams, holding moisture against the surface for weeks after rain stops. Treat moss as a maintenance priority, not an aesthetic one.
What Paragonroofingbc typically finds on North Shore inspections
After inspecting and repairing roofs across North Vancouver, West Vancouver, and the broader North Shore, certain failure patterns show up repeatedly. They are worth knowing because they are not always obvious from the ground.
The most common finding on flat and low-slope roof decks is ponding at parapets caused by blocked or undersized scuppers. Debris accumulates at the parapet base, the scupper opening fills, and water sits against the membrane termination for days at a time. The membrane fails at the termination bar first, then water tracks under the membrane to the sheathing edge.
OSB edge swelling is the second most frequent issue on older North Shore builds. When OSB panels are installed without H-clips and the edges are not sealed, the panel edges absorb moisture and swell. Over several wet seasons, the swelling causes the sheathing to buckle, which lifts shingles and creates a gap at the seam — a direct water entry point.
Compressed insulation causing condensation is a subtler problem. When blown-in or batt insulation settles or gets compressed against the underside of the sheathing, it blocks the ventilation channel between the insulation and the deck. The sheathing surface temperature drops, condensation forms, and moisture content climbs above the decay threshold without any external leak.
In our North Shore inspections, the majority of roofs showing interior ceiling stains had at least localised sheathing replacement needs when we accessed the attic — and in many of those cases, the exterior roof surface looked serviceable from the ground. This is why a ground-level visual check is never a substitute for attic access and moisture probing.
Photo documentation matters beyond the repair itself. For strata properties, a timestamped photo report showing the condition of the deck before and after repair protects the strata corporation, supports insurance claims, and provides evidence of due diligence if a future owner raises questions about the building’s maintenance history.
Pro Tip: If you are buying a North Shore property with a flat roof deck or a roof deck used as outdoor living space, request a pre-purchase inspection that specifically includes attic access and moisture probing. A standard home inspection rarely goes deep enough on roof deck condition.
How to get ready for your inspection and protect your home in the meantime
You do not need to wait passively once you suspect roof deck rot. There are practical steps you can take before the roofer arrives that will speed up the inspection and limit further damage.
Pre-inspection checklist
- Photograph every interior sign: ceiling stains, peeling paint, wet insulation visible from the attic hatch. Include a date stamp if your phone allows it.
- Note the date you first noticed each sign and whether it worsened after specific rain events.
- Record any recent work done on the roof: new shingles, skylight installation, satellite dish mounting, or gutter replacement.
- Confirm roof access: is there a hatch, a ladder, or a specific access point the roofer should know about?
- For strata properties, pull the last two years of strata meeting minutes and any maintenance records related to the roof.
Temporary measures that are safe to do yourself
- Place buckets or absorbent towels under any active interior drip and empty them regularly.
- Lay a heavy-duty tarpaulin over the suspected exterior area, weighted down with sandbags or secured with bungee cords tied to non-penetrating anchor points at the eave.
- Keep the attic hatch closed to limit warm, humid interior air from reaching the cold sheathing.
- Do not attempt to caulk or patch the roof surface yourself — an improper patch can trap water behind it and accelerate decay.
Do not walk on any area of the roof you suspect is soft. Sheathing that has lost structural integrity can fail under body weight without warning.
Pro Tip: When you call for an inspection, mention whether the property is strata-managed. Paragonroofingbc can tailor the photo report format to meet strata documentation requirements, which saves time at the council meeting.
When you contact Paragonroofingbc for emergency leak response, the team will confirm the inspection scope, timeline, and what the photo report will cover before arriving on-site.
What I’ve learned from inspecting North Shore roofs
Hey, it’s Harman. After years of walking roofs across North Vancouver and the North Shore, the pattern I keep coming back to is this: the damage homeowners can see is almost never the whole story.
A ceiling stain is a symptom. The actual problem is usually a combination of a failed flashing, an under-ventilated attic, and a drain that has been partially blocked for two or three seasons. Fix only the visible symptom and you will be back on that roof within 18 months.
What I prioritise on every inspection is finding the failure path, not just the failed material. That means attic access on every job, moisture readings at multiple points, and a photo report that maps the findings so the homeowner or strata council can see exactly what we found and why we are recommending what we are. A verbal report is not good enough for a strata building, and honestly, it is not good enough for any homeowner who wants to make an informed decision.
The other thing I want strata councils and property managers to hear: permit compliance and structural safety are not optional extras. If a repair triggers a permit requirement, we handle that process. Cutting corners on a code-triggered upgrade creates liability that outlasts the repair itself.
Paragonroofingbc’s North Vancouver roof deck services
When your North Shore roof deck shows signs of rot, you need a contractor who knows the local climate, carries the right documentation, and can handle everything from a single-panel patch to a full re-deck with new waterproofing.

Paragonroofingbc serves North Vancouver, West Vancouver, Surrey, Coquitlam, Burnaby, and Delta with residential roofing services that include on-site inspections with photographic reports, localised sheathing repairs, partial and full re-decking, waterproofing membrane installation, drainage corrections, and emergency leak response. Every job is completed by licensed crews with direct Lower Mainland experience, and every inspection produces a written report you can use for strata records, insurance, or future sale documentation.
For strata councils and property managers, Paragonroofingbc can structure inspection scopes to align with depreciation report cycles and provide the before/after photo documentation your records require.
Book your North Vancouver roof inspection today and get a clear picture of what is actually happening under your shingles before the next rain season arrives.
Sources
The following resources informed this article and are worth consulting before an inspection or strata meeting:
Bring printed or digital copies of the BC Housing guide and the Stop Construction Falls assessment tool to your inspection or strata meeting. They give you a shared reference point with the contractor and make it easier to ask the right questions.
FAQ
What causes roof decking to rot?
Roof decking rots when wood moisture content stays above roughly 19% for weeks to months, allowing decay fungi to colonise the sheathing fibres. In North Vancouver, the most common triggers are failed flashings, poor attic ventilation causing condensation, blocked drains on flat decks, and ice damming at the eave line.
What is the building code requirement for a roof deck in Vancouver?
BC Building Code requires roof decks to have positive drainage, appropriate waterproofing membranes, and sheathing that meets minimum thickness and nailing schedules. BC Housing’s guidance on decks and balconies distinguishes roof deck detailing requirements from those for open decks and balconies; confirm current permit requirements with your local municipality before beginning any repair work.
How often should roof decking be replaced?
Decking does not have a fixed replacement interval. It should be replaced whenever moisture probing or visual inspection reveals decay, delamination, or structural softness. During a typical reroof, industry guidance suggests 5–15% of decking panels require replacement on average, though that figure rises significantly on North Shore properties with a history of poor drainage or ventilation.
How long will a roof last in North Vancouver?
Asphalt shingle roofs in North Vancouver typically last several decades, though persistent moss, blocked gutters, and inadequate attic ventilation can shorten that lifespan noticeably. Flat roof membranes on roof decks generally have a service life depending on the membrane type and maintenance history. Regular inspections every two years help catch sheathing issues before they shorten the roof’s useful life.
When should I call a roofer instead of waiting?
Call a licensed roofer promptly if you see active water entry, sagging between rafters, daylight visible from the attic, or a ceiling stain that is growing after each rain event. These signs indicate that decay may already be affecting the structural sheathing, and waiting through another wet season will expand the repair scope and cost.
Recommended
Our Roofing Blog


Have more questions about roofing?
Check out our FAQs or give us a call today to speak to an expert roofer in Vancouver Lower Mainland, BC. We're here to help our neighbours make educated decisions about their roof. For our team, we value helping clients save money while making their roofs last.
