Ice & Water Shield in Vancouver: the quiet backbone of a storm-ready roof
In Vancouver’s rain and wind, yes—install ice & water shield at eaves, valleys, penetrations, and tricky transitions; extend coverage on windward rakes and low-slope planes; and on borderline slopes use full-field self-adhered underlayment so the roof stays quiet, dry, and predictable through long wet spells. best underlayment Vancouver
- Start with self-adhered membrane at eaves and valleys.
- Wrap every penetration; curb skylights; add back-pans.
- Reinforce windward rakes and dead valleys.
- Use full-field self-adhered on borderline slopes.
- Balance intake and ridge ventilation so decks dry. asphalt shingle lifespan Vancouver
| Factor | Minimum membrane coverage | Why it matters |
|---|---|---|
| Eaves | From drip into the warm side past exterior wall line | Stops wind-driven rain, backups, and ice-edge meltwater |
| Valleys | Full width, continuous, no splices at centerline | Valleys collect volume; failures start here |
| Penetrations | 18–24 in around pipes, vents, stacks; larger for curbs | Seals nails; blocks capillary paths |
| Rakes (windward) | Narrow strip under rake metal to first shingle course | Stiffens edge; defeats wind-driven rain lanes |
| Dead valleys / wall butts | Full field, then metal liners and diverters | Slow drainage zones need belt-and-suspenders |
| Borderline slopes | Convert entire plane to self-adhered | Field nails become liabilities at low slope |
| Chimneys & sidewalls | Up-the-wall turn-ups + step & counter flashing | Prevents recirculation and back-wetting |
| Skylights | Full curb wrap + back-pan to split flow | Ends drip metronomes; redistributes water cleanly |
I’m Harman at Paragon Roofing BC. I build and rebuild roofs across Metro Vancouver—from salt-kissed points to shaded North Shore slopes—and I’ll give you the blunt, field-tested answer: ice & water shield (a self-adhered, rubberised underlayment) isn’t “overkill”; it’s the quiet backbone that keeps water where it belongs when November shows its teeth. roofing Vancouver
What ice & water shield actually does (and why Vancouver is the perfect proving ground)
Self-adhered membranes bond to the deck and to themselves. They seal around fasteners, span tiny gaps, and refuse to flutter. When rain goes sideways for days, when wind gusts load edges and corners, when a surprise cold snap leaves thawing snow sitting at the eaves, the membrane carries the load that shingles alone can’t. Our city’s “time-of-wetness” is long: surfaces stay damp; roofs only get short drying windows between systems. The membrane’s job is simple—hold the line until gravity, wind, and ventilation finish the play.
Three truths frame every spec I write here:
- Edges and interruptions fail first. Eaves, rakes, valleys, and wall transitions take the beating.
- Low slope magnifies risk. Water lingers; capillary paths stay active longer.
- Ventilation decides recovery. A deck that dries fast forgives tiny mistakes; a wet cavity turns pinholes into problems.
Ice & water shield is not a substitute for good shingles, clean flashing geometry, or balanced airflow. It’s the fail-safe woven into those elements so a single rough day doesn’t become a soak-through.
Where Vancouver roofs absolutely need ice & water shield
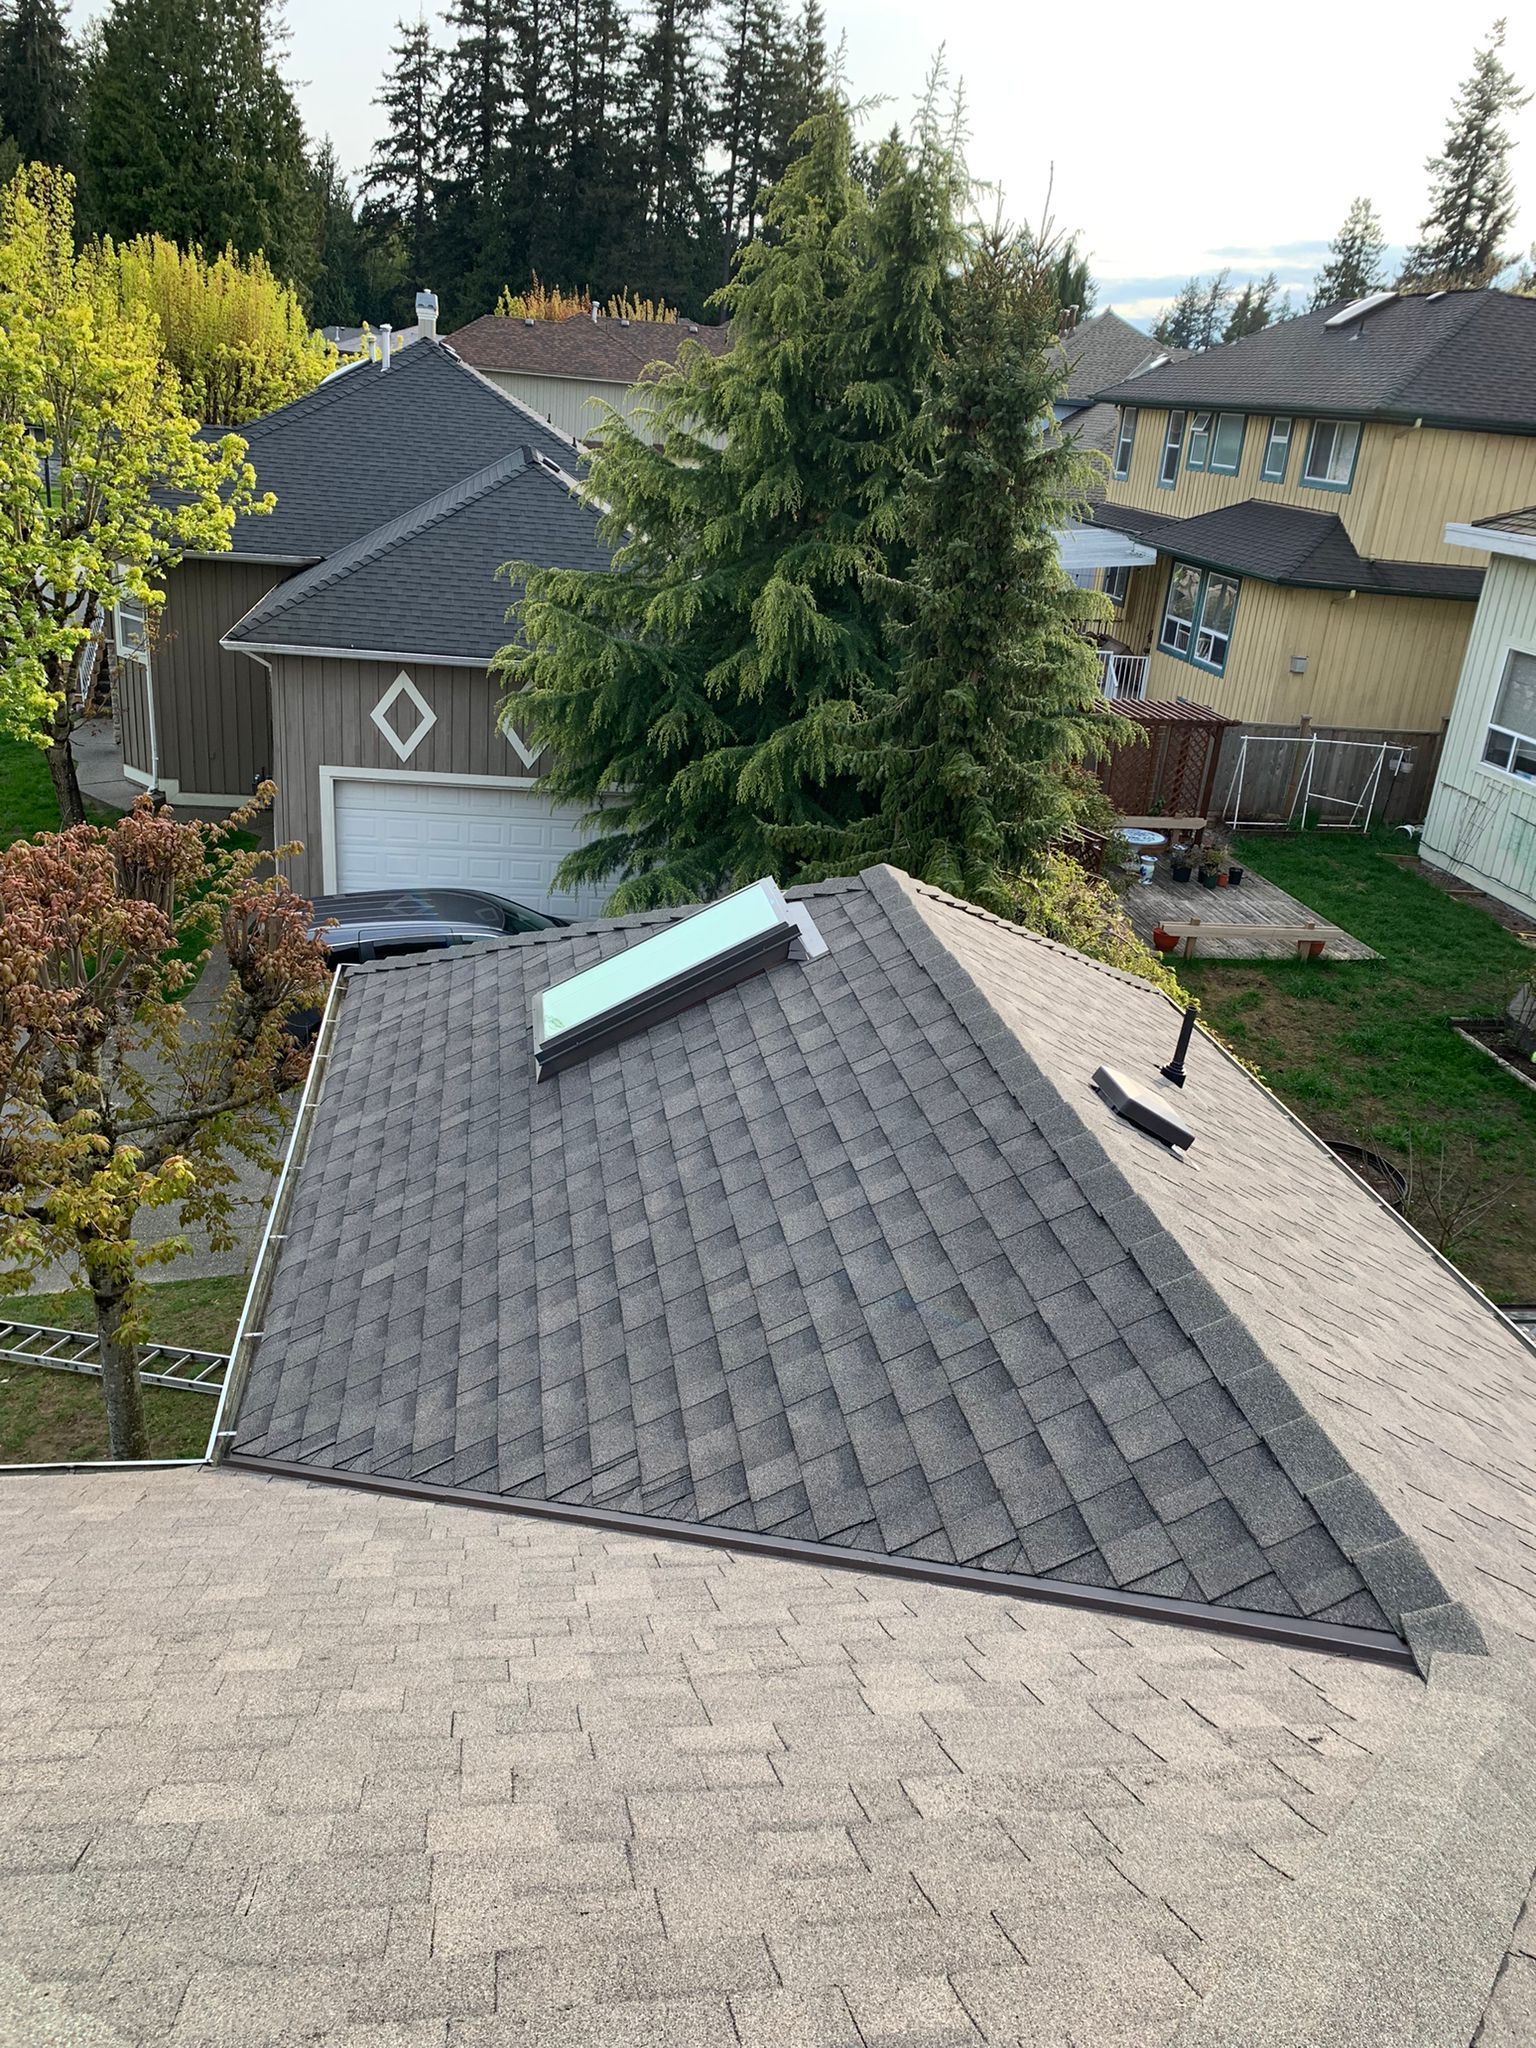
Eaves: the most loaded inch of the entire roof
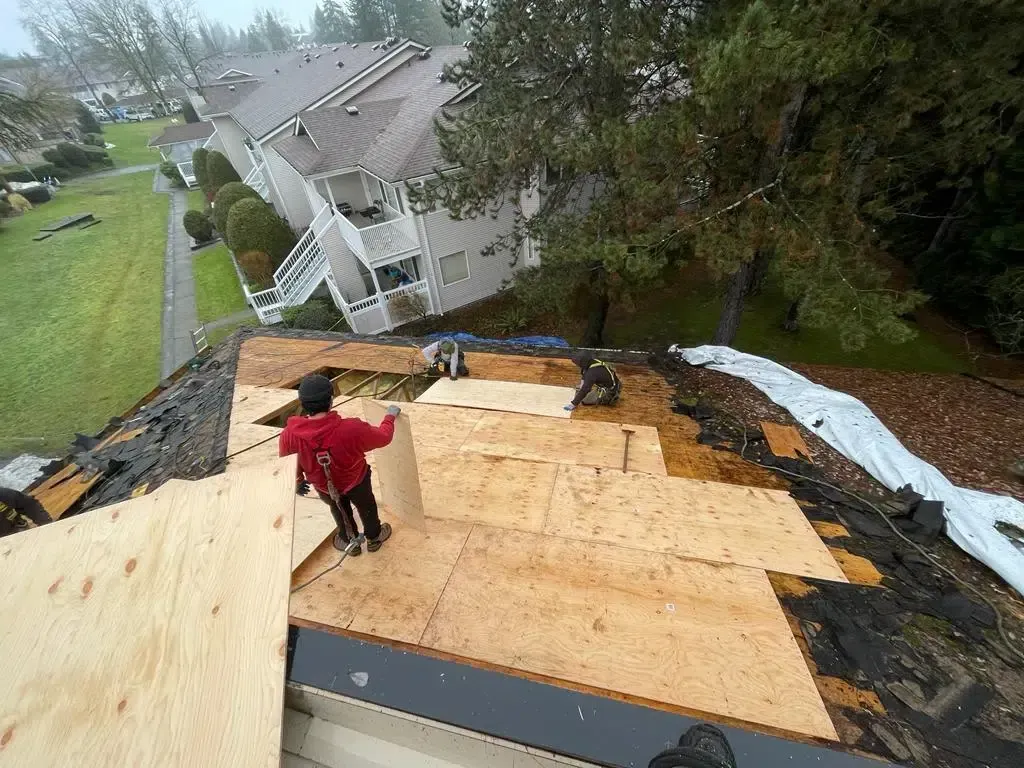
At the eave you get the triple threat: wind, water volume, and the cold edge of the roof. Even without “deep winter,” we see edge melt-and-refreeze in shaded pockets and at elevation. My baseline spec is continuous self-adhered membrane from the eave drip up the deck to at least the warm-side line of the exterior wall—often farther on windward faces. Sequence matters: membrane first, then eave drip over the membrane so runoff lands on metal, not behind it. That one detail cures years of mysterious edge staining and soffit rot.
Valleys: a river you pretend is a line
Valleys deserve the thick of it: full-width membrane, continuous sheets that do not splice at the centerline, and then formed metal valley flashing on top. Valleys are the roof’s collectors. Wind pushes; leaves loiter; flow concentrates. I widen membrane coverage on windward valleys and where big trees feed debris all autumn.
Penetrations: tiny circles, big problems
Every pipe, vent, and antenna bracket is a leak waiting for a storm day. Membrane turns circles into islands: I run at least 18–24 inches of self-adhered around each penetration, then install boots/flashings, then shingles. On curbs (skylights, fans), I wrap the curb with membrane and add a back-pan —a little metal “roof on the roof” that splits flow and stops drip metronomes.
Dead valleys and roof-into-wall junctions
If a roof pitch dies into a wall or another roof, water slows, eddies form, and capillary back-paths multiply. I treat these as “full-field membrane zones” first, then overlay with metal liners, diverters, and step-plus-counter flashing. Add a kick-out where roof meets wall so water exits the cladding, not behind it. No exceptions.
Rakes on windward edges
Rake edges are the roof’s gills. On storm days, air and rain pry at every seam. A narrow strip of self-adhered under rake metal, lapped into the first shingle course, stiffens the edge and stops the sneaky, inch-deep water lane you never see from the ground.
Chimneys, dormers, parapets
Anything tall that interrupts flow deserves a membrane apron, up-the-wall turn-ups, and then textbook step and counter flashing. Chimneys get saddles (crickets) on the upslope side; dormers get diverters; parapets get through-wall flashings that don’t recycle water onto the roof below.
When (and why) to convert an entire plane to self-adhered
You can’t nail-apply your way out of physics. On borderline slopes—think around 4:12 and below, or any plane with stubborn shade and debris—a field of nail-applied underlayment leaves thousands of penetrations that rely on compression and overlap alone. A full-field self-adhered layer bonds to the deck, seals those fasteners, and becomes a continuous water-shedding surface beneath the shingles. I also convert to full-field membrane on short, complicated planes packed with skylights and vents; there’s no prize for gambling with 40 flashing edges in six linear metres.
“But Vancouver doesn’t have real ice dams.” True—and irrelevant.
Ice dams are the marketing shorthand for why this product exists, not the only reason to use it. Our risk profile leans wind-driven rain, long wetting periods, and edge melt in cool snaps. The membrane isn’t just “ice insurance.” It’s edge insurance and time-of-wetness insurance —for rain that arrives sideways, lingers, and claws at the same inch of eave for hours.
Common failure patterns I see (and exactly how membrane cures them)
- Eave drip-back and soffit stains. Cause: membrane stops short of warm-side line; eave metal is under, not over, the layer. Fix: extend membrane; flip sequence; hem the drip for stiffness.
- Valley “mystery leak” during atmospheric rivers. Cause: spliced membrane at centerline or gaps under the valley metal. Fix: continuous membrane; metal valley set to true plane; no humps.
- Skylight drip metronome. Cause: no back-pan; membrane doesn’t wrap curb. Fix: curb wrap + sloped back-pan that throws water left and right.
- Windward rake wetting. Cause: raw deck at the metal edge; capillary lane under the first course. Fix: membrane strip under rake, lapped into the first shingle course; fasteners into solid wood.
- Wall butt recirculation. Cause: missing kick-out; flat siding intersection. Fix: membrane turned up wall; step and counter flashing; proper kick-out to daylight.
Myth-busting: seven things homeowners hear—and what’s correct
- “Ice & water shield is only for snowy climates.” Not here. Ours is rain-plus-wind-plus-long-wet spells. Membrane is storm hardware, not just winter hardware.
- “It’s overkill; shingles are waterproof.” Shingles shed water via laps and a self-seal; they are not a monolithic waterproofing sheet. When water gets beneath, membrane is the backstop.
- “Breathable underlayments make membrane unnecessary.” Outward drying through shingles is small. Breathable sheets help in specific assemblies; they don’t stop a wind-driven lane at a rake.
- “Membrane everywhere will trap moisture.” Moisture traps come from missing ventilation, not from a single bonded layer. Balance intake and ridge exhaust; baffle over insulation; keep cavities dry.
- “Metal roofs don’t need it.” Different skin, same edges. I still run self-adhered at eaves/valleys/penetrations under standing seam and stamped metal—then add closures and hems.
- “It voids warranties.” Membrane installed per the shingle/metal manufacturer almost always supports warranty paths; skipping edge protection often does the opposite.
- “It’s just a cost add.” It’s a call-back delete. One leak avoided in one storm pays for every roll on the job.
How much membrane—and where the seams go
I plan coverage by risk not just minimums:
- Eaves: up past the warm-side line of the wall (often two rows on standard rolls).
- Valleys: full width, both planes, continuous to the ridge where practical.
- Rakes (windward): 9–12 inches under metal, turned into the first course.
- Around penetrations: 18–24 inches beyond the flange edge; no seam corners landing at flange corners.
- Dead valleys: full field across those small basins before metal liners go in.
- Low-slope planes: entire plane; seam staggered; laps shingled to the fall line.
S-laps and end-laps are shingled to gravity: lower sheets first, uppers lapping over; seams never stack; seams never land at a plane break. The membrane should vanish under the finished roof but still read like a drain plan if you photographed it before shingles.
The eave and rake metal sequence that prevents stain lines and whistles
- Eave: membrane first, then eave drip over the membrane; hemmed edge, fastened into solid substrate; shingles lap onto the drip so water never meets raw plywood.
- Rake:
rake metal first, then membrane lapped over
the flange into the first course zone; shingles cover both. This reverses the eave logic to stop capillary creep under the side metal.
Add kick-outs where any rake dies into a wall. That small triangle of metal is the difference between dry sheathing and a discoloured interior corner two winters from now.
Ventilation: the teammate that makes membranes look brilliant
A bonded layer keeps water out. Ventilation gets humidity out. I design for continuous soffit intake and a matched ridge exhaust, with baffles to prevent insulation from choking the flow at the eaves. On older homes with blocked soffits, I’ll spec under-eave vents or smart retrofits. Membrane and airflow together battle the real Vancouver foe: persistent damp.
When to say “full-field” even on decent slopes
- Short planes with many penetrations. Think solar arrays, multiple bath fans, or a tight cluster of skylights. Too many holes? Give yourself a zero-flutter base.
- Heavy debris zones. Where conifers dump needles and small cones, drainage slows. Full-field membrane forgives lingering puddlelets.
- Wind corridors. Waterfront streets and hill saddles create gust lanes. Full-field buys margin.
- Old decks with patched sheathing. Self-adhered spans micro-gaps and stabilises nail holes better than nail-applied sheets.
Asphalt shingles vs. metal panels: the membrane logic is the same
Shingles shed water via overlapping tabs and seal strips; metal panels shed via ribs and hems. Different physics; same vulnerability map. Under both, I want a bonded, sealed base at edges, valleys, and interruptions, because wind always finds the same square foot on a bad day. Metal adds one trick: closures. Foam at eaves and ridges blocks wind-and-spray paths; membrane under those closures catches anything that sneaks by.
Cost, value, and where the money actually goes
For a typical Vancouver detached home, stepping up from a bare-minimum underlayment package to a “membrane where it matters” plan might add a few rolls and a few hours. That’s hundreds, not tens of thousands. The return is measured in call-backs you never make, interior paint you never touch up, and soggy soffit plywood you never replace. Put dollars where they silence problems: eaves, valleys, penetrations, dead valleys, windward rakes, and borderline slopes.
Installation pitfalls that turn a good product into a false promise
- Wrinkles in the water path. A wrinkled run under a valley is a dam. Pull it and re-lay; no pride in trapping water.
- Seams pointed uphill. Every lap should face the fall line correctly, like shingles.
- Seam corners landing at penetrations. Move seams; never stack vulnerabilities.
- Bonding over dust or wet sap. Wipe, warm, and press. The adhesive needs clean wood or primed metal to bite.
- Nailing through fresh membrane at the eave edge to “hold it.” Don’t. Use temporary caps high, then remove; let the drip and shingles lock the edge.
Your at-home audit: five photos that tell me everything
- Eave close-up with drip: do I see membrane peeking under, or raw wood?
- Valley mid-span: is there a continuous metal valley, flat to the plane, no bumps?
- Windward rake: can you spot a membrane strip inboard of the metal, or just paper?
- Around a pipe: is there a wide, clean field under the boot, or scabs of patch?
- Skylight upslope: do I see evidence of a back-pan (lift the shingle tab gently), or just shingles and hope?
Send me those five, and I can usually predict whether your roof will shrug off November or sulk.
“Breathable” underlayments—when they help and when they don’t
Vapor-permeable synthetics can add a nudge of outward drying if the assembly above them includes a ventilated over-deck space. On typical vented attics with sheathing + shingles, outward drying is tiny compared to what soffit-to-ridge ventilation can move. My rule: use breathable where the assembly logic requires it; don’t treat it as a magic potion that replaces membrane at edges.
What inspectors and adjusters like to see (and why you should care)
Document your hidden layers. Before shingles, snap a dozen photos: eaves showing membrane under drip, valleys with full-width runs, membrane wrapping curbs, and clean, shingled laps. If you ever have to prove craft or chase a mysterious stain months later, those images turn opinions into facts. It’s also persuasive E-E-A-T for your future buyer: the roof wasn’t just “redone”; it was designed.
A mini-glossary so we speak the same language
- Ice & water shield / self-adhered membrane: Rubberised, peel-and-stick underlayment that bonds to the deck.
- Back-pan: A flat, sloped sheet behind a curb (like a skylight) that splits and sheds water.
- Kick-out flashing: A small diverter at roof-to-wall bottoms that ejects water to daylight.
- Dead valley: A low spot where drainage converges and slows—often where two roofs meet a wall.
- Time-of-wetness: How long a surface stays wet; longer equals higher risk.
- Borderline slope: Pitches where shingle physics start losing margin; think around 4:12 and below.
Decision guide (fast, honest, Vancouver-specific)
- Simple gable, decent slope, inland: Membrane at eaves, valleys, penetrations.
- Cut-up roof with dormers and skylights: Add rakes, dead valleys; consider full-field on short busy planes.
- Waterfront or wind corridor: Widen eave and valley coverage; strip under windward rakes.
- Borderline slope anywhere: Full-field self-adhered.
- North Shore shade + conifers: Full valleys; dead valleys treated as mini-flat roofs; membrane everywhere water lingers.
People Also Ask — concise answers you can trust
Do Vancouver roofs really need ice & water shield?
Yes. Our risk isn’t just snow; it’s wind-driven rain and long wet spells. Self-adhered membrane at eaves, valleys, penetrations, and tricky transitions protects where shingles can’t. On borderline slopes or busy planes, full-field membrane turns “maybe” into “done.”
Where exactly should ice & water shield go?
At minimum: eaves past the warm-side line, full-width valleys, around penetrations and curbs, windward rakes, and dead valleys. Add kick-outs at roof-into-wall ends. On borderline slopes, convert the entire plane to self-adhered before shingles.
Do metal roofs in Vancouver need ice & water shield?
Yes at the same hotspots—eaves, valleys, and penetrations—plus closures at ribs and ridges. Metal sheds water differently, but edges and holes stay vulnerable in wind-driven rain. Membrane provides a sealed base so clips, hems, and closures have backup.
Won’t full-field ice & water shield trap moisture?
Not with proper ventilation. Moisture traps come from blocked soffits and missing ridge exhaust, not from a single bonded layer. Balance intake and exhaust, insert baffles, and keep bath fans vented outside. Dry decks forgive tiny sins; wet decks punish them.
Is breathable underlayment a replacement for ice & water shield?
No. Breathable sheets help in specific assemblies with over-deck venting. Ice & water shield is for water exclusion at edges and interruptions. They solve different problems and often work together on the same roof.
How far up from the eave should membrane run?
Run it from the drip edge up past the warm-side line of the exterior wall, often two membrane courses on standard rolls. On windward or heavily shaded faces, extend farther to outflank splash and slow thaw-refreeze cycles.
Do skylights and chimneys really need special treatment?
Absolutely. Wrap curbs with membrane, add a sloped back-pan, use step plus counter flashing, and turn membrane up the wall behind your weather barrier. Tall interruptions recirculate water; the details must break that cycle.
Will adding membrane void my shingle warranty?
Installed per the manufacturer’s instructions, ice & water shield typically supports warranty compliance. Skipping edge protection and valley reinforcement is far more likely to cause claims trouble than adding membrane at the right spots.
How much more does ice & water shield cost?
On most homes, upgrading to a “membrane where it matters” package adds hundreds, not thousands, of dollars—and deletes a world of callbacks. Full-field conversion on small planes costs more material, but it buys real, storm-day margin.
Can I see proof my contractor installed it?
Ask for pre-shingle photos: eaves with membrane under drip, valley sheets without centerline splices, wrapped curbs with back-pans, and rake strips on windward edges. Good crews already document hidden layers; it’s how we show our work.
Do I need ice & water shield if my roof never sees snow?
Yes. The Vancouver story is water persistence and wind, not just snow. Membrane at eaves, valleys, and penetrations is storm gear, not winter gear. You’re protecting against sideways rain and long wet edges as much as freezing.
What’s the single most important spot to protect?
Tie between eaves and valleys. Eaves take the longest wetting; valleys move the most water. If budget forces triage, protect both, then wrap penetrations and dead valleys, then add windward rakes.
References (not included in word count)
- RCABC Roofing Practices Manual — Asphalt Shingle Systems, Eave Protection & Underlayment
- Vancouver Building By-law — Division B, 9.26 Roofing (materials installed to manufacturer instructions; eave protection and low-slope provisions)
- NRCA — Steep-slope underlayment and edge/valley detailing guidance
- Environment and Climate Change Canada — Vancouver climate normals (1991–2020)