Residential Roof Installation in Vancouver: Step-by-Step Process & Timeline
Residential roof installation in Vancouver requires careful planning around our coastal climate's unique challenges. With 1,189mm annual rainfall spread across 170 precipitation days, installation timing becomes critical. Unlike dry-climate regions where contractors work year-round with predictable schedules, Vancouver projects require weather monitoring, flexible timelines, and immediate protection protocols when unexpected rain occurs.
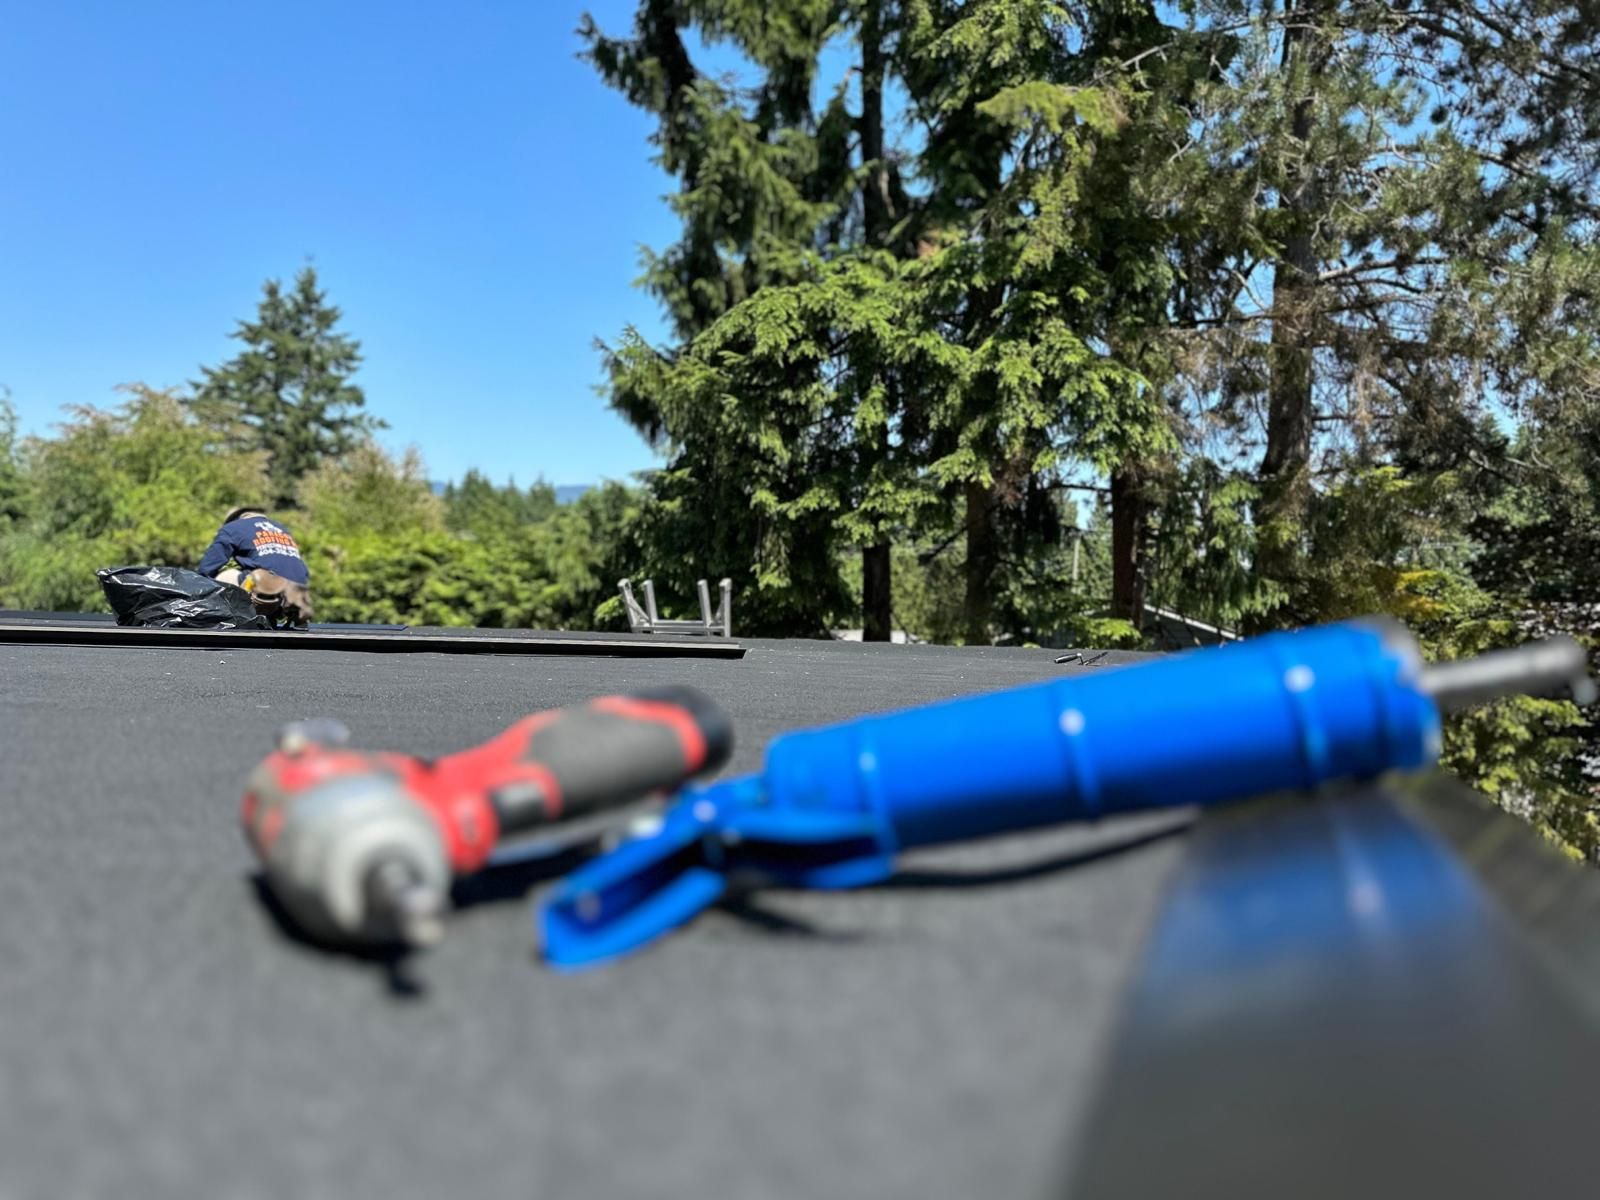
Common homeowner concerns include noise levels (roof installation produces significant sound from tear-off and nail guns), project duration (typically 2-5 days but weather-dependent), and weather delays (even summer months experience occasional rain requiring work stoppage).
This comprehensive guide explains when new roof installation becomes necessary, pre-installation planning requirements, step-by-step installation process from tear-off through final inspection, realistic timeline expectations by material type, cost considerations, common questions, post-installation care, mistakes to avoid, and contractor selection criteria.
What Vancouver Homeowners Should Know Before a Roof Installation
When Is Residential Roof Installation Necessary?
Installation vs Repair: What's the Difference?
Roof repair addresses localized damage affecting small areas (under 10% of the roof). Examples include replacing blown-off shingles, fixing specific leak points, or repairing isolated flashing failures. Costs typically range from $500 to $3,000, depending on the extent.
Roof replacement involves the complete removal of existing roofing and installation of a new system. This constitutes "installation" on existing homes requiring a comprehensive tear-off, deck inspection, and fresh materials throughout.
New construction installation applies roofing to bare structures without existing materials requiring removal. Process simpler than replacement, but follows similar installation steps after sheathing completion.
New Construction vs Existing Homes
New builds: Roofing coordinates with the construction schedule after framing and sheathing completion. No tear-off required. The timeline is more predictable without surprises from hidden damage. Costs often 20–30% less than full replacement, primarily due to eliminating tear-off and disposal expenses.
Full tear-off replacements: Most common Vancouver residential installation scenario. Requires removal of existing roofing, deck inspection and repair, disposal management, and installation of a complete new system. Discovery of hidden problems (deck rot, inadequate ventilation, structural issues) adds complexity and cost.
Signs a New Roof Installation Is Needed
Aging materials: Asphalt roofs exceeding 20-25 years, cedar shake beyond 25-30 years, or flat systems over 25 years approach the end of serviceable life. Even without obvious failures, the materials' exhaust capacity requires replacement.
Structural upgrades: Adding solar panels, upgrading HVAC systems, or making building envelope improvements often necessitate concurrent roofing work. Coordinating projects maximizes efficiency and ensures proper integration.
Repeated repairs: Spending $5,000-12,000 annually patching different areas indicates systemic failure beyond economical repair. New installation provides a comprehensive solution with warranty coverage.
Professional roof repair services address minor issues, while replacement handles comprehensive needs.

Pre-Installation Planning for Vancouver Homes
Thorough preparation prevents surprises and ensures appropriate material selection.
Roof Inspection & Assessment
Structural integrity: Professional assessment evaluates roof framing capacity, identifies sagging areas indicating inadequate support, and verifies the ability to handle new roofing weight. Metal and tile require verification that the existing structure supports their loads.
Decking condition: Visual inspection from the attic identifies obvious deck deterioration (soft spots, water staining, visible rot). However, a complete deck assessment requires tear-off, exposing all sheathing. Budget 10-15% contingency for unforeseen deck repairs discovered during removal.
Moisture damage: Infrared scanning or visual attic inspection identifies trapped moisture, indicating leak history. Addressing moisture sources (inadequate ventilation, bathroom fan exhaust, plumbing leaks) prevents recurring problems after new roof installation.
Choosing the Right Roofing Material
Asphalt vs metal vs cedar: Material selection balances budget, aesthetics, maintenance tolerance, and ownership timeline. Asphalt provides accessible entry ($11,000-19,000) for moderate-term ownership. Metal justifies a higher cost ($24,000-40,000) through a 50-70 year lifespan for long-term owners. Cedar suits heritage properties with maintenance commitment.
Climate suitability: Vancouver's persistent moisture favors materials resisting biological growth. Metal eliminates moss concerns entirely. Architectural asphalt performs better than 3-tab in wet conditions. Cedar requires intensive annual treatments to survive coastal dampness.
Comprehensive material guidance is available throughroofing materials resources.
Permits & Local Vancouver Requirements
When permits are needed: Most complete roof replacements in the City of Vancouver require building permits ($300-600 typical). Permits ensure code compliance, proper inspections, and official documentation. Experienced contractors handle permit applications and coordinate required inspections.
Strata approvals: Townhouse owners in strata corporations may require council approval even for individual unit roof work if affecting common property or building appearance. Verify requirements with the property manager before proceeding.
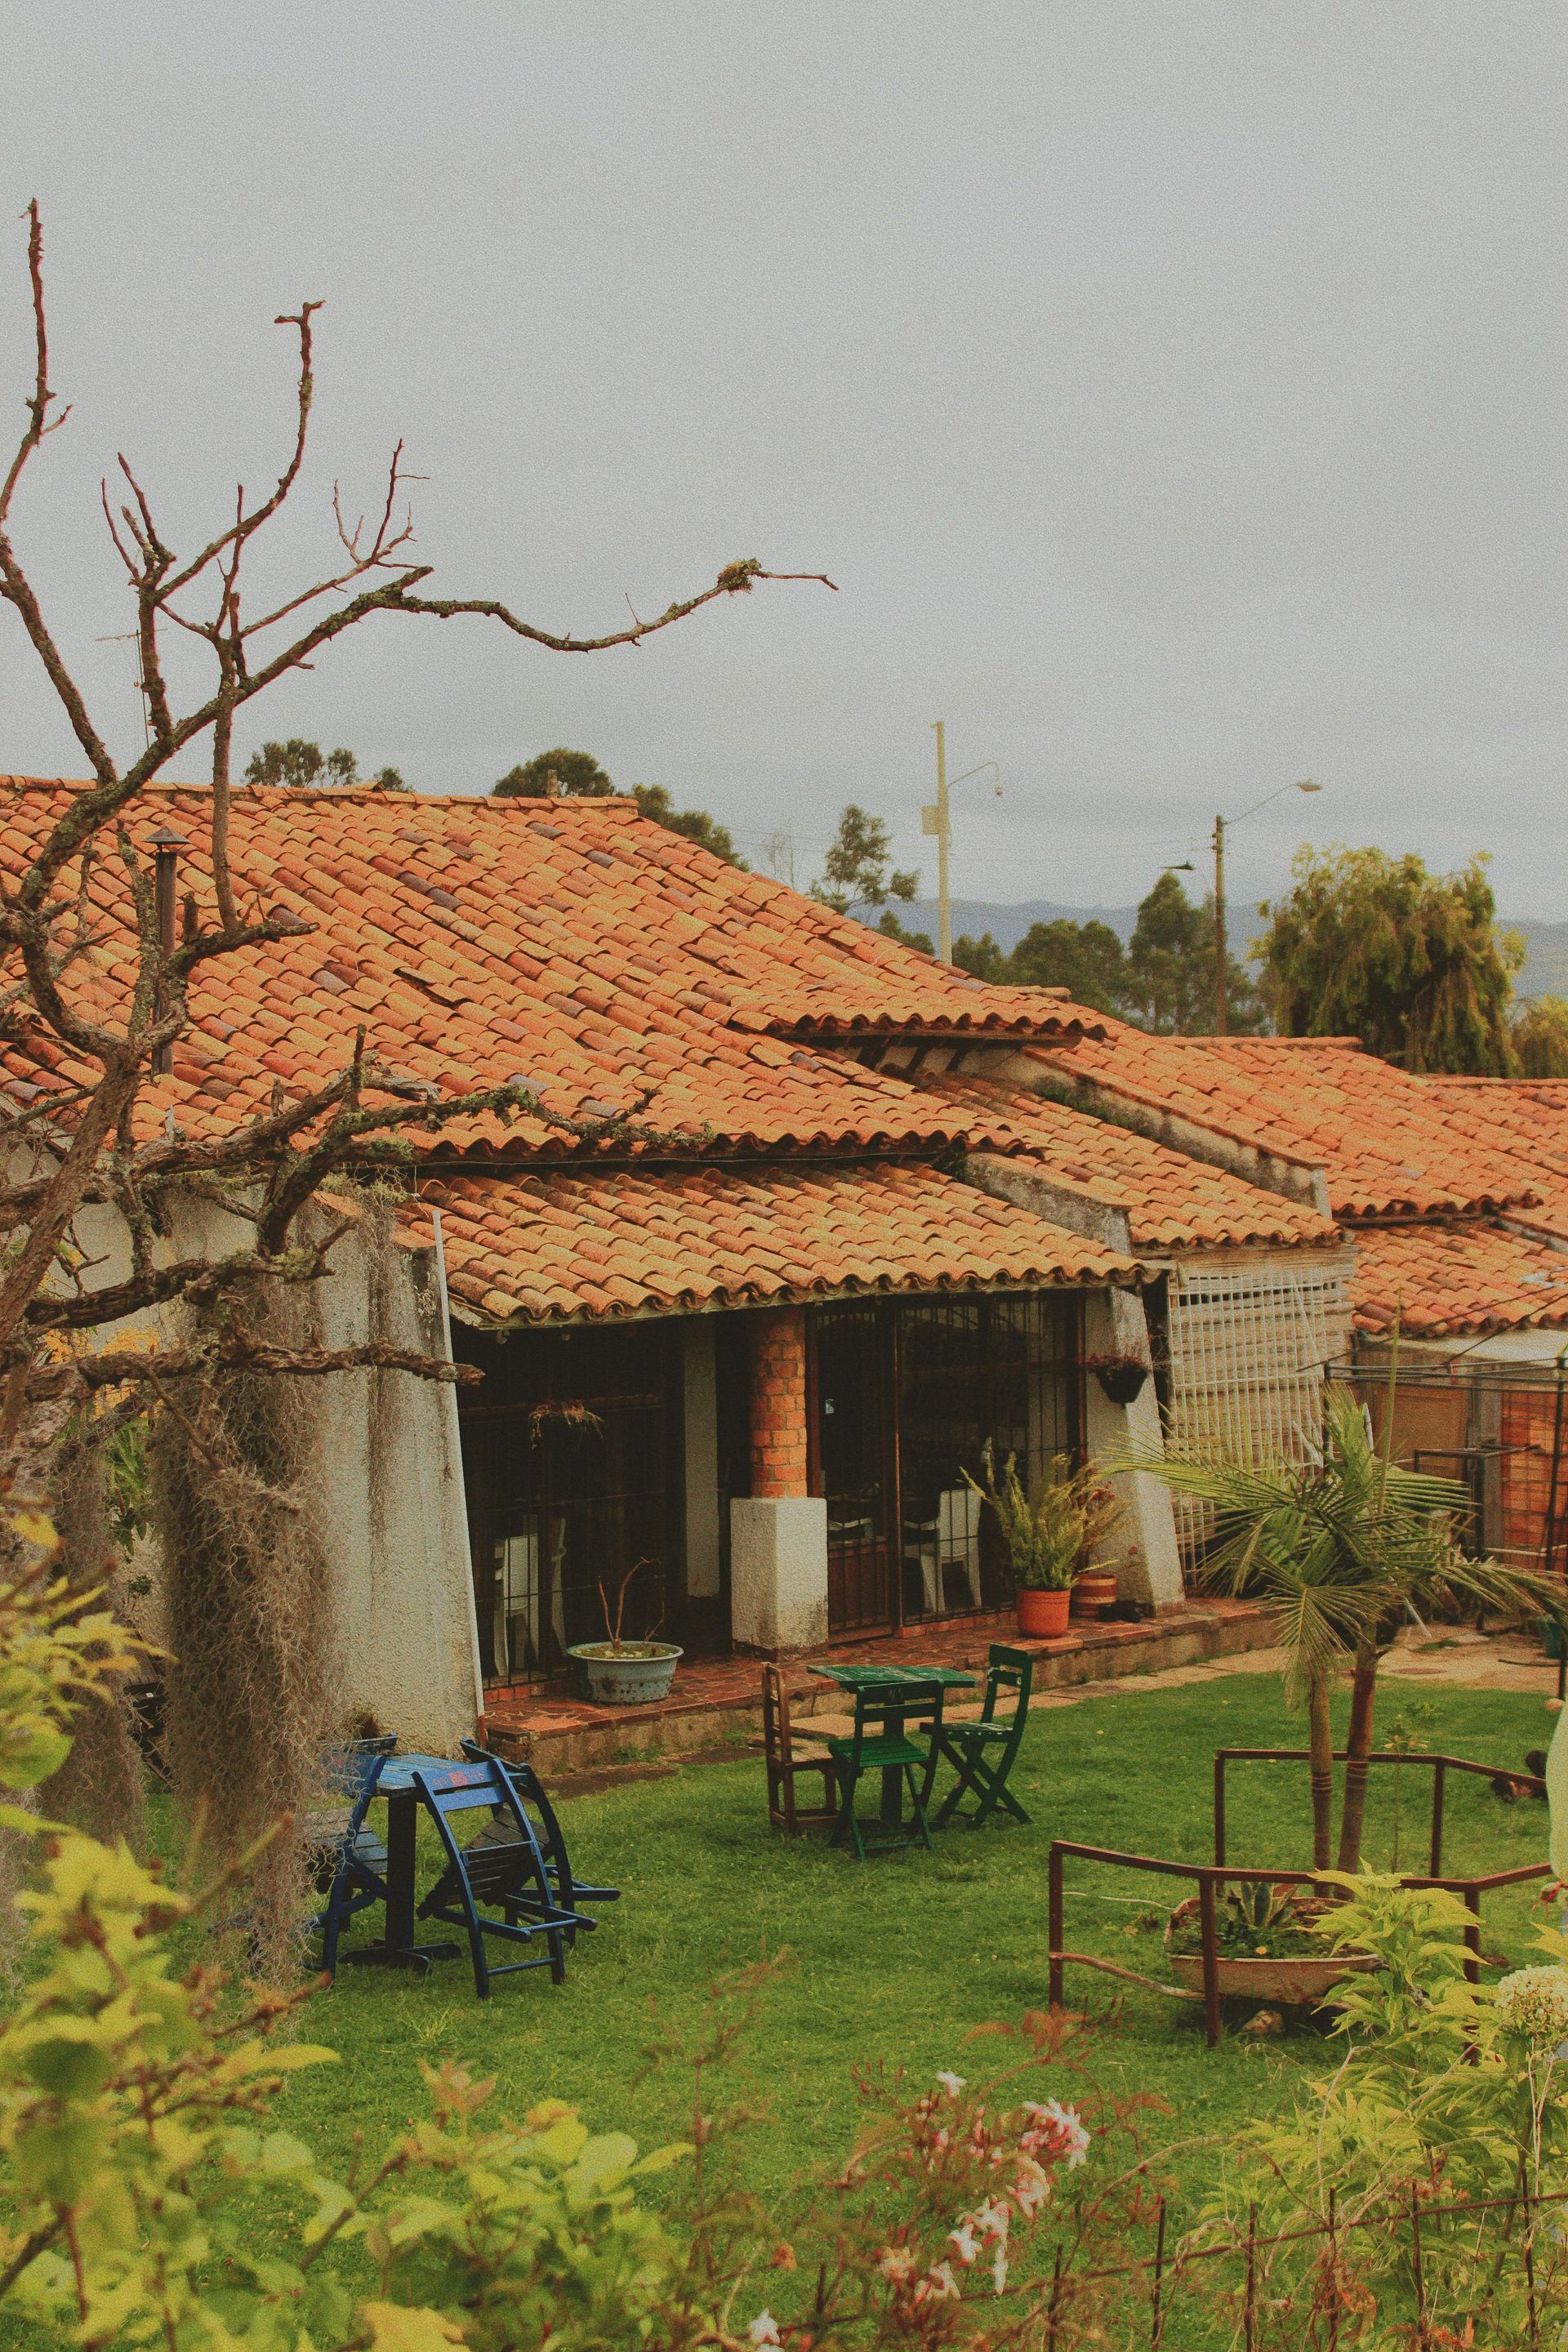
Heritage considerations: Properties in designated heritage areas face restrictions on allowable materials and procedures. City planning department confirms requirements for character homes in neighborhoods like Strathcona, Mount Pleasant, and Kitsilano.
Scheduling Around Vancouver Weather
Rain delay reality: Even during prime season (June-September), occasional rain requires work stoppage. Contractors provide temporary protection for exposed areas and reschedule completion once conditions improve. Build flexibility into timeline expectations.
Seasonal timing: April through October offers the driest conditions. Projects scheduled for June-August experience the fewest delays, but higher contractor demand. Shoulder seasons (April-May, September-October) provide better availability with acceptable weather. Winter installations (November-March) are possible for emergencies but involve premium pricing and extended timelines.
Property protection: Contractors cover landscaping, outdoor furniture, vehicles, and vulnerable areas with tarps, preventing damage from falling debris. Driveway protection prevents staining from roofing materials.
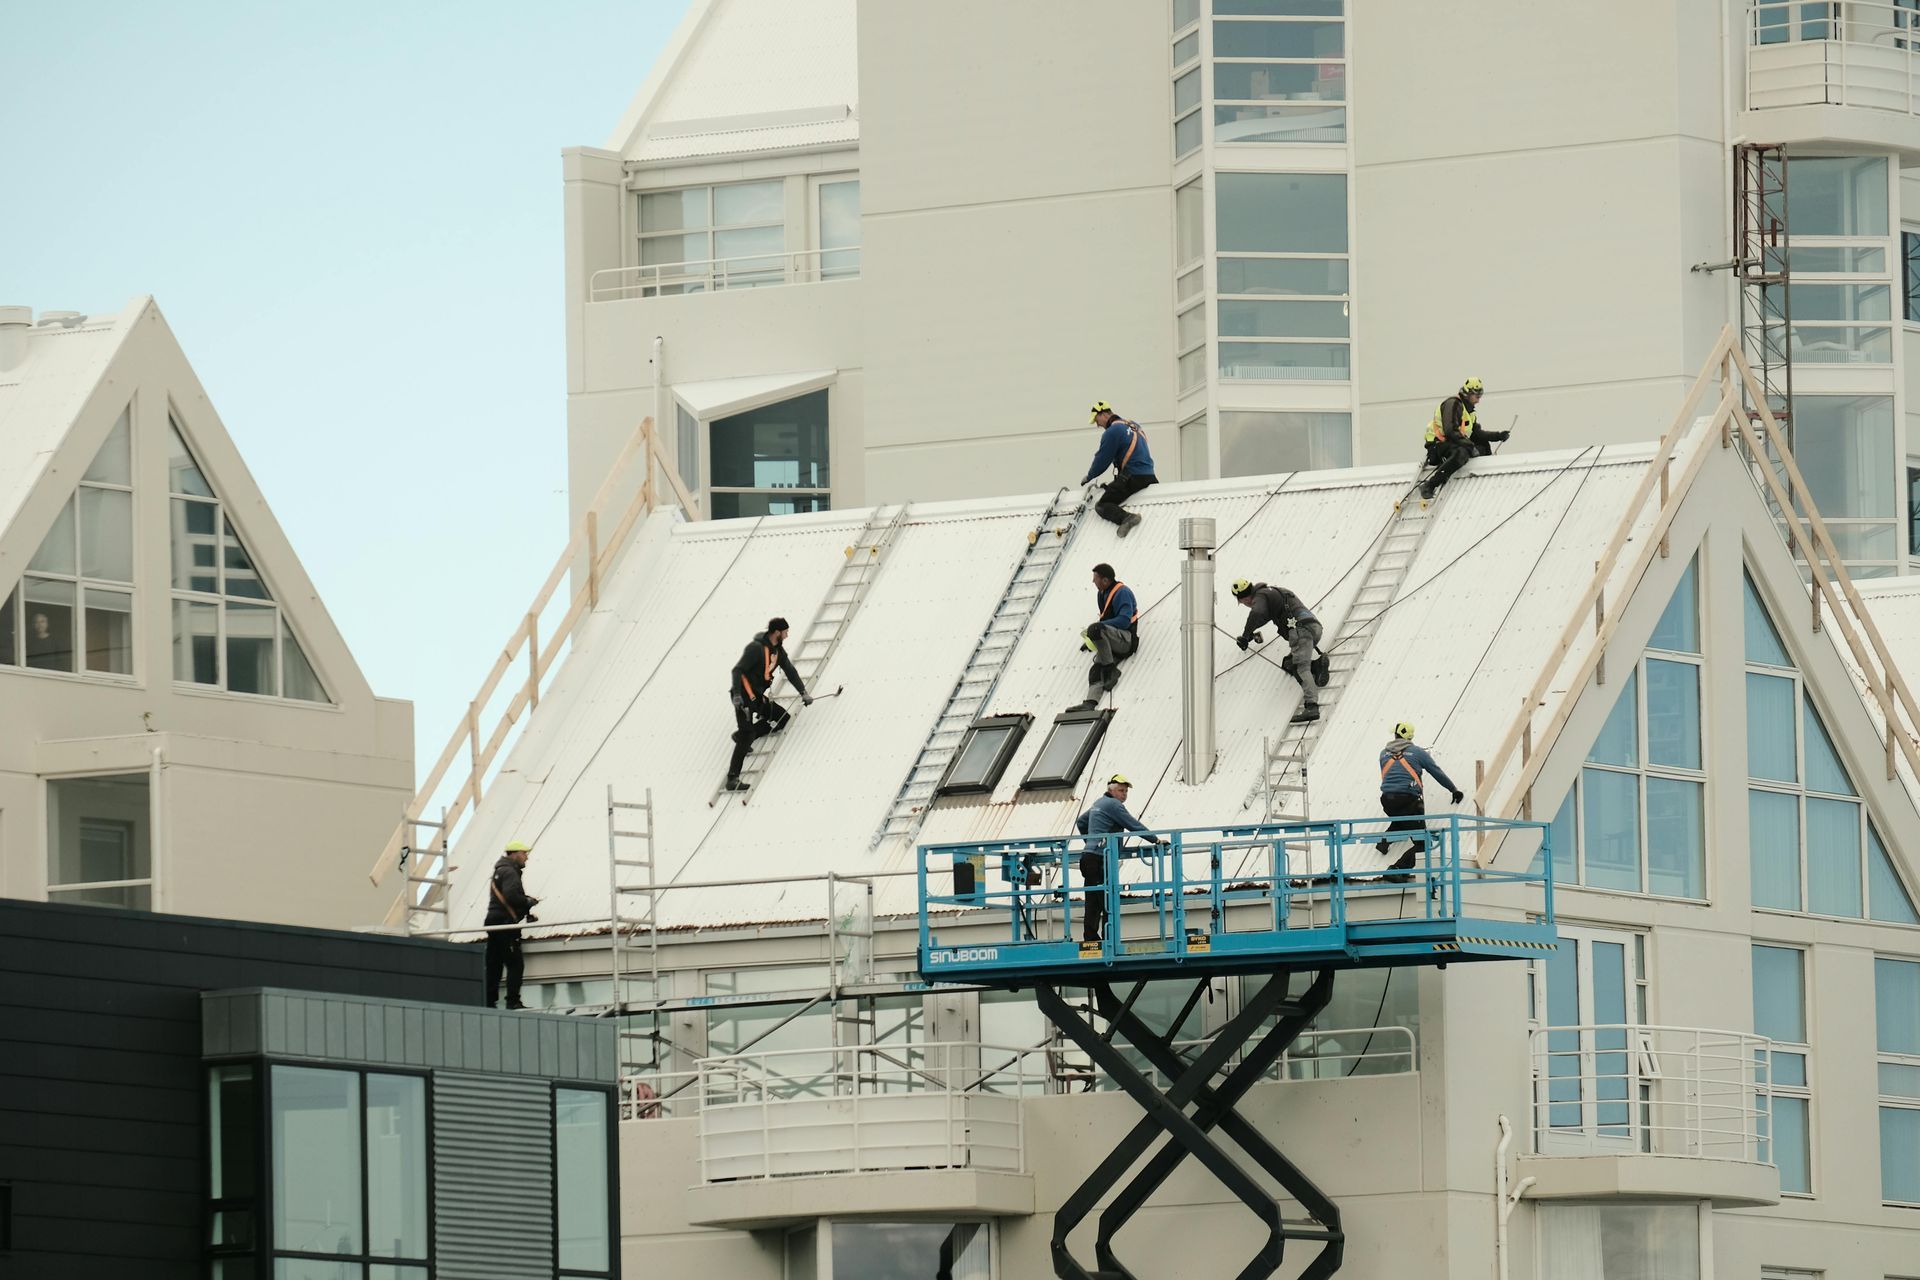
Safety barriers: Ground-level barriers prevent pedestrian access beneath work areas. Roof-level fall protection systems (guardrails, safety anchors, harnesses) protect workers. Professional contractors maintain comprehensive safety protocols.
Step 2: Removal of Existing Roofing (If Applicable)
Tear-off process: Crews systematically remove existing shingles, underlayment, and flashings, exposing the roof deck. Work proceeds in manageable sections, maintaining weather protection during multi-day projects. Careful removal around chimneys, skylights, and penetrations prevents damage to retained components.
Waste disposal: Vancouver requires proper disposal of roofing materials. Contractors coordinate debris removal through designated facilities. Dumpsters or dump trailers are positioned for efficient waste management. Magnetic sweeps collect stray nails, preventing tire damage or injury.
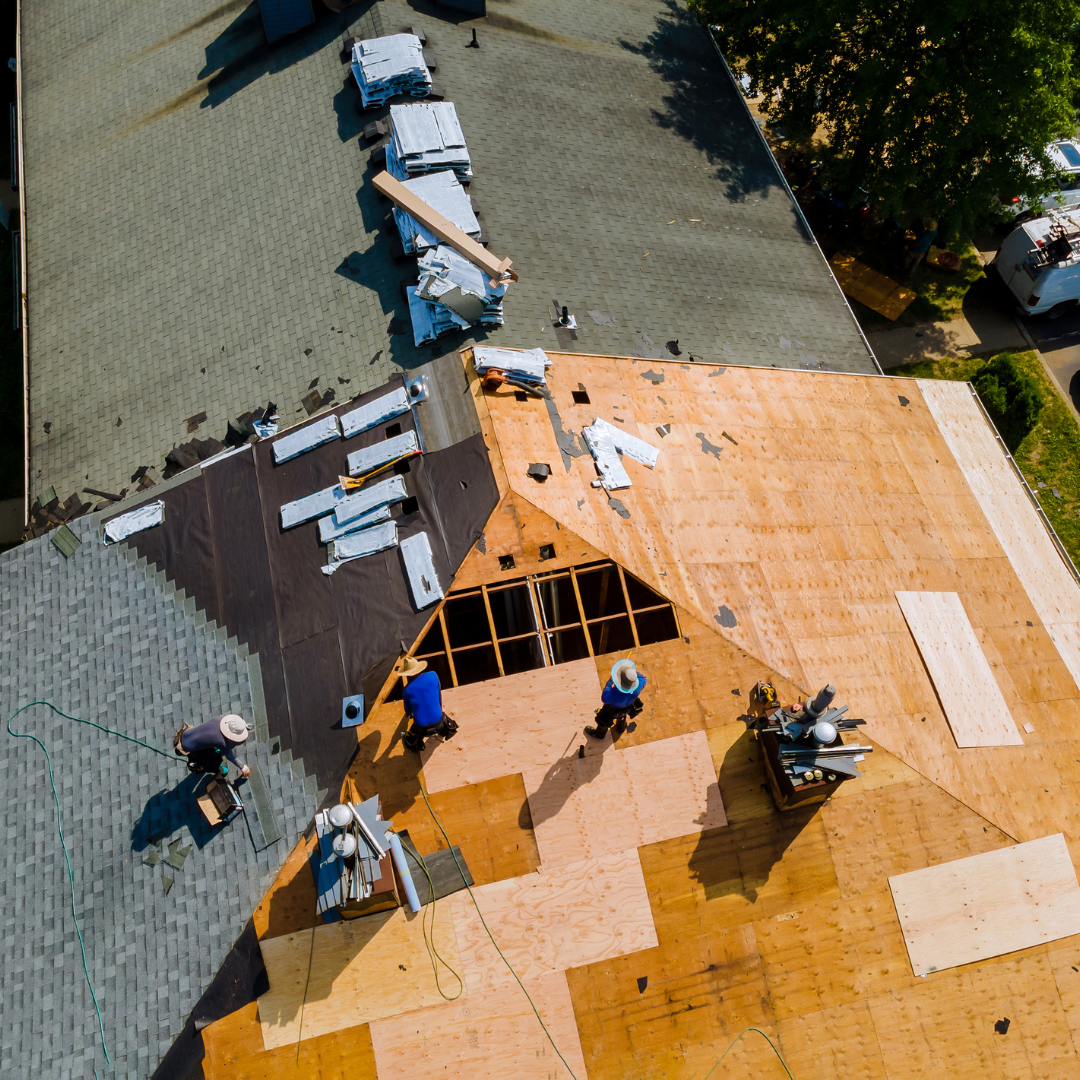
Step 3: Roof Deck Inspection & Repairs
Replacing damaged plywood: Soft, rotted, or deteriorated sheathing receives replacement. Quality installations use 5/8-inch plywood (or OSB meeting structural requirements) properly fastened to framing. Extent of repairs discovered during tear-off affects timeline and cost.
Moisture remediation: If significant moisture damage exists, addressing the source (ventilation deficiencies, plumbing leaks) prevents recurrence. Installing new roofing over unresolved moisture problems guarantees premature failure.
Step 4: Underlayment & Waterproofing
Ice & water shield: Self-adhering rubberized membrane applied at eaves, valleys, and around penetrations provides critical secondary waterproofing. Vancouver installations typically use ice & water shield more extensively than minimum code (full valley coverage, 6+ feet at eaves), given our heavy rainfall.
Leak protection importance: Quality synthetic underlayment (lasting 30-40 years) protects against water infiltration if shingles fail. Traditional felt paper (degrading in 10-15 years) provides inadequate long-term protection for the Vancouver climate. Premium installations invest in superior underlayment, ensuring lasting performance.
Step 5: Installation of Roofing Materials
Shingles, metal panels, or membranes: Material-specific installation follows manufacturer requirements and RCABC (Roofing Contractors Association of BC) standards. Asphalt shingles are installed with proper overlap, alignment, and fastener placement. Metal panels require precise measurements and specialized fastening. Each material demands distinct expertise.
Proper fastening methods: Shingle installations use 4-6 fasteners per shingle (depending on product and wind rating requirements) positioned in manufacturer-specified nail zones. Overdriven or underdriven fasteners compromise wind resistance and waterproofing. Quality control inspections ensure consistent application.
Step 6: Flashing, Ventilation & Penetrations
Chimneys: Step flashing is installed with each shingle course up the chimney sides. Counter flashing embedded properly into mortar joints protects step flashing from weather exposure. Cricket (saddle) required behind chimneys wider than 30 inches, diverting water flow.
Skylights: Curb flashings integrate with underlayment and shingle courses, creating watertight seals. Proper skylight installation requires understanding manufacturer specifications and water flow patterns.
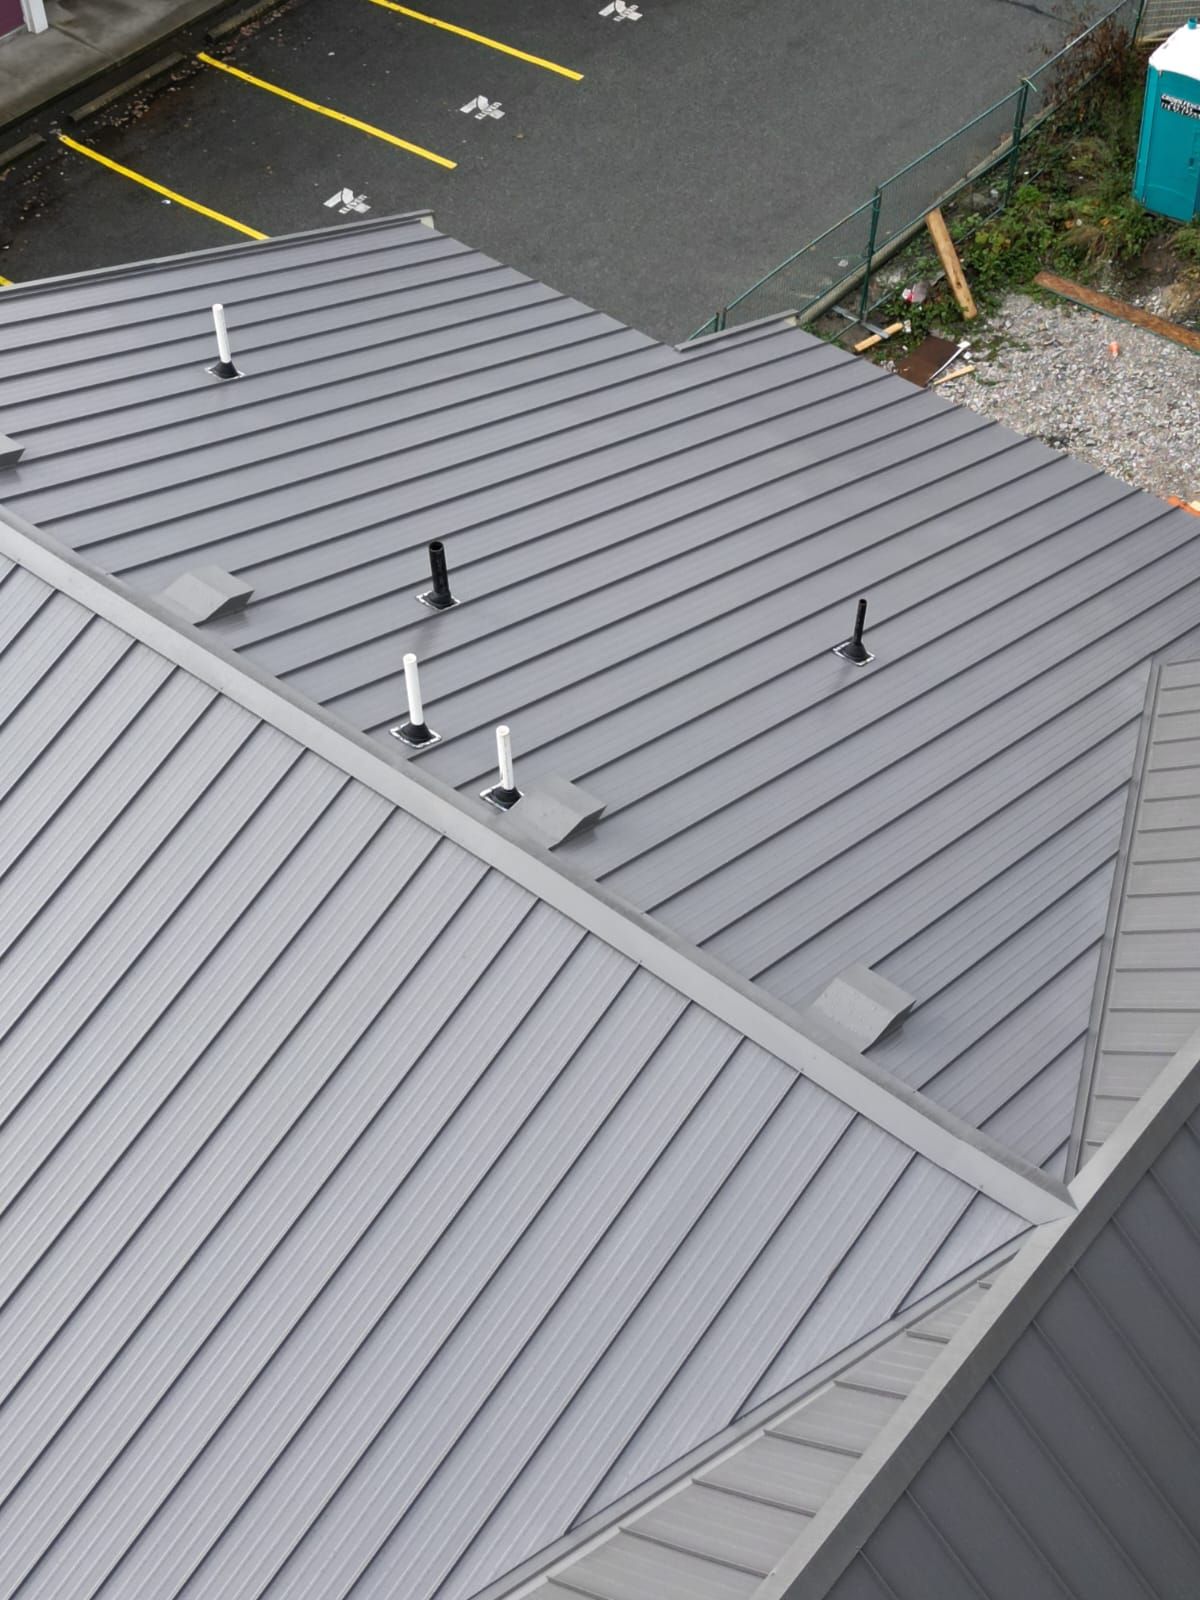
Roof vents: Plumbing vents, bathroom exhaust, and attic ventilation penetrations receive proper boots or flashings. Ridge vents provide continuous exhaust ventilation along peaks. Soffit vents create a balanced intake, completing the ventilation system.
Step 7: Cleanup & Final Inspection
Debris removal: Comprehensive cleanup removes all tear-off materials, packaging, and construction waste. Tarps protecting landscaping are removed once areas are cleared of debris.
Nail sweep: Magnetic tools sweep property, collecting stray fasteners, preventing tire punctures or barefoot injuries. Quality contractors perform thorough sweeps of driveways, walkways, and lawn areas.
Final walkthrough: Homeowner and contractor review completed installation, address any concerns, verify cleanup quality, and discuss warranty registration and maintenance recommendations before final payment.
Step-by-Step Residential Roof Installation Process
Understanding the complete workflow helps homeowners know what to expect during each phase.
Step 1: Site Preparation & Safety Setup
How Long Does Residential Roof Installation Take in Vancouver?
Timeline expectations help homeowners plan around disruption and understand project flow.
Typical Installation Timeline by Roof Type
Asphalt shingles (2,000 sq ft typical home):
- Simple gable roof: 2-3 days
- Complex hip/valley configuration: 3-5 days
- Large home (3,000+ sq ft): 4-7 days
Metal roofing:
- Standing seam panels: 4-6 days
- Ribbed panels: 3-5 days
- Complex details add 1-2 days
Cedar shakes:
- Hand-split installation: 5-8 days
- Taper-sawn: 4-6 days
- Slowest due to individual shake placement
Factors That Can Extend the Timeline
Weather delays: Rain halts installation even during summer. Brief showers may cause half-day delays. Extended rain events postpone work 1-3 days. Contractors monitor forecasts and adjust schedules accordingly.
Structural repairs: Discovering extensive deck rot, inadequate framing, or drainage deficiencies extends the timeline 2-5 days while repairs are being completed. Unforeseen structural work represents the most common timeline extension.
Material availability: Special-order colors, premium products, or supply chain disruptions occasionally delay start dates. Standard products are typically stocked locally, but custom specifications may require extended lead times.
Residential Roof Installation Costs in Vancouver
Understanding complete project costs prevents budget surprises.
What's Included in Installation Costs
Labor: Represents 40-60% of total project cost, depending on complexity. Includes tear-off crews, installation teams, cleanup personnel, and project supervision.
Materials: Roofing product, underlayment, ice & water shield, flashings, fasteners, ridge cap, starter strips. Quality varies significantly between economy and premium products, affecting performance and longevity.
Disposal: Dump fees, transportation, and dumpster rental. Single-layer tear-off generates 2-4 tons of waste for typical homes. Multiple existing layers or heavy materials (shake, tile) increase disposal costs.
Safety equipment: Fall protection systems, scaffolding if needed, barriers, signage. Professional contractors maintain proper equipment, protecting workers and property.
Factors That Affect Installation Pricing
Roof complexity: Simple rectangular roofs install efficiently. Multiple valleys, dormers, varying pitches, and elaborate details slow installation, increasing labor costs 20-40%.
Access challenges: Properties with limited access, steep terrain, or height requiring scaffolding add equipment and labor costs. Urban locations with parking restrictions or narrow access complicate material delivery.
Material choice: Dramatic cost variation between products. Premium architectural shingles cost 50-75% more than basic 3-tab. Metal costs 2-3x asphalt. Cedar runs 3-4x basic asphalt pricing.
Detailed cost guidance is available throughresidential roofing resources.
What Happens After Your Roof Installation?
Post-installation procedures ensure long-term satisfaction and warranty protection.
Final Inspection & Quality Checks
Code compliance: Building inspector verifies installation meets BC Building Code requirements for wind resistance, fire rating, ventilation, and structural adequacy. Passing inspection required for permit closure.
Manufacturer requirements: Some warranty programs require third-party inspection or manufacturer representative verification, ensuring proper installation, and qualifying for extended coverage.
Warranties & Documentation
Workmanship warranties: Quality contractors provide 5-10 year coverage on installation errors. Obtain warranty terms in writing specifying covered items and claim procedures.
Material warranties: Manufacturer coverage varies by product (15-50 years typical). Register warranty within the required timeframe (usually 30-90 days), activating extended coverage. Maintain proof of installation and material specifications.
Initial Maintenance After Installation
First inspection timing: Schedule professional inspection 6-12 months after installation, verifying system performance through seasonal weather cycles. Early identification of any installation deficiencies allows correction under warranty.
Early warning signs: Monitor for lifted shingles, interior leaks, or unusual sounds during storms. Report concerns to the contractor promptly while the workmanship warranty is active.
Ongoing
roof maintenance programs protect the installation investment long-term.
Common Residential Roof Installation Mistakes
Understanding typical errors helps homeowners recognize quality installation and avoid problematic contractors.
Improper flashing installation: Most roof leaks trace to flashing failures rather than field membrane problems. Common errors include:
- Counter flashings are caulked rather than properly embedded in mortar joints
- Step flashings omitted or improperly overlapped
- Valley flashings are undersized or poorly integrated with shingles
- Penetration flashings sealed with caulk alone without proper boot installations
Quality installations embed counter flashings 1-2 inches into masonry using non-shrinking mortar, not caulk. Step flashings integrate with each shingle course, creating a shingled water-shedding system.
Poor ventilation planning: Many installations place new roofing over inadequate ventilation systems, perpetuating problems. Without addressing ventilation deficiencies, new roofs age prematurely from trapped heat and moisture. Comprehensive installations assess and upgrade ventilation, ensuring:
- Balanced intake (soffit vents) and exhaust (ridge vents)
- Clear airflow paths from eaves to peak (baffles maintaining space above insulation)
- Adequate net free area (1 sq ft per 300 sq ft attic floor minimum)
Proper ventilation extends roof lifespan 5-10 years beyond inadequately ventilated systems while preventing condensation damage to the structure.
Cutting corners on underlayment: Budget installations use minimum code-required felt paper (15-pound or 30-pound), degrading in 10-15 years. Quality installations invest in synthetic underlayment lasting 30-40 years, providing long-term secondary waterproofing matching the roof membrane lifespan.
Ice & water shield application varies dramatically between contractors. Minimum code requires 3 feet at eaves and in valleys. Vancouver's heavy rainfall justifies extended coverage (6+ feet at eaves, full valley protection, around all penetrations), providing superior leak protection.
Inadequate fastening: Shingles require proper fastener quantity (4-6 per shingle, depending on product), correct placement (manufacturer-specified nail zones), and appropriate depth (flush with shingle surface, not overdriven or underdriven). Improper nailing compromises wind resistance and waterproofing.
Common fastening errors include:
- Too few fasteners (cost-cutting, reducing wind resistance)
- Fasteners placed outside nail zones (failing to engage the shingle properly)
- Overdriven nails breaking the shingle surface (creating leak points)
- Underdriven nails protruding (preventing proper seal)
Ignoring manufacturer specifications: Each roofing product has specific installation requirements for ventilation, underlayment, fastening, and detail work. Contractors unfamiliar with products or cutting corners void manufacturer warranties through improper installation. Extended warranty coverage typically requires installation by certified contractors following exact specifications.
Inadequate deck preparation: Installing new roofing over damaged, inadequate, or improperly prepared decks guarantees problems. Quality installations:
- Replace soft, rotted, or deteriorated sheathing
- Verify proper fastening of deck to framing (every 6 inches at edges, 12 inches in field)
- Ensure proper spacing between panels (1/8 inch gaps allowing expansion)
- Confirm adequate thickness (5/8-inch minimum for shingles)
Rushed timeline sacrificing quality: Contractors rushing installations to maximize daily output compromise quality through:
- Inadequate flashing integration
- Poor shingle alignment
- Improper fastener placement
- Incomplete cleanup creates safety hazards
Quality installations prioritize proper execution over speed, accepting realistic timelines, ensuring lasting performance.
Choosing the Right Roof Installation Contractor in Vancouver
Contractor selection significantly impacts installation quality, warranty protection, and long-term satisfaction.
Local experience with Vancouver climate:
Contractors familiar with coastal conditions understand:
- Proper ventilation design prevents condensation in humid conditions
- An extended ice & water shield application is appropriate for heavy rainfall
- Material selection suited to persistent dampness
- Moss-resistant installation techniques for shaded properties
- Heritage home considerations in older neighborhoods
Verify experience through references from similar Vancouver projects rather than general roofing experience in different climates.
Licensing & insurance verification:
WorkSafeBC coverage: All legitimate BC contractors maintain current registration. Request clearance letters before work commences, protecting homeowners from liability if worker injuries occur. Verify registration status through the WorkSafeBC website using the company number.
Liability insurance: Minimum $2 million commercial general liability protects against property damage claims during installation. Request the current certificate naming you as an additional insured for the project duration.
Municipal licensing: Verify business license and required trade certifications demonstrating legitimate operations and compliance with local requirements.
Material certifications & manufacturer relationships:
Certified installers: Many manufacturers maintain certification programs training contractors on proper installation techniques. Certified installers qualify for extended warranty coverage unavailable through uncertified contractors.
Factory relationships: Established contractors with solid manufacturer relationships ensure material quality consistency, warranty support, and technical guidance for complex applications.
Product knowledge: Quality contractors explain material options objectively, discussing pros and cons rather than pushing specific products. They help homeowners make informed choices, matching budgets and expectations.
Written scope of work & transparency:
Comprehensive proposals specify:
- Complete scope (tear-off, disposal, deck repairs, underlayment, roofing material, flashings, cleanup)
- Material specifications (brand, product line, color, thickness, warranty terms)
- Labor breakdown by project phase
- Timeline with weather contingency planning
- Payment schedule tied to completion milestones (deposit, material delivery, completion)
- Permit handling and inspection coordination
Avoid vague "total price" proposals without scoped details, ls creating opportunities for change orders and disputes.
Residential Roof Installation FAQs in Vancouver
Why does residential roof installation take longer in Vancouver?
Residential roof installation takes longer in Vancouver because frequent rain requires weather monitoring, flexible scheduling, and work stoppages to protect exposed roof areas. Even summer installations can experience delays due to unexpected rainfall.
When is a full roof installation necessary instead of a repair?
A full roof installation is necessary when roofing materials are near end-of-life, leaks are recurring in multiple areas, or structural issues are present. Ongoing repairs costing thousands annually usually indicate replacement is the more economical option.
How long does residential roof installation take in Vancouver?
Most residential roof installations in Vancouver take 2–5 days for asphalt shingles, 4–6 days for metal roofing, and 5–8 days for cedar shake, depending on roof size, complexity, and weather conditions.
What happens during the roof installation process?
The roof installation process includes site protection, tear-off of old materials, deck inspection and repairs, underlayment and waterproofing installation, roofing material installation, flashing and ventilation work, followed by cleanup and final inspection.
How does weather affect roof installation timelines?
Rain immediately halts roof installation to prevent water damage, often extending timelines by 1–3 days during wet periods. Contractors use temporary protection and resume work once dry conditions return.
What factors most affect residential roof installation cost?
Roof installation cost is most affected by roof size and complexity, material choice, tear-off requirements, access challenges, and the extent of deck or ventilation repairs discovered during removal of the old roof.
What should homeowners do after a new roof is installed?
After installation, homeowners should register warranties, schedule a professional inspection within 6–12 months, monitor for early issues after storms, and follow regular maintenance to protect the roof’s lifespan and warranty coverage.
Next Steps for Residential Roof Installation in Vancouver
Ready for your free roof installation quote? Contact Paragon Roofing BC for a complimentary assessment.
Related services:
Understanding the complete installation process, realistic timelines, and proper preparation helps ensure successful outcomes, protecting your Vancouver home's most important weather barrier.
Disclaimer:
Pricing, timelines, and installation durations shown are for general informational purposes only and are not quotes or guarantees. Actual residential roof installation costs and schedules in Vancouver vary based on roof size and complexity, material selection, access, weather conditions, and structural or moisture issues discovered during tear-off. Final pricing and scheduling require a professional on-site inspection.
Here's What Our Existing Clients Think.
Home and business owners we've served across the greater Vancouver area.
Our Google Reviews
Edit Google Reviews Widget
We look forward to helping you.
For all your roofing needs, contact Paragon Roofing BC — call, text, or email us at 604-358-3436
Paragon Res Roof Install #2
We will get back to you as soon as possible.
Please try again later.
