Why Flashing Is the Most Critical (and Most Failed) Roof Detail
Table of Contents
- Why Flashing Is the Most Critical Roof Detail
- What Flashing Is Actually Supposed to Do
- Where Flashing Commonly Fails on Vancouver Roofs
- Why Flashing Fails (Even on Newer Roofs)
- How Proper Flashing Detailing Is Supposed to Work
- Common Flashing Shortcuts We See in Vancouver
- How Flashing Failures Usually Show Up Inside the Home
- How We Detail Flashing for Long-Term Performance
- When Flashing Should Be Inspected or Replaced
- Recommended links
Key Takeaways
| What matters most | Vancouver reality | What to do about it |
|---|---|---|
| Flashing is primary waterproofing at transitions | Wind-driven rain pushes water sideways and uphill during storms | Detail every transition as a layered system, not “trim” |
| Most leaks come from sequencing and fastener placement | Even new roofs can leak when flashing is installed out of order | Follow shingle-style overlaps and keep fasteners out of water paths |
| Sealant is not the defense | UV + moisture cycles crack and shrink caulking quickly | Build redundancy so the detail sheds water even if sealant fails |
| Interior stains rarely map to the real source | Water can travel along framing before showing inside | Inspect flashing zones first (walls, chimneys, valleys, penetrations, edges) |
Why Flashing Is the Most Critical (and Most Failed) Roof Detail
Flashing exists for one reason: to control water where roofs are most vulnerable. Any place a roof changes direction, meets a wall, surrounds an object, or transitions between materials is a place where water naturally wants to enter. Shingles, membranes, and metal panels are excellent at shedding water on open roof fields—but they are not designed to seal transitions on their own. That job belongs entirely to flashing.
In Vancouver, flashing failures show up faster and more often because of wind-driven rain. Rain doesn’t just fall straight down here. It gets pushed sideways, forced uphill, and driven under materials during storms. Weak flashing details that might survive in drier climates are exposed quickly in the Lower Mainland.
This is why many homeowners are told they have a “roof problem” when the real issue is a single failed flashing detail. The roof covering itself may still be serviceable, but once flashing fails, water bypasses the system entirely. Shingles curl, membranes blister, sealants crack—but all of those symptoms trace back to flashing not doing its job.
Flashing is also the most commonly compromised detail during installation. It’s often hidden, rushed, or treated as secondary to the visible roofing material. Yet every other component of the roof system depends on flashing to function properly. When flashing fails, everything above it becomes irrelevant.
What Flashing Is Actually Supposed to Do
Flashing is not decorative trim, and it is not a backup layer. It is primary waterproofing at roof transitions. Its role is to intercept water and deliberately redirect it back onto the roof surface or safely off the building.
At its core, flashing must:
- Direct water away from joints, seams, and edges, especially where materials meet
- Create a waterproof transition between dissimilar materials like roofing and siding, masonry, or metal
- Allow controlled movement caused by temperature changes, wind uplift, and building settlement
- Maintain continuity with underlayment and roofing so water always has a clear exit path
A properly detailed flashing system assumes water will get behind surface materials. Its job isn’t to pretend water won’t get there—it’s to ensure that when it does, it’s safely guided back out.
This is why flashing must work as part of a system, not as a standalone piece of metal. Flashing without proper underlayment integration, correct overlap, or movement allowance will fail regardless of material quality.
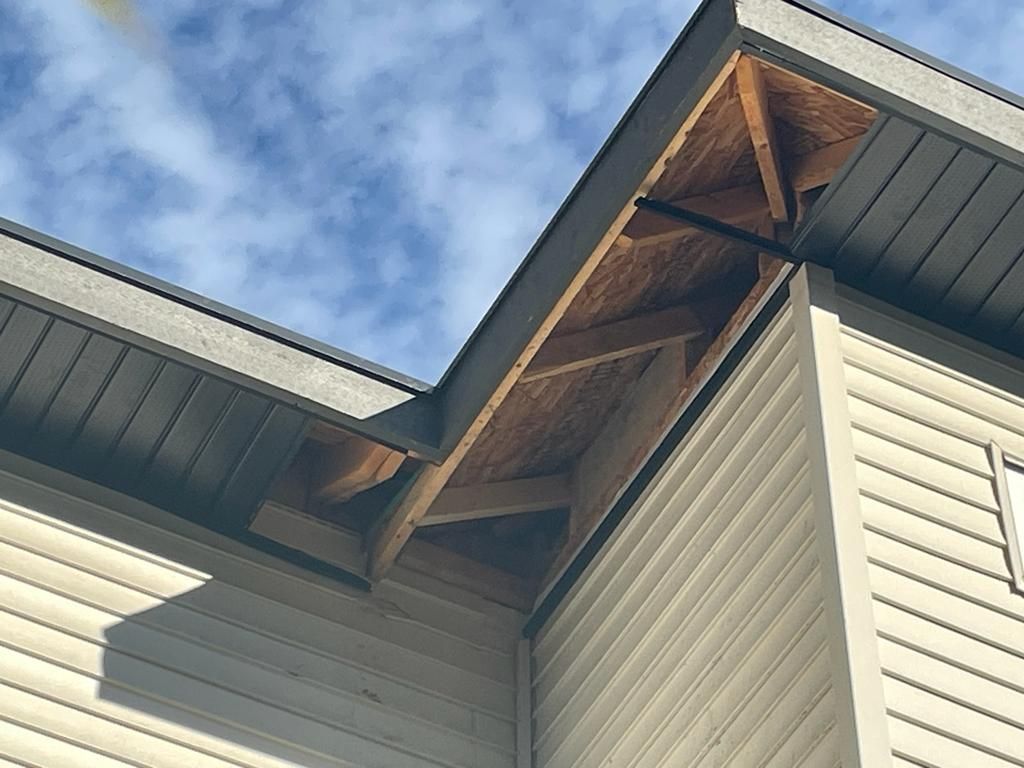
Where Flashing Commonly Fails on Vancouver Roofs
Certain roof areas are under constant stress because they handle more water, more movement, or both. These locations account for the vast majority of flashing-related leaks we see.
Chimneys and wall-to-roof intersections are high-risk zones because they combine vertical walls, horizontal roof planes, and multiple materials. Water running down walls meets water shedding off roofs, creating concentrated flow and back-up pressure.
Valleys and roof-to-roof transitions collect more water than any other part of the roof. They handle runoff from multiple roof planes, and even minor flashing errors can overwhelm these areas during heavy rain.
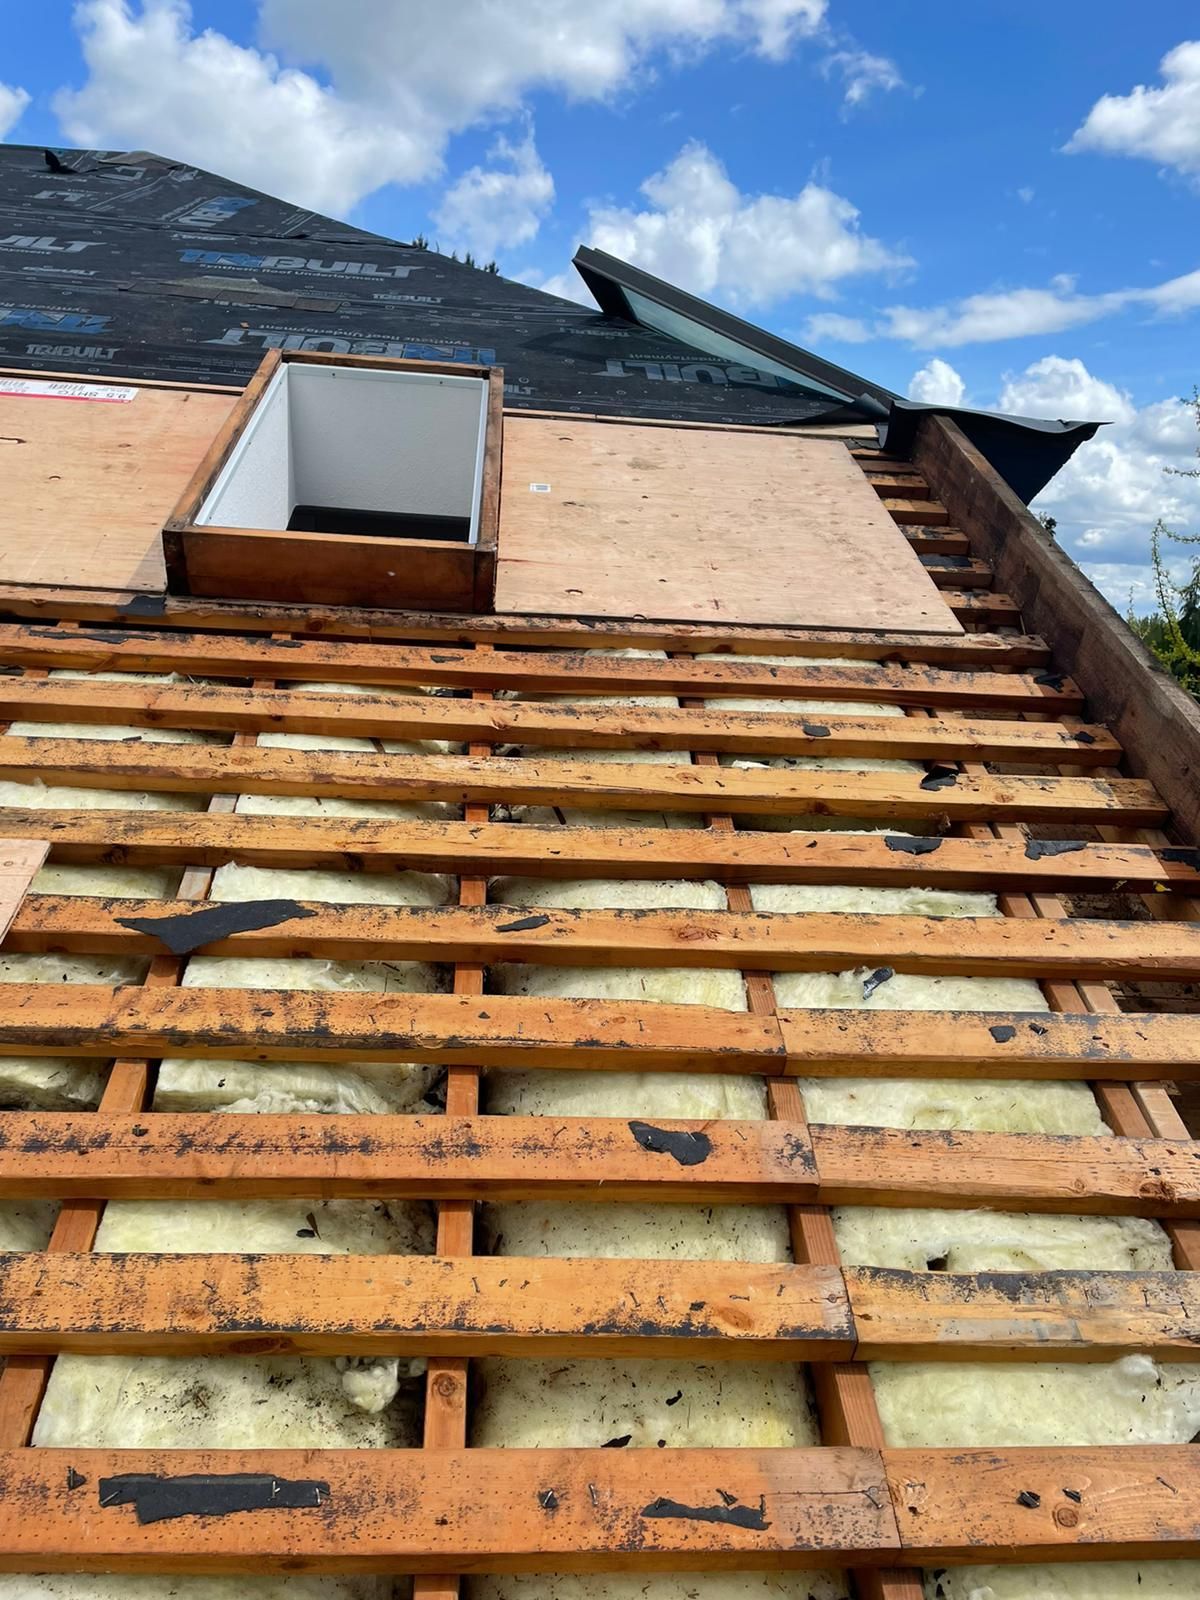
Skylights, vents, and mechanical penetrations interrupt the roof surface entirely. Each penetration introduces movement, differential expansion, and a permanent break in the roofing field—making precise flashing essential.
Roof edges, parapets, and step-downs are exposed to wind uplift and capillary water movement. These areas often fail quietly, leading to fascia rot, interior wall damage, or leaks that appear far from the roof edge itself.
All of these locations share two traits: high water load and constant movement. Flashing in these areas must be designed specifically for those conditions.
Why Flashing Fails (Even on Newer Roofs)
Flashing failure is rarely about age alone. Many leaks occur on relatively new roofs because of design and installation errors, not material breakdown.
One major cause is using the wrong flashing type for the transition. Step flashing, apron flashing, counterflashing, and pan flashing are not interchangeable. Using a generic piece of metal where a system detail is required almost always leads to failure.
Another frequent issue is poor sequencing. Flashing must be installed in the correct order with underlayment and roofing materials. If flashing is buried incorrectly, reversed, or isolated from the membrane layer, water is directed inward instead of outward.
Fasteners placed in active water paths are another common problem. Even a single nail through flashing in the wrong location becomes a permanent leak point once movement or corrosion begins.
Many installations rely too heavily on sealants and caulking. Sealant should never be the primary waterproofing method. In Vancouver’s UV exposure and moisture cycles, sealants crack, shrink, and detach—leaving nothing underneath to stop water.
Incompatible metals also play a role. When dissimilar metals contact each other, galvanic corrosion accelerates failure. This is often overlooked when flashing is added during repairs or retrofits.
Finally, natural movement —from temperature swings, wind uplift, and building settlement—stresses rigid flashing details. If flashing isn’t designed to accommodate movement, it will eventually crack, tear, or separate.
How Proper Flashing Detailing Is Supposed to Work
Correct flashing detailing starts with the understanding that every transition is unique. Flashing must be designed for the specific roof geometry, materials, exposure, and movement at that location—not pulled from a generic solution.
Proper detailing follows a strict layering hierarchy:
Structure → membrane → flashing → roofing
This order ensures that if water bypasses one layer, it is still directed outward by the next. Flashing is integrated with underlayment so water never encounters a dead end.
All flashing details are built using shingle-style overlaps, meaning every upper layer laps over the layer below. Water is never asked to defy gravity, sealant, or luck—it is simply guided downward and out.
Equally important is allowing room for movement. Flashing must be secured in a way that permits expansion and contraction without tearing fasteners, cracking sealant, or distorting metal.
Many of the most important flashing details are hidden once the roof is complete. These unseen overlaps, membrane tie-ins, and termination points matter far more than what’s visible from the ground. When done correctly, they quietly protect the roof for decades. When done poorly, they create leaks that no surface repair can ever truly fix.
Flashing doesn’t fail because roofs are complicated—it fails because the details are underestimated. When flashing is treated as the backbone of the roof system rather than an accessory, leaks stop being a recurring problem and start becoming a rarity.
Common Flashing Shortcuts We See in Vancouver
Flashing failures in Vancouver are rarely accidental. In most cases, they come from shortcuts taken during installation or replacement, often to save time, reduce material cost, or avoid coordination with other trades. Unfortunately, these shortcuts almost always resurface later as leaks, rot, or interior damage—often long after the original work is finished.
One of the most common shortcuts is reusing old flashing during a roof replacement. On the surface, old flashing may look “fine,” especially if it isn’t visibly rusted. But flashing is stressed every day by expansion, contraction, and water movement. Once roofing is removed, old flashing has already been bent, nailed, sealed, and weathered. Reinstalling it compromises its integrity and almost guarantees premature failure.
Another frequent issue is flashing cut too short or made from metal that’s too thin. Proper flashing needs enough vertical height and overlap to handle wind-driven rain. Short pieces don’t provide adequate coverage, and thin metal deforms easily under thermal movement or foot traffic. In Vancouver’s climate, marginal dimensions fail quickly.
We also see nails driven directly through flashing in active water paths. This is one of the most damaging shortcuts. Every fastener through flashing becomes a potential leak point once sealant dries, metal moves, or corrosion sets in. Correct flashing design avoids fasteners in areas where water flows or pools.
Skipping step flashing at walls is another widespread problem, especially behind siding or stucco. Continuous metal flashing is often used instead of proper stepped pieces, even though walls and roofs move differently. Without step flashing, water gets trapped behind siding and is driven straight into the structure.
Finally, there’s the habit of covering poor flashing with sealant as a “fix”. Sealant may temporarily stop visible leakage, but it does nothing to address underlying design or sequencing problems. In many cases, heavy sealant use is actually a red flag that flashing was never detailed correctly to begin with.
How Flashing Failures Usually Show Up Inside the Home
Flashing failures are notoriously misleading from the inside of the house. The symptoms homeowners see rarely point directly to the real source of the problem, which is why flashing-related leaks are often misdiagnosed.
A common sign is water appearing far from the actual flashing failure. Once water gets past flashing, it travels along rafters, trusses, insulation, or sheathing before finally showing up as a stain or drip. The visible damage may be several feet—or even an entire room—away from the failing detail.
Many flashing issues cause intermittent leaks, showing up only during heavy rain, wind-driven storms, or specific wind directions. On calm rainy days, the roof may appear dry. During storms, water is pushed sideways or uphill, bypassing compromised flashing.
Homeowners often notice stains that dry out and then return. This cycle gives the false impression that the problem has been “fixed,” when in reality moisture is still entering the structure intermittently. Over time, this repeated wetting and drying accelerates wood rot and mold growth.
Another telltale sign is a history of repeated repairs that never fully solve the issue. Caulking is reapplied, shingles are replaced, or small patches are made—but the leak keeps coming back. That’s because the root cause isn’t surface damage; it’s a failed flashing detail underneath.
Interior symptoms also tend to lag far behind exterior failures. Flashing can fail months or even years before visible interior damage appears. By the time stains show up, moisture has often already compromised sheathing, framing, or insulation.
How We Detail Flashing for Long-Term Performance
Long-lasting flashing performance starts long before the first shingle or panel is installed. The process begins with transition-first planning, where every change in plane, material, or roof geometry is identified and detailed before roofing begins. Flashing is treated as the backbone of the system—not an accessory.
Material selection is based on exposure, roof type, and surrounding materials. Heavier-gauge metals and appropriate coatings are used where water volume, wind, or salt exposure demands it. Incompatible metals are avoided to prevent corrosion.
We design flashing so there are no fasteners in active water zones. Fasteners are placed only where water is not expected to flow or back up, and always in a way that allows controlled movement.
Flashing is fully integrated with underlayment and roofing materials, following correct sequencing so water always has a clear path outward. Underlayment laps into flashing, flashing laps into roofing, and no layer relies on sealant alone to remain watertight.
Finally, photo documentation is used to show homeowners exactly how critical flashing details are built before they’re covered. This transparency builds trust and ensures the system can be understood, maintained, and evaluated properly in the future.
When Flashing Should Be Inspected or Replaced
Flashing should never be treated as “set it and forget it.” There are specific times when inspection or replacement is not just recommended, but essential.
Flashing should always be evaluated during any roof replacement. Even if it appears serviceable, replacing roofing without addressing flashing is one of the fastest ways to create future leaks.
Recurring leaks near the same areas—chimneys, walls, valleys, or penetrations—are a strong indicator that flashing is the real issue, not the roofing material itself.
Any time siding, windows, or chimney work is done, flashing should be inspected. These trades often disturb existing flashing or alter how water moves across the roof and walls.
Visible sealant-heavy repairs are another warning sign. Excess caulking usually means flashing is no longer doing its job structurally.
Finally, flashing should be reviewed as part of preventative roof inspections, especially on older homes or buildings exposed to heavy wind and rain. Catching flashing issues early can prevent extensive structural damage and costly repairs down the line.
When flashing is designed, installed, and maintained correctly, it quietly protects the most vulnerable parts of the roof system. When shortcuts are taken, it becomes the starting point for some of the most expensive and frustrating roofing failures homeowners face in Vancouver.