Roof Underlayment Installation in Vancouver – The Waterproof Layer Your Roof Actually Depends On

PARAGON ROOFING BC


Protecting Your Home.

Building Your Family’s Future.

Vancouver roofers near me
Roofers installing shingles on a roof, blue tarp, sunny day.

Roof Underlayment for Vancouver Homes – Why It Matters

What roof underlayment actually does under your shingles or metal

Underlayment is the quiet workhorse of your roof system. It sits directly on the plywood or OSB deck, underneath your shingles or metal panels, acting as a continuous protective skin over the structure of your home. Think of it as the “safety net” between the weather and the wood. If wind lifts a shingle, if a fastener backs out slightly, if snow or wind-driven rain tries to work sideways under the roof surface, the underlayment is what buys you time and stops minor issues from turning into full-blown leaks.

On a typical Vancouver roof, you’ll usually see a mix of materials: self-adhered membrane (often called ice & water shield) in high-risk areas like valleys, eaves and around penetrations, and a broader field underlayment across the rest of the deck. The quality, type and installation of that field underlayment will influence not just how your roof behaves in storms, but how it ages over 20–30 years. Poorly installed or low-grade felt can wrinkle, tear or trap moisture; modern synthetics and, in some cases, breathable membranes are designed to stay stable, lay flat and cope better with the real-world movement of wood decks. If you want to go deep on the differences between felt, synthetic and breathable products specifically for this region, our detailed guide on what underlayment is best under shingles in Vancouver breaks it all down.


Why underlayment is critical in Vancouver’s heavy rain and wind

Vancouver doesn’t test roofs with one big storm a year—it tests them with hundreds of wet days, sideways rain, freeze–thaw cycles and the occasional wind event that rips across the roof at just the wrong angle. Under those conditions, relying on shingles or metal alone is asking for trouble. Underlayment gives you a continuous, secondary water-shedding layer that doesn’t have the same pattern of seams, joints and cut-outs as your finished roof. When wind blows rain up a slope or across a valley, it often finds its way under roofing surfaces through the smallest gaps. If it hits bare wood, you’re on the clock; if it hits a properly lapped underlayment system, it usually runs back out or dries before causing damage.

Underlayment also matters during installation itself. Vancouver jobs can get interrupted by pop-up showers or damp mornings. A good synthetic underlayment, installed correctly and fastened to manufacturer specs, can temporarily protect your home even before the shingles or panels go on. That gives crews the flexibility to work in realistic weather windows without exposing the deck to repeat wetting and drying, which over time can warp panels and open joints. In short, underlayment acts like a pressure-relief valve for the roof—it absorbs the imperfect realities of weather, installation timing and wind, so your finished roof doesn’t have to be perfect every second of its life to keep you dry.


Underlayment as your backup waterproofing if shingles ever fail

Every roof system has a primary line of defence and a backup. On pitched roofs, the primary is your shingle, shake, tile or metal surface; the backup is the underlayment and targeted membranes. When shingles age, lose granules or begin to curl, they start letting more water and wind underneath than they did when they were new. Underlayment is what keeps that gradual decline from turning into immediate leaks. It doesn’t replace the need for timely replacement, but it slows the damage curve.

In higher-risk zones—valleys, dead-end walls, low-slope sections tying into steeper areas—we’ll often specify a more robust self-adhered membrane, then transition to high-quality synthetics across the rest of the deck. That way, if a branch hits the roof, a nail backs out, or wind-driven rain finds a weak spot, water still has to get past a second, continuous waterproofing layer. When we design a roof for a Vancouver home, we’re not just thinking about how it will perform on day one; we’re thinking about how it behaves in year 15, after dozens of storms, small impacts and seasonal shifts. Proper underlayment selection and detailing is one of the main reasons some roofs limp through their later years with minimal drama, while others start leaking at the first sign of age. For homeowners looking at the whole system—not just the visible shingle—it’s worth pairing any future replacement with a full system upgrade from deck to finish, like we outline on our main Vancouver roof replacement service page.

We're Excited To Serve YOU!

Paragon Res Roof #1

Types of Roof Underlayment We Install in Vancouver

Synthetic underlayment vs traditional felt (tar paper)

On older Vancouver roofs, you’ll often find traditional #15 or #30 felt—what most people call “tar paper.” It’s essentially an organic or fiberglass mat soaked in asphalt. It works, but it has limitations: it can wrinkle when it gets damp, tear under foot traffic, and break down faster if the roof deck moves or the job drags through wet weather. In Vancouver’s climate—where it can rain three days in a row, clear up for a day, then rain again—felt doesn’t always give you the stability and long-term performance you want.

That’s why, on most modern replacements, we lean heavily toward branded synthetic underlayments. These are engineered plastic-based sheets designed to be lighter, stronger and more tear-resistant than felt. They lay flatter, stay more stable when they get a bit of moisture during installation, and offer better grip underfoot for crews working on steeper pitches. Good synthetics from reputable manufacturers often have higher UV exposure ratings as well, meaning if your roof sits open for a few days during a busy season, the underlayment isn’t degrading quietly in the sun. When we design a system for a Vancouver home, we’ll match the underlayment to the shingle or metal line you’ve chosen, so the whole system—from deck to outer layer—works together instead of being a patchwork of random products. If you’re exploring your options broadly, our main Vancouver roofing materials page is a good place to see how underlayment fits into the bigger picture.


Ice & water shield for eaves, valleys and leak-prone areas

In Vancouver, “just felt everywhere” is not enough. The weak spots on a roof are not the big open fields—they’re the transitions and high-risk areas: eaves, valleys, low-slope tie-ins, dead-end walls, and anywhere snow or water can sit, back up, or be driven sideways by wind. That’s where we specify self-adhered “ice & water” membranes from major manufacturers. These peel-and-stick products bond directly to the deck, creating a watertight barrier that self-seals around nails and fasteners. Instead of relying on gravity alone, they act like a gasket between your roof and the weather.

At eaves, ice & water shield helps protect against those early- and late-season cold snaps where meltwater can back up behind debris or small ice ridges. In valleys, it gives you a robust hidden channel that can handle concentrated flows during the kind of heavy rain events Vancouver gets every year. We also use these membranes at roof-to-wall intersections, around chimneys, and under step flashings—anywhere experience tells us leaks show up first. The goal is simple: assume water will eventually try to get in, and design belt-and-suspenders protection in the spots where that story usually starts.


High-temperature underlayment for metal and low-slope roofs

Metal and low-slope roofs run hotter than a typical shingle system—especially on darker colours or south- and west-facing slopes. Standard underlayment isn’t always built to handle that kind of sustained heat, expansion and contraction. Over time, the wrong product under metal can wrinkle, bond improperly, or even melt onto the back of panels, making future service a nightmare.

For standing seam metal, metal shingles and certain low-slope applications, we’ll specify high-temperature-rated self-adhered or synthetic underlayments that are designed for elevated surface temperatures and thermal cycling. These products maintain their bond to the deck, resist slumping under heat, and stay more dimensionally stable under panels that are constantly expanding and contracting. On low-slope or “almost flat” sections that tie into pitched roofs, we may combine high-temp membranes with additional cover boards or insulation layers to create a more robust, layered system. This is especially important on homes that mix metal accents, low-slope sections and traditional pitched roofs—a common layout in newer Vancouver builds and renovations.


Peel-and-stick membranes around skylights, chimneys and walls

Skylights, chimneys and wall transitions are where Vancouver roofs are most often “tested” by sideways rain. Shingles and even metal flashing alone are rarely enough if the prep work underneath isn’t done perfectly. That’s why we wrap these details in peel-and-stick membranes before flashings and cladding ever go on.

Around a skylight, we’ll typically create a fully boxed-in waterproofing zone: peel-and-stick membrane carried up the curb, integrated with the surrounding underlayment, then layered with step flashing, counter flashing and the skylight’s own kit. If wind-driven rain forces water uphill under the visible flashing, it still has to get past the self-adhered membrane before reaching the wood. The same approach applies to chimneys and walls: we extend peel-and-stick up the vertical surfaces, over the deck, and integrate it with step flashings and siding or stucco details. Done properly, this creates a continuous, shingled-in system where every layer directs water safely back out.

We use similar treatment at tricky dead-end walls, sidewall dormers, and anywhere a roof dives into a vertical surface—common details on character homes and renovations across East Van and the West Side. If you’re the type of homeowner who likes to understand the “why” behind these choices, our in-depth guide to roofing materials in Vancouver helps connect these hidden components to real-world performance, so you’re not just buying a shingle colour—you’re investing in a full system that’s built for this climate.

Roofer working on a dark shingle roof near a brick chimney. Sunlight casts a shadow on the chimney and the roof.

Types of Roof Underlayment We Install in Vancouver

Synthetic underlayment vs traditional felt (tar paper)

On older Vancouver roofs, you’ll often find traditional #15 or #30 felt—what most people call “tar paper.” It’s essentially an organic or fiberglass mat soaked in asphalt. It works, but it has limitations: it can wrinkle when it gets damp, tear under foot traffic, and break down faster if the roof deck moves or the job drags through wet weather. In Vancouver’s climate—where it can rain three days in a row, clear up for a day, then rain again—felt doesn’t always give you the stability and long-term performance you want.

That’s why, on most modern replacements, we lean heavily toward branded synthetic underlayments. These are engineered plastic-based sheets designed to be lighter, stronger and more tear-resistant than felt. They lay flatter, stay more stable when they get a bit of moisture during installation, and offer better grip underfoot for crews working on steeper pitches. Good synthetics from reputable manufacturers often have higher UV exposure ratings as well, meaning if your roof sits open for a few days during a busy season, the underlayment isn’t degrading quietly in the sun. When we design a system for a Vancouver home, we’ll match the underlayment to the shingle or metal line you’ve chosen, so the whole system—from deck to outer layer—works together instead of being a patchwork of random products. If you’re exploring your options broadly, our main Vancouver roofing materials page is a good place to see how underlayment fits into the bigger picture.


Ice & water shield for eaves, valleys and leak-prone areas

In Vancouver, “just felt everywhere” is not enough. The weak spots on a roof are not the big open fields—they’re the transitions and high-risk areas: eaves, valleys, low-slope tie-ins, dead-end walls, and anywhere snow or water can sit, back up, or be driven sideways by wind. That’s where we specify self-adhered “ice & water” membranes from major manufacturers. These peel-and-stick products bond directly to the deck, creating a watertight barrier that self-seals around nails and fasteners. Instead of relying on gravity alone, they act like a gasket between your roof and the weather.

At eaves, ice & water shield helps protect against those early- and late-season cold snaps where meltwater can back up behind debris or small ice ridges. In valleys, it gives you a robust hidden channel that can handle concentrated flows during the kind of heavy rain events Vancouver gets every year. We also use these membranes at roof-to-wall intersections, around chimneys, and under step flashings—anywhere experience tells us leaks show up first. The goal is simple: assume water will eventually try to get in, and design belt-and-suspenders protection in the spots where that story usually starts.


High-temperature underlayment for metal and low-slope roofs

Metal and low-slope roofs run hotter than a typical shingle system—especially on darker colours or south- and west-facing slopes. Standard underlayment isn’t always built to handle that kind of sustained heat, expansion and contraction. Over time, the wrong product under metal can wrinkle, bond improperly, or even melt onto the back of panels, making future service a nightmare.

For standing seam metal, metal shingles and certain low-slope applications, we’ll specify high-temperature-rated self-adhered or synthetic underlayments that are designed for elevated surface temperatures and thermal cycling. These products maintain their bond to the deck, resist slumping under heat, and stay more dimensionally stable under panels that are constantly expanding and contracting. On low-slope or “almost flat” sections that tie into pitched roofs, we may combine high-temp membranes with additional cover boards or insulation layers to create a more robust, layered system. This is especially important on homes that mix metal accents, low-slope sections and traditional pitched roofs—a common layout in newer Vancouver builds and renovations.


Peel-and-stick membranes around skylights, chimneys and walls

Skylights, chimneys and wall transitions are where Vancouver roofs are most often “tested” by sideways rain. Shingles and even metal flashing alone are rarely enough if the prep work underneath isn’t done perfectly. That’s why we wrap these details in peel-and-stick membranes before flashings and cladding ever go on.

Around a skylight, we’ll typically create a fully boxed-in waterproofing zone: peel-and-stick membrane carried up the curb, integrated with the surrounding underlayment, then layered with step flashing, counter flashing and the skylight’s own kit. If wind-driven rain forces water uphill under the visible flashing, it still has to get past the self-adhered membrane before reaching the wood. The same approach applies to chimneys and walls: we extend peel-and-stick up the vertical surfaces, over the deck, and integrate it with step flashings and siding or stucco details. Done properly, this creates a continuous, shingled-in system where every layer directs water safely back out.

We use similar treatment at tricky dead-end walls, sidewall dormers, and anywhere a roof dives into a vertical surface—common details on character homes and renovations across East Van and the West Side. If you’re the type of homeowner who likes to understand the “why” behind these choices, our in-depth guide to roofing materials in Vancouver helps connect these hidden components to real-world performance, so you’re not just buying a shingle colour—you’re investing in a full system that’s built for this climate.

  • Rooftop view of several houses with asphalt shingle roofs and spinning turbine vents on a sunny day.

    Slide title

    Write your caption here
    Button
  • Slide title

    Write your caption here
    Button
  • View of a brown shingled roof with a turbine vent, set in a residential neighborhood.

    Slide title

    Write your caption here
    Button
  • Overhead view of a brown shingled roof with a square vent cap, other homes in the background.

    Slide title

    Write your caption here
    Button

Our Cedar Roof Conversion Process in Vancouver

Converting an old cedar roof isn’t just “new shingles on top.” Done properly, it’s a full reset of your roof structure: tear-off, new plywood, modern waterproofing, tuned ventilation, and a new roofing system that actually fits Vancouver’s rainy, moss-prone climate. Here’s how we walk through that process step by step so you know exactly what’s happening over your head.


On-Roof Assessment & Detailed Quote

Everything starts with getting boots on the roof, not just a drive-by estimate. We climb up and walk the slopes, checking:

  • Cedar shake/shingle condition (thickness, curling, splitting, moss loading)
  • Roof geometry: valleys, dormers, wall transitions, skylights, chimneys
  • Signs of past patchwork: tar, metal inserts, random repairs
  • Existing ventilation: number and placement of roof vents, soffit openings, ridge lines

From there, we take clear photos of problem areas and general conditions so you’re not guessing or taking our word for it. The quote you receive is built off those photos and actual measurements—not guesses based on Google Street View.

We break down the estimate into clear components: tear-off and disposal, new 3/8" or 1/2" plywood sheathing, underlayment and ice & water, ventilation upgrades, and your chosen roofing system. That way you can see exactly where the investment is going, line by line.


Removing the Old Cedar Shakes/Shingles

Once you’re ready to move forward, the first big step on-site is a controlled cedar tear-off. We remove the old shakes or shingles carefully so we’re not smashing debris into your gardens, walkways, or siding.

Key parts of this phase:

  • Setting up proper tarps and protection for landscaping and decks
  • Using tear-off tools and techniques that minimize damage to the existing skip-sheathing and structure
  • Keeping nails and sharp fragments contained so they don’t end up in driveways or lawns

Cedar roofs tend to shed a lot of small fragments and moss as they come apart, so our crews stay on top of cleanup throughout the day—so you’re not looking at a war zone for a week.


Inspecting Rafters & Existing Skip-Sheathing

Once the cedar is off, the “real truth” of the roof shows up. With the old shakes and underlayment gone, we can see:

  • The condition of the skip-sheathing or boards underneath
  • Any rot around eaves, valleys, chimneys, or plumbing vents
  • Signs of long-term leaks—dark staining, soft areas, moldy sections
  • Twists or sags in rafters that might need attention

We mark out any compromised boards or structural issues and discuss them with you before we proceed. This is the point where we fix what the cedar was hiding—replacing rotten sections and making sure the skeleton of the roof is ready to support new plywood and a modern roofing system. You don’t want to bury problems under fresh materials; this is where we make sure we’re building on something solid.


Installing New Plywood Sheathing

Cedar roofs were often built on skip-sheathing, which works for shakes but not for modern shingles, synthetic systems, or metal. So the next step is a full re-sheet with proper plywood sheathing —typically 3/8" or 1/2" plywood, depending on the structure, spans, and code requirements.

What matters here isn’t just “throw some plywood down”:

  • Sheets are installed with correct stagger and orientation for strength
  • Nailing patterns follow code and manufacturer specifications (spacing at edges and in the field)
  • Panels are fastened properly into rafters/joists, not just randomly into boards
  • Gaps between sheets are handled correctly to allow for expansion and prevent buckling

This plywood layer transforms your roof from an old, open board deck into a continuous, stable surface—ready to support any modern roofing system you choose.


Upgrading Underlayment & Waterproofing

With the plywood installed, we move into the waterproofing stack that will actually keep Vancouver’s rain out of your home. This is where a lot of cheaper jobs cut corners—we don’t.

Typical upgrades include:

  • Synthetic underlayment across the main field of the roof for better tear resistance and longer-term durability than old-school felt
  • Ice & water shield in critical zones: valleys, eaves, around chimneys, skylights, and other penetrations where water likes to back up or sneak in
  • Extra attention at wall-to-roof transitions and dead valleys where snow or water might linger

This layer is your “second line of defense” under the finished roofing. If any water ever gets past a shingle, shake, or panel, it’s the underlayment and ice & water that stop it from reaching your plywood and framing.


Improving Ventilation for the New Roof System

Cedar roofs can sometimes “get away” with imperfect ventilation because the system is more breathable. Once you convert to asphalt, synthetic, or metal on a solid deck, ventilation becomes non-negotiable—especially in Vancouver’s wet climate.

We look at the whole airflow path:

  • Intake: are there enough open soffits or low vents to bring cool, dry air in?
  • Exhaust: is there continuous ridge venting or a correct number and layout of roof vents?
  • Pathways: are baffles in place to keep insulation from choking off airflow at the eaves?

If needed, we add or upgrade vents, open up blocked soffits, and install proper baffles. Good ventilation helps reduce condensation, prevent mold, keep the attic cooler in summer, and extend the life of your new roofing system. It’s one of the least “visible” parts of a cedar conversion, but one of the most important.


Installing Your New Roofing System

Once the structure, sheathing, waterproofing, and ventilation are dialed, then the visible roof goes on. Depending on what you’ve chosen, that might be:

  • Architectural asphalt shingles – the most common, cost-effective upgrade from cedar, with great colour and profile options.
  • Synthetic shakes or slate(like premium composite systems) – ideal if you want to keep a “cedar look” or upscale appearance with far less maintenance.
  • Metal roofing – standing seam or metal shingles for long life, clean lines, and excellent performance in rain and snow.

Each system has its own fastening pattern, flashing details, and edge treatments, and we install according to manufacturer specifications so your warranty and long-term performance are protected. Valleys, hips, ridges, skylights, chimneys, and wall transitions all get detail-focused attention—that’s where roofs usually succeed or fail.


Clean-Up, Final Walkthrough & Warranty

A cedar conversion creates a lot of debris—wood, nails, underlayment scraps, packaging. By the time we’re done, the goal is that your property looks like a roofing crew was never there, aside from the brand-new roof overhead.

End-of-job steps include:

  • Magnetic sweep of driveways, walkways, and lawn areas for stray nails
  • Removal of tarps, plastic, and protective coverings
  • Final checks around gutters, decks, and gardens for hidden debris

Then we walk the roof and the property with you (or your representative):

  • Review the key details—valleys, flashings, vents, skylights
  • Go over completion photos so you can see areas that aren’t visible from the ground
  • Explain your workmanship warranty and how the product warranty works

By the time we’re done, you don’t just have “new shingles.” You have a fully rebuilt roof assembly—from rafters to plywood to waterproofing to finished system—designed to handle our coastal weather. If you want to go deeper into what that looks like across different homes and materials, you can explore how we approach a full cedar roof conversion in Vancouver here: cedar roof conversion with Paragon Roofing BC.

Structural & Code Considerations for Cedar Conversions

When you convert a cedar roof in Vancouver, you’re not just changing the “top layer.” You’re changing how the entire roof assembly behaves structurally, how it handles moisture, and how long it will last in our soaked-for-months climate. A proper cedar conversion respects structure, code, and physics—not just aesthetics.


Why You Can’t Just Shingle Over Old Cedar

This is the shortcut that ruins roofs.

Old cedar shakes and shingles are uneven, soft, and full of air gaps. When you try to nail asphalt, synthetic, or metal directly over them, you create a stack of problems:

  • The surface is bumpy and inconsistent, so shingles don’t lie flat. That means more exposed nail heads, lifted tabs, and spots where water can sneak in.
  • Fasteners don’t bite properly. Nails driven through old, brittle cedar can sit proud, back out, or miss solid wood entirely. Over time, that turns into loose shingles and leaks.
  • The whole assembly becomes too thick and “mushy.” Instead of a solid, continuous deck, you’re building over a spongy layer that moves differently in heat and moisture.

On top of that, building codes and manufacturers expect modern roofing systems to be installed over solid sheathing, not skip-sheathing and old shakes. Ignoring that can void product warranties and cause issues if there’s ever an insurance claim or an inspection for resale. It may look fine from the street for a few years, but under the surface, you’re gambling.


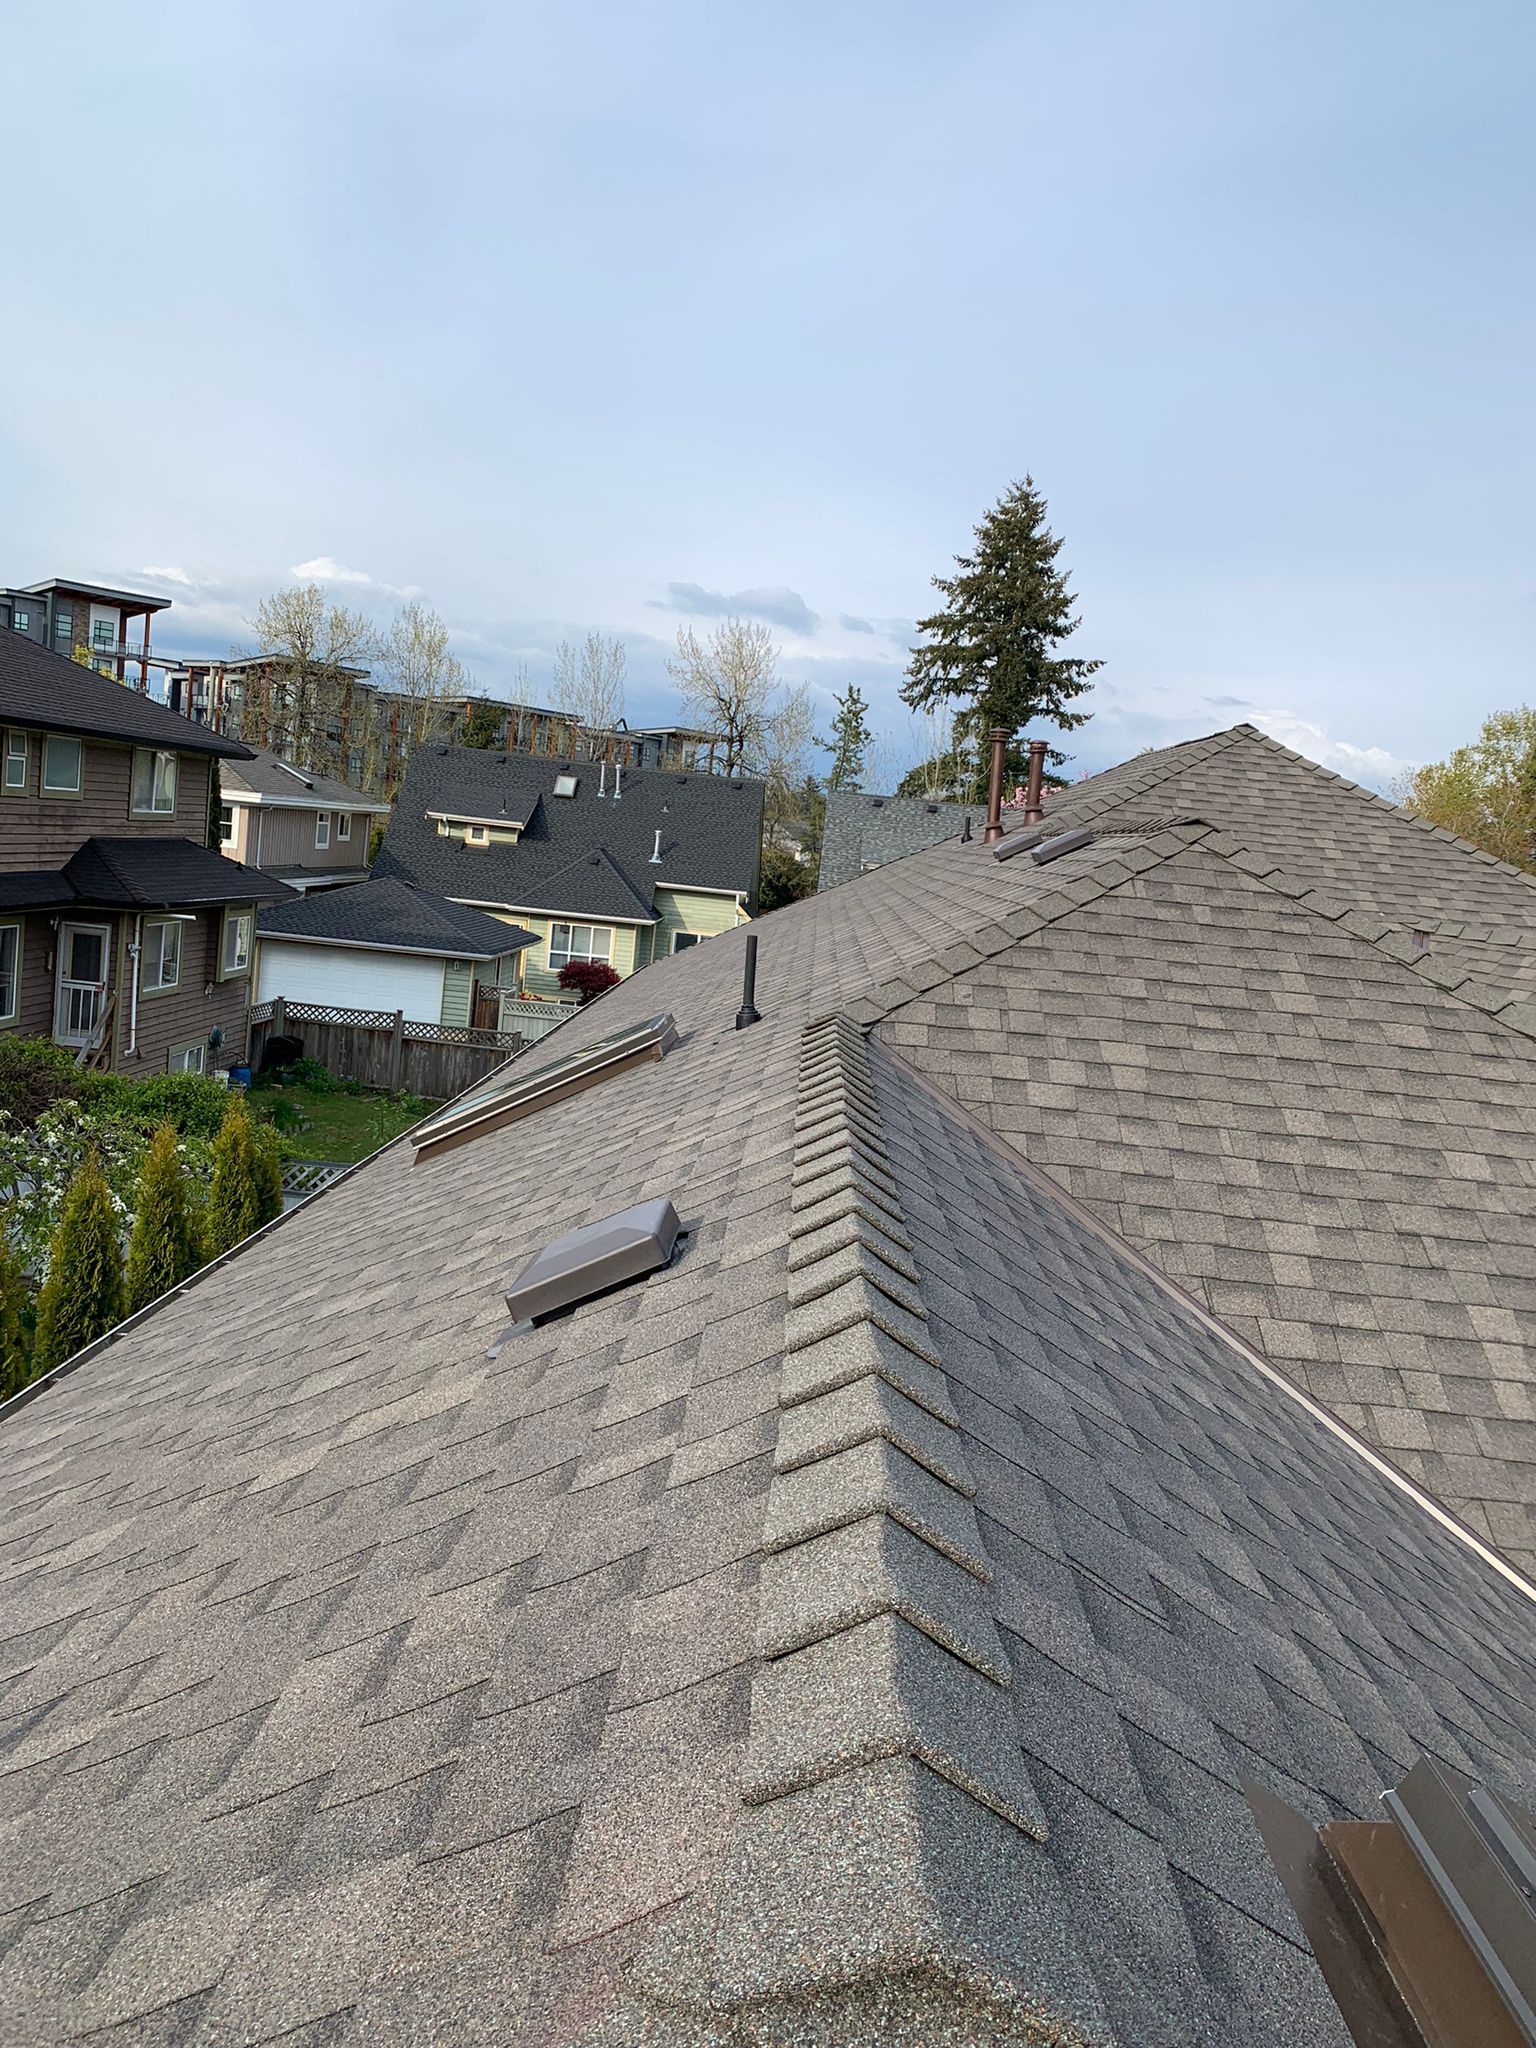
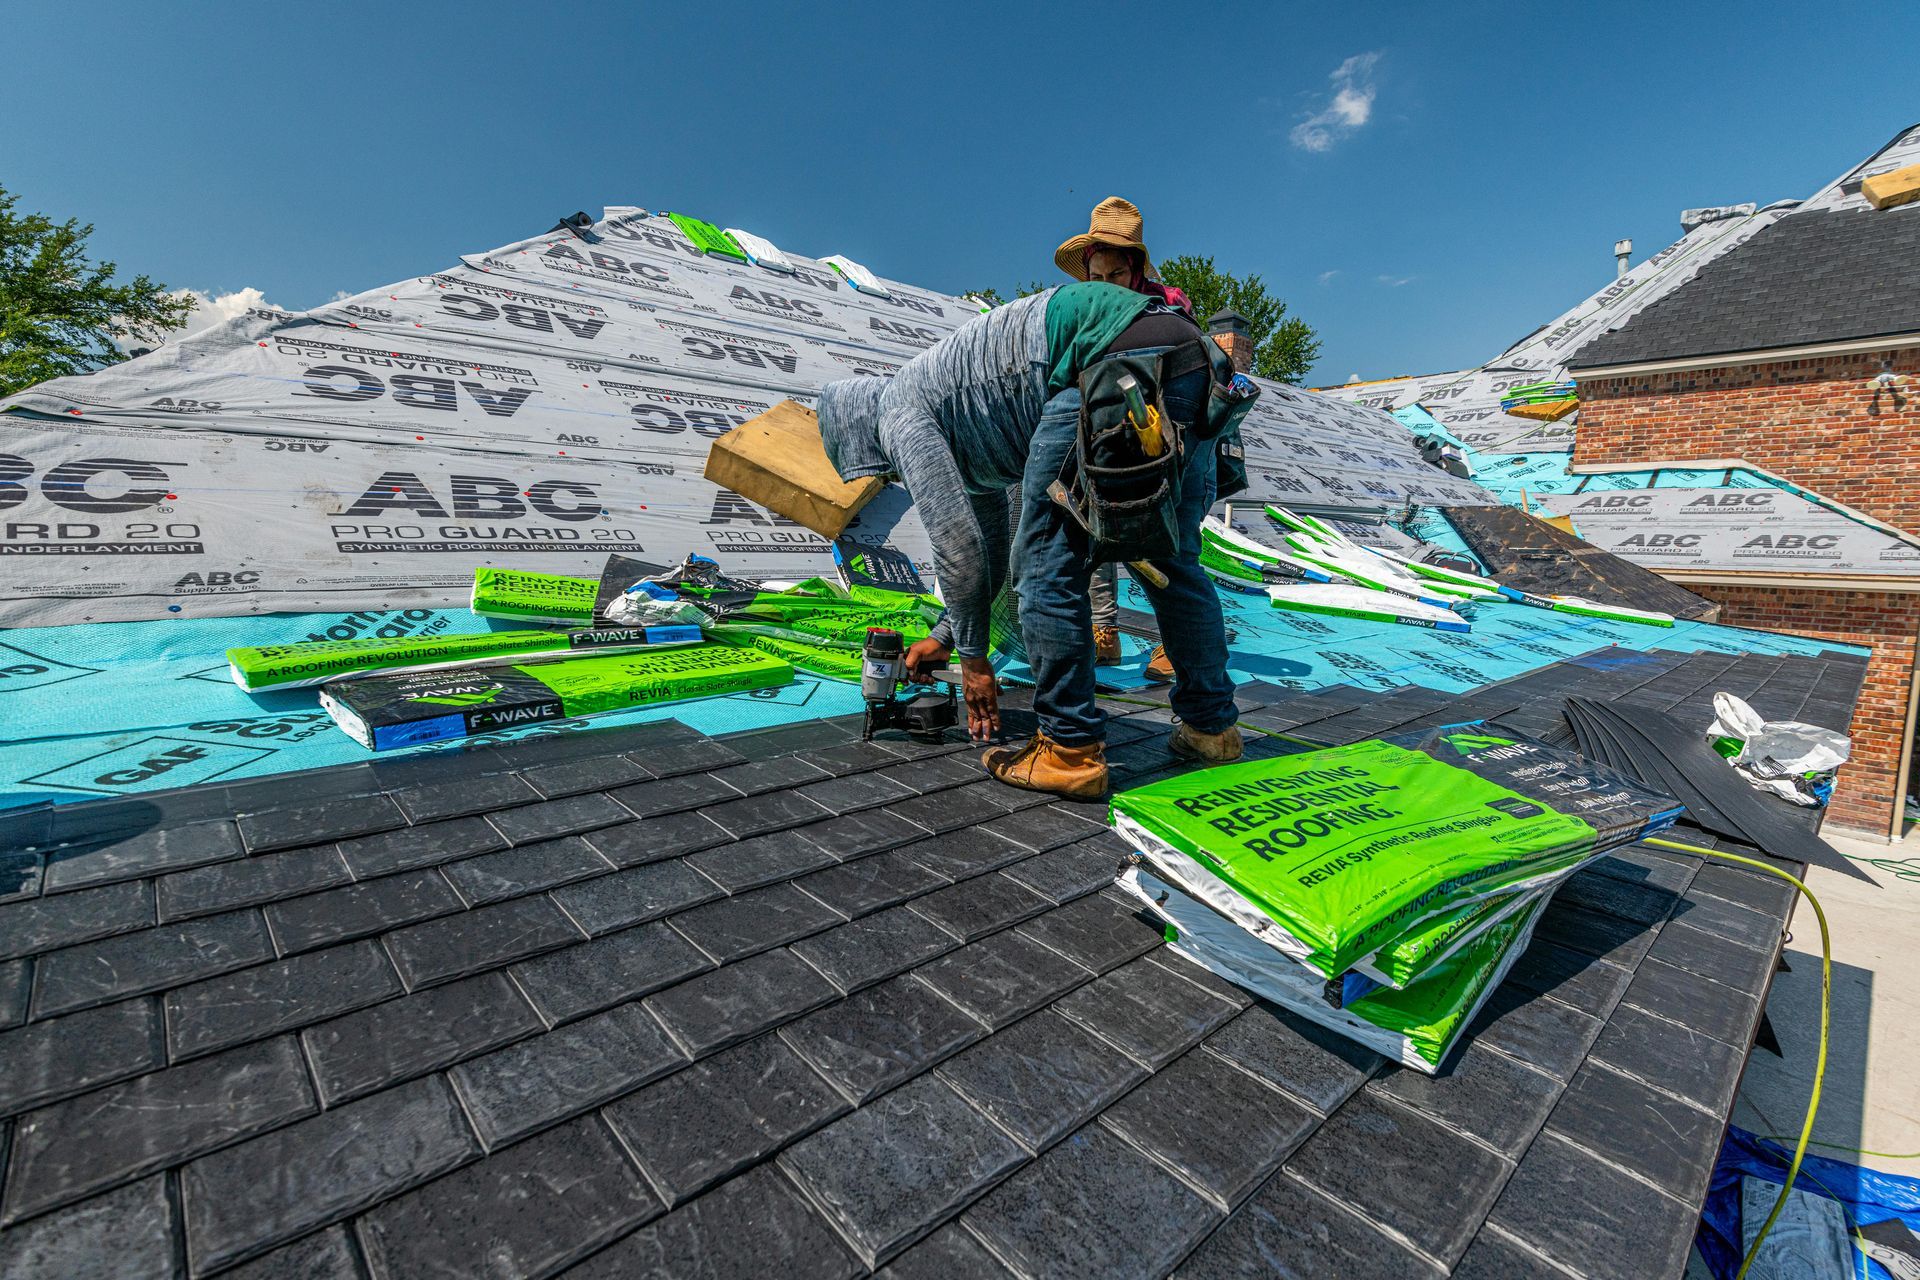
Plywood Thickness & Fastening Requirements

Homeowners don’t need to memorize code clauses, but you do need to understand the basics of why new plywood is such a big deal in a cedar conversion.

When we strip cedar and install new sheathing, we’re basically giving your roof a new backbone. Using 3/8" or 1/2" plywood, correctly installed, turns a loose board deck into a strong, uniform surface:

  • Sheets are tied together and fastened into rafters in a consistent pattern so the deck acts as a single plane, not a bunch of disconnected boards.
  • Proper thickness helps control flex between rafters. That means fewer cracked shingles, fewer popped nails, and a more solid feel underfoot.
  • A well-fastened deck also improves how the house handles wind loads. The roof becomes a braced surface, not just something “resting” on top.

In plain language: good plywood and correct fastening make everything above it work better—underlayment, shingles, synthetic shake, metal, all of it. Skimping here is like putting a luxury floor on a rotten subfloor; it might look good for a moment, but it won’t stay that way.


Ventilation & Condensation Control in Vancouver’s Climate

Now layer our climate on top of all this: long, wet winters, cool nights, and houses that constantly breathe warm, moist indoor air upward. If the roof assembly can’t relieve that moisture, it condenses in the attic or under the deck. That’s where ventilation becomes non-negotiable.

There are two big ideas:

  • Vented roof assemblies – cold attic, warm house. You have intake at the soffits and exhaust at the ridge or high vents. Air moves through, carrying moisture away and keeping the deck closer to outdoor temperature.
  • Closed (unvented) assemblies – typically only done with specific insulation strategies and detailed design. Most older Vancouver homes weren’t built for this and shouldn’t be converted casually into one.

Poor ventilation leads to:

  • Condensation on the underside of the plywood
  • Damp insulation that loses effectiveness
  • Mold and mildew on rafters and sheathing
  • Shortened roof life because the deck spends too much time wet from the inside

When we do a cedar conversion, we’re not just laying new roofing—we’re making sure intake and exhaust are balanced, baffles are in place where needed, and the roof can actually breathe in our coastal environment.


Cedar Roof Conversion vs Installing New Cedar Again

Once you accept that the old cedar has to go, there’s a fork in the road: do you put new cedar back on, or do you convert to asphalt, synthetic, or metal? The right answer isn’t the same for everyone, but it’s never just about nostalgia. It’s cost, maintenance, aesthetics, and how future buyers (and insurers) will see your home.


Cost Comparison – New Cedar vs Conversion to Asphalt or Synthetic

New cedar is no longer the “default” it once was. High-quality cedar is more expensive, harder to source, and often requires thicker, better-grade product to survive in today’s climate and air quality. Factor in:

  • The cost of the cedar itself
  • Skilled labour to install it properly (cedar is slower and more detailed work)
  • Ongoing maintenance over time

By contrast, a cedar conversion to architectural asphalt often lands at a lower or similar upfront cost —even when you include new plywood, upgraded underlayment, and proper ventilation work.

Synthetic shake or slate systems usually cost more than asphalt, but they often sit in the same range or slightly above quality cedar—except they’re designed to hold their look and shape for a much longer period, with far less maintenance. So the comparison isn’t just “price today,” it’s what you’re buying over 20–30 years.


Maintenance Requirements Over 10–20 Years

Cedar looks romantic when it’s new. Twenty years later, the romance is moss, needles, UV splitting, and endless patch repairs. In Vancouver especially, cedar:

  • Absorbs and holds moisture
  • Becomes a habitat for moss and algae
  • Needs periodic cleaning and sometimes chemical treatments
  • Often requires selective shake replacement long before the whole roof is “done”

Asphalt and synthetic systems are not magic, but they’re far more predictable. With regular roof maintenance and inspections, you’re mostly dealing with:

  • Occasional shingle replacements after storms
  • Minor flashing corrections
  • Moss management that’s less intense than on organic cedar

Synthetic shakes/slate and metal take the maintenance conversation even further: minimal interventions, longer periods between work, and less worry about individual pieces rotting or splitting. Over 10–20 years, the time, energy, and money you put into cedar can easily exceed what you’d spend caring for a converted roof system.


Aesthetic Considerations – Keeping the Look vs Updating

This is where the heart sometimes argues with the head. Some homes genuinely wear cedar the way they were designed to—West Coast post-and-beam, older character homes, or certain North Shore properties where the roof is part of the architectural identity.

If you want to keep that layered, textured shake look, you now have options beyond natural wood:

  • Synthetic shakes that preserve the profile and depth without the rapid aging
  • Colour-stable blends that still feel organic but don’t go blotchy and patchy in five years

On more typical suburban homes—1980s and 90s builds with vinyl or stucco—architectural asphalt often looks cleaner, more contemporary, and more in line with what’s happening on the rest of the street. Metal, on the right house, can push things into a modern, design-forward territory.

The decision is less about “cedar vs not cedar” and more about whether the roof is a quiet backdrop or a key design feature.


Resale Value & Buyer Expectations in Vancouver

Buyers are more informed now than they’ve ever been. Their inspectors are, too. When someone walks into an open house and sees an old cedar roof, they don’t just see charm—they see future cost, maintenance, insurance questions, and negotiation leverage.

A converted roof—especially one with:

  • A new plywood deck
  • Modern underlayment and ice & water
  • Updated ventilation
  • A widely understood system like architectural asphalt, synthetic, or metal

—signals “this big-ticket item has been dealt with.” That can:

  • Reduce the chance of last-minute price drops over “roof concerns”
  • Make financing and insurance smoother
  • Push your home higher up the list for buyers who don’t want immediate projects

In some neighbourhoods, staying with cedar might still appeal to a niche buyer who loves that look, but the broader market is shifting toward low-maintenance, modern systems. A professionally executed cedar roof conversion in Vancouver is often seen as a smart long-term upgrade rather than a downgrade from “premium cedar,” especially when it’s done as a full system rebuild rather than a cosmetic swap. You’re not just putting on a new roof—you’re sending a clear message about how the house has been cared for.

How Much Does a Cedar Roof Conversion Cost in Vancouver?

Pricing a cedar roof conversion in Vancouver is a bit like pricing a full exterior renovation: the numbers move with complexity, access, and what we find once the old shakes are off. You’re not just paying for “new shingles” — you’re paying to rebuild the roof structure into a modern, fully-sheathed system that works properly in our coastal climate.


Typical Price Ranges for Cedar to Asphalt Conversions

Cedar-to-asphalt conversions are usually the most budget-friendly option, while still feeling like a major upgrade. You get a new plywood deck, modern underlayment, and a full architectural shingle system that’s easy to maintain and familiar to inspectors, insurers, and buyers.

Most Vancouver homes fall into a broad band:

  • Smaller bungalows and simpler rooflines at the lower end of the range
  • Larger, multi-gable or split-level homes sitting mid-range
  • Big custom homes with lots of hips, valleys, and details near the upper end

Because every cedar conversion involves tearing down to the skip-sheathing and building up from scratch, the cost is always higher than a basic “shingle-over-shingle” job—but you’re getting a completely reset roof assembly, not a cosmetic band-aid. For most homeowners, this becomes the “sweet spot” between upfront cost and long-term reliability.


Price Ranges for Cedar to Synthetic or Metal Conversions

If you’re converting cedar to synthetic shake or slate(Enviroshake, DaVinci, Brava-style systems) or to a metal roof, you’re stepping into the premium bracket. The structure of the job is similar—tear-off, new plywood, underlayment, ventilation—but the material investment and detailing time are higher.

Roughly speaking:

  • Synthetic shake/slate conversions typically sit above asphalt but below some high-end metal systems, especially when you factor in long lifespan and curb appeal.
  • Metal conversions (especially standing seam) often live at or near the top range for residential roofing, because they’re both labour-intensive and material-heavy.

These systems make the most sense when you plan to stay long-term, want a statement look, or you’re in a neighbourhood where higher-end roofs are the norm and you don’t want your home to feel like the “weak link” on the street.


Factors That Affect Total Cost

Two houses can have the same square footage and wildly different roof costs. The difference is never just the number—it’s the story behind the roof:

  • Roof size & complexity
    Simple rectangles with one or two slopes sit at the lower end. Multiple gables, dormers, hips, and valleys add time, detail work, and waste.
  • Amount of rotten wood replacement
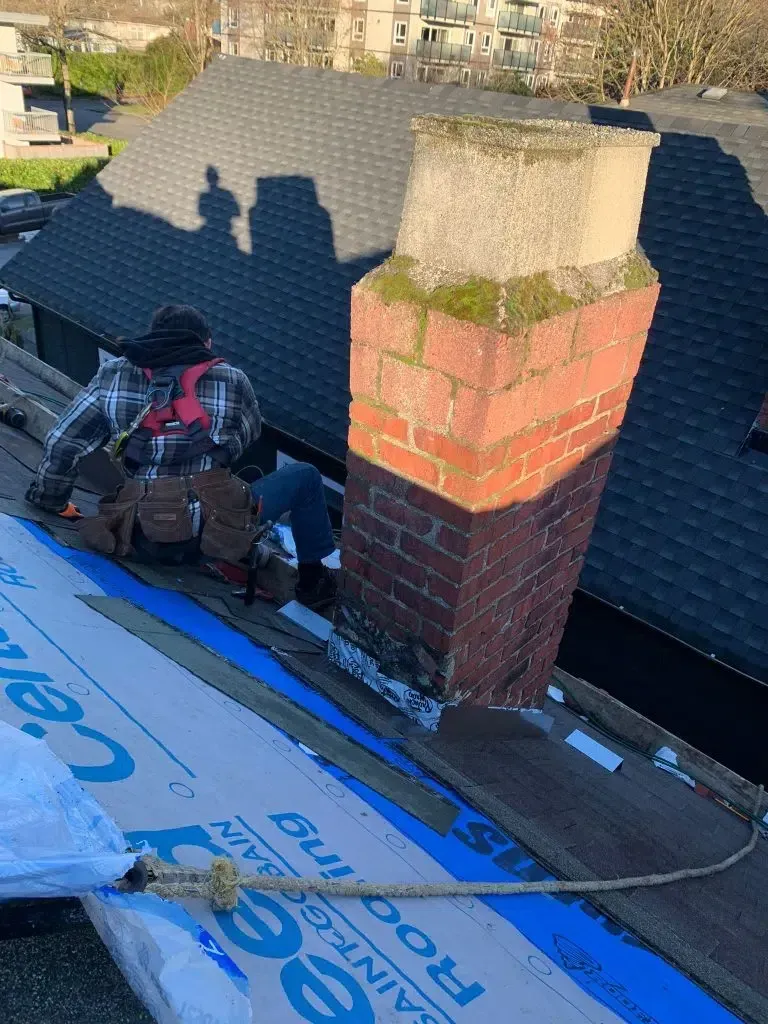
    On some cedar roofs, the skip-sheathing and rafters are in great shape. On others, we open things up and find rot, water staining, or structural issues that need fixing before we can move forward. More repairs = more labour and material.
  • Flashings, skylights, chimneys & valleys
    Every penetration on the roof is a detail that needs careful treatment. Old brick chimneys, multiple skylights, awkward wall junctions, and complex valleys all add to the scope.
  • Access & height
    Tight driveways, steep slopes, limited staging areas, and three-story elevations affect how we load materials, move crews, and manage safety.

All of this is why an on-site assessment is so important. A cedar conversion quote that ignores these factors is guesswork, and guesswork always ends up expensive for someone.


Why Conversions Are an Investment, Not Just a Cost

A proper cedar roof conversion in Vancouver isn’t just about getting through one more rainy season. It’s about resetting your roof so it behaves like a modern system: solid deck, proper underlayment, better ventilation, and a durable finish layer.

The “hidden” return shows up in a few ways:

  • Reduced maintenance – No more constant cedar patching, aggressive moss battles, or worrying about the next storm pulling up soft, aging shakes.
  • Fewer leaks & repairs – A new deck, new flashing, and a well-ventilated assembly drastically reduce the odds of surprise water stains and emergency buckets in the living room.
  • Better long-term performance – Asphalt, synthetic, and metal systems are more predictable over time, especially when they’re installed over fresh plywood and paired with proper ventilation.
  • Improved resale value – Buyers and inspectors love seeing a recently converted roof with documentation. It takes a major “risk item” off their list.

Done properly, a cedar conversion is a once-in-decades decision that can stabilize your home’s envelope and make ownership calmer and more predictable. If you want to see the full, step-by-step breakdown of what that looks like, you can dive deeper into our dedicated cedar roof conversion in Vancouver overview.


Common Questions About Cedar Roof Conversions in Vancouver

Homeowners usually ask the same core questions once they start seriously considering a conversion. That’s a good sign—you’re thinking about disruption, safety, comfort, and long-term payoff, not just shingle colours.


How long does a cedar roof conversion take?

Most single-family homes land in the range of several working days to a couple of weeks, depending on size, complexity, and weather. The process includes tear-off, sheathing, underlayment, ventilation upgrades, and installation of the new roofing system.

A simple, modest-sized roof with good access and straightforward detailing moves faster. Large custom homes with extensive valleys, skylights, or complex layouts take longer because every detail needs to be opened, rebuilt, and properly sealed. Weather also matters; in Vancouver, we build the job around keeping your home dry even if the sky doesn’t cooperate.


Will converting my cedar roof damage my home or landscaping?

A good crew treats your property like it has to look just as good (or better) when they leave as when they arrived. That means:

  • Using tarps and plywood to protect gardens, walkways, and patios
  • Controlling where debris falls during tear-off
  • Cleaning up daily, not only at the very end

The conversion itself is a heavy-duty construction process—old cedar is messy—but with the right prep and discipline, you shouldn’t be left with crushed plants and nails in the lawn. A proper magnet sweep and walk-around at the end are non-negotiable.


Can I stay in my home during the project?

For almost every cedar conversion, yes, you can stay home. You’ll hear noise—tear-off, compressors, nailers, occasional hammering—but the work stays outside and on the roof.

Most homeowners continue working from home, caring for kids, or living normally with a bit more daytime background noise. If you’re especially sensitive to noise, you might plan a few key outings or work days off-site, but there’s no requirement to move out.


Is converting from cedar to asphalt/synthetic/metal noisy?

Short answer: yes, at times it is. You’ll hear:

  • The sound of old cedar and lath coming off the roof
  • Footsteps overhead while crews move materials
  • Nail guns and saws during sheathing and roofing installation

The loudest period is usually tear-off and re-sheeting, when old material is being removed and new plywood is going down. After that, the rhythm settles into a more steady, predictable construction noise. It’s concentrated in working hours; evenings and nights are quiet.


Does a cedar conversion require permits or engineering?

In many cases, cedar conversions fall under typical roofing and sheathing work, but certain situations can trigger permit or engineering requirements, such as:

  • Structural concerns discovered during inspection (sagging, undersized rafters, visible deflection)
  • Significant changes to the roof structure or load path
  • Local municipality rules around major exterior renovations

A responsible contractor will flag anything that looks like it needs an engineer’s eyes and help you understand whether permits are required in your specific jurisdiction. The goal isn’t to make things complicated; it’s to make sure the roof you’re investing in is safe, legal, and properly documented.


How long will my new roof last after conversion?

Once your cedar has been converted to a modern system and installed correctly, roof life is no longer limited by the old shakes—it’s defined by the new roofing material and the quality of the build.

  • Architectural asphalt roofs in Vancouver commonly offer a multi-decade service life when properly ventilated and maintained.
  • Synthetic shake/slate systems are designed for even longer performance, with stronger resistance to moisture, UV, and warping.
  • Metal roofing often provides the longest horizon, with high durability and excellent performance in rain and snow.

Pair that with a solid deck, upgraded underlayment, and correct ventilation, and you’re no longer wondering if the roof will limp through another winter. You’re planning in decades, not in “one more season” guesses.

Let's Chat Roofing!

Paragon Res Roof #2

Why Vancouver Homeowners Choose Paragon Roofing BC for Cedar Roof Conversions

Experience with Vancouver’s Older Cedar Roofs

If you live in Vancouver and your roof started life as cedar, there’s a good chance it’s 20–40 years old and has seen every flavour of coastal weather. That’s the world we live in every day.

We’ve pulled off cedar shakes in:

  • Classic West Side pockets like Dunbar, Kerrisdale, Kitsilano and West Point Grey
  • Steep North Shore roofs in North Vancouver and West Vancouver where moss and shade are constant
  • East Van character homes and post-war specials in Grandview-Woodland, Hastings, Renfrew, and Mount Pleasant

Older cedar roofs aren’t “one size fits all.” Some are thin builder-grade shakes from the late 80s that are simply worn out. Others are heavier premium cedar that’s structurally fine but destroyed by moss, shade, or decades of patchwork repairs. Because we’ve seen the full spectrum, we can look at your roof and tell you honestly whether it’s time to convert, what surprises we might find under the shakes, and which new system actually fits your home and neighbourhood.

We’re not guessing from a brochure. We’re working from years of tearing these roofs apart and rebuilding them from the deck up.


Proper Plywood Re-Sheeting, Ventilation & Detailing

A cedar conversion done right is not just “rip off shakes, throw on shingles.” That shortcut is exactly how you end up with waves in the roof, nail pops, leaks, and a system that never feels quite right.

Our approach is full-system:

  • Strip the cedar down to the old skip-sheathing
  • Inspect rafters and existing boards for rot or structural concerns
  • Install new 3/8" or 1/2" plywood sheathing across the entire roof, nailed properly and consistently
  • Upgrade underlayment (synthetic plus ice & water where it actually matters)
  • Rebuild flashings at chimneys, walls, skylights and valleys
  • Correct the ventilation so the new roof can actually live out its lifespan

We treat the conversion like a rebuild, not a cosmetic swap. The goal isn’t to just get a new surface on top—it’s to leave you with a roof deck, ventilation system and flashing package that would make sense even if someone else inspected it ten years from now.


Clear, Photo-Based Quotes & Progress Updates

Cedar conversions can feel big and a bit intimidating. We remove the mystery by showing you everything.

  • During the quote: photos of existing issues (thin shakes, rot, moss, lifted courses, exposed fasteners)
  • During the job: progress updates so you can see sheathing going down, underlayment being installed, and details around chimneys, skylights and tricky junctions
  • At the end: a photo record of the completed roof and critical areas

You’re never stuck wondering “What did they actually do up there?” You get visual proof of each major step, in plain language, so you can connect the cost to the work and feel confident you got what you paid for.


Strong Warranties & After-Project Support

A cedar conversion is a long-term play, so the support has to be long-term too. When we rebuild your roof, you’re getting:

  • Workmanship warranty on the installation
  • Manufacturer-backed coverage based on the system you choose (asphalt, synthetic, or metal)
  • Practical guidance on basic care so you don’t unintentionally shorten the roof’s lifespan
  • Priority attention for future roof maintenance or small repairs on the system we installed

We’re building a relationship, not just sending an invoice. If you see something you’re unsure about a year down the road, you should feel comfortable picking up the phone and asking—not worried that you’re “bothering” anyone.

A good cedar conversion should give you decades of peace of mind. A good contractor should stand behind it for the entire first chapter of that lifespan.


Get a Cedar Roof Conversion Estimate in Vancouver

Book a Site Visit or Upload Photos

If your cedar roof is looking tired, mossy, or you’re fielding warnings from inspectors or insurance, the next step doesn’t need to be complicated. Start with information, not pressure.

You can:

  • Book a site visit so we can walk the roof, take photos, and check the structure
  • Send your address plus clear photos of the roof, close-ups of problem areas, and any inspection reports you already have

From there, we’ll build a detailed, photo-backed estimate that shows you exactly what’s involved in converting your roof and what options you have for the new system. If you’d like to see the process laid out step-by-step before we even show up, you can also review our dedicated cedar roof conversion service overview and then reach out with questions.


Ideal for Aging Cedar Roofs 20+ Years Old

If your cedar roof is past the 20-year mark—especially if it’s never had a major overhaul—it’s squarely in the “pay attention” zone. Once you start seeing:

  • Heavy moss that returns quickly after cleaning
  • Curling, cupping, thinning or splitting shakes
  • Ongoing patches and spot repairs
  • Bits of daylight visible through the roof deck in the attic

…it’s usually more cost-effective to plan a conversion than to keep pouring money into band-aid fixes. For many Vancouver homes built in the 80s and 90s, converting now means you reset the clock and avoid a cycle of constant leak chasing.

Where We Go.

Proudly serving our local community & focused on being the best Vancouver roofers possible.

  • Vancouver

    Acadia Park, Arbutus Ridge, Burrard Indian Reserve, Cambie, Capilano Indian Reserve 5, Cedar Cottage, Champlain Heights, Chinatown, Coal Harbour, Collingwood, Commercial Drive, Creekside, Davie Village, Downtown, Downtown Eastside, Downtown South, Downtown Vancouver, Dunbar Southlands, East Hastings, English Bay, Fairview, False Creek Flats, False Creek North, False Creek South, Fraser, Fraserview, Gastown, Grandview - Woodland, Granville, Granville Entertainment District, Granville Island, Greektown, Hastings - Sunrise, Hastings Crossing, Hastings East, Hillcrest, Historic Japan Town, Hogans Alley, Kensington - Cedar Cottage, Kerrisdale, Killarney, Kits Point, Kitsilano, Knight, Langara, Little Ginza, Little India, Little Mountain, Lost Lagoon, Lower Hudson, MacKenzie Heights, Main, Marpole, Metro Vancouver, McMillan Island 6, Mole Hill, Mount Pleasant, Mt. Pleasant, Musqueam, Musqueam Indian Reserve 2, Norquay Village, North Vancouver, Oak, Oakridge, Olympic Village, Quilchena, Renfrew - Collingwood, Renfrew Heights, Riley Park, Seymour Creek Indian Reserve, Shaughnessy, Shaughnessy Heights, South Cambie, South False Creek, South Granville, South Hill, South Vancouver, Southlands, Southwest Marine, Stanley Park, Stanley Park Subdivision, Strathcona, Sunrise, Sunset, The Drive, Tsawwassen Indian Reserve, University Endowment Lands, University Hill, Victoria - Fraserview, West Broadway, West End, West Point Grey, West Vancouver, Westbrook Village, White Rock, Woodland, Yaletown - Stadium District

  • West Vancouver

    Altamont, Ambleside, Ambleside Beach, Bayridge, British Properties, Cammeray, Canerbury, Caulfeild, Cedardale, Chartwell, Chelsea Park, Cypress, Cypress Bowl, Cypress Park, Cypress Park Estates, Deer Ridge, Dundarave, Dundarave Village, Eagle Harbour, Eagle Ridge, Furry Creek, Gleneagles, Glenmore, Horseshoe Bay, Howe Sound, Lions Bay, Olde Caulfeild, Panorama, Panorama Village, Park Royal, Porteau Cove, Queens, Rockridge, Sandy Cove, Sentinel Hill, Sunset Beach, Upper Caulfeild, Upper Levels Highway, Wentworth, West Bay, Westhill, Westmount, Whitby Estates, Whytecliff

  • North Vancouver

    Blueridge, Boundary, Braemar, Canyon Heights, Capilano, Carisbrooke, Cedar Village, Central Lonsdale, Central Lynn, Cleveland, Cove Cliff, Deep Cove, Delbrook, Dollarton, Edgemont Village, Grand Boulevard, Grouse Woods, Handsworth, Highlands, Indian River, Keith Lynn, Kirkstone, Lions Gate, Lower Capilano, Lower Capilano Marine, Lower Lonsdale, Lower West Lynn, Lynn Canyon, Lynn Creek, Lynn Valley, Lynn Valley Centre, Lynnmour North, Lynnmour South, Mahon, Main Street, Maplewood, Marine-Hamilton, McCartney Woods, Mission IR#1, Moodyville, Norgate, Northlands, Norwood Queens, Parkgate, Parkway, Pemberton Heights, Riverside East, Riverside West, Roche Point, Seymour Heights, Tempe, Upper Capilano, Upper Delbrook, Upper Lonsdale, Upper Lynn, Upper West Lynn, West Lynn Terrace, Westview, Windridge, Windsor Park

  • Port Moody

    April Road, Barber Street, Belcara, College Park, Coronation Park, Glenayre, Harbor Heights, Heritage Mountain, Heritage Woods, Inlet Centre, Ioco, Moody Centre, Mountain Meadows, Noons Creek, North Shore, Pleasantside, Port Moody Centre, Seaview, Twin Creeks

  • Lions Bay

    Alberta Bay, Kelvin Grove, Brunswick Beach, Oceanview Road, Panorama Road, Bayview, Sunset Drive, Stewart Road

  • Pitt Meadows

    Central Pitt Meadows, North Pitt Meadows, Pitt Meadows City Centre, Pitt Polder, West Pitt Meadows

  • Bowen Island

    Apodaca Park, Arbutus Point, Artisan Square, Bluewater, Bowen Bay, Cates Hill, Collins Road, Cove Bay, Cowan Point, Davies Orchard, Deep Bay, Eagle Cliff, Fairweather, Fairweather Point, Galbraith Bay, Grafton Bay, Hood Point, Hood Point West, Josephine Lake, King Edward Bay, Miller's Landing, Mount Gardner, Mt Gardner, Ocean view, Queen Charlotte Heights, Scarborough, Sealeigh Park, Seven Hills, Seymour Bay/Alder Cove, Snug Cove, Snug Point, Sunset Park, Sunset Park Estates, The Cape, The Holdings, The Valley, Timber Grove, Tunstall Bay, Union Bay, Valhalla, Village Square

  • Delta

    Annieville, Beach Grove, Boundary Beach, Cliff Drive, Delta Manor, East Delta, English Bluff, Hawthorne, Holly, Ladner, Neilson Grove, Nordel, Pebble Hill, Port Guichon, Scottsdale, Sunshine Hills, Tsawwassen Central, Tsawwassen East, Tsawwassen North, Annacis Island, Ladner Village, Holly Park, Ladner Rural, Westham Island, Ladner Central, Marina Garden Estates, Canoe Pass Village, Country Woods, Elliot, Riverside Industrial Park, Whitelaw, Mountain View, Tilbury Industrial Park, Tilbury North, Tilbury East, Westridge Industrial Park, Delta Heritage Airpark, Delta Port Industrial Park, Tilbury Business Park, West Ladner Industrial Park, Tilbury Auto Mall, Tsawwassen Heights, Boundary Bay, Tsawwassen Shores, Annacis Island Industrial Park, Kennedy, Sunshine Woods, The Highlands, Imperial Village, Forest-by-the-Bay, Sunbury

  • Belcarra

    Belcarra Village, Belcarra Bay, Bedwell Bay, Coombe, Cosy Cove, Woodhaven, Belvedere, Twin Islands

  • Surrey

    Alluvia, Aloha Estates, Amble Green, Anniedale - Tynehead, Bear Creek Green Timbers, Campbell Heights, Clayton, Cloverdale, Cloverdale Town Centre, Crescent Beach, Crescent Beach – Ocean Park, Douglas, East Clayton, East Clayton North, East Clayton West, East Newton, East Newton North, East Newton South, East Panorama Ridge, Elgin, Elgin - Chantrell, Elgin Chantrell, Fleetwood, Fleetwood Enclave, Fleetwood Town Centre, Fraser Heights, Grandview Heights, Guildford, Guildford Town Centre, Highway 99 Corridor, King George Corridor, Morgan Creek, Morgan Heights, Mud Bay, Newton, Newton Town Centre, North Cloverdale East, North Cloverdale West, North Grandview Heights, North Surrey, Ocean Park, Orchard Grove, Panorama Ridge, Queen Mary Park, Rosemary Heights Central, Rosemary Heights West, Saint Helen’s Park, Semiahmoo Town Centre, South Newton, South Port Kells, South Surrey, South Westminster, South Westminster Heights, Sullivan, Sunnyside Heights, Surrey Metro Centre, Surrey Newton, West Clayton, West Cloverdale North, West Cloverdale South, West Newton, West Newton - Highway 10, West Newton North, West Newton South, Whalley

  • Richmond

    Aberdeen Village, Acheson-Bennett, Ash Street, Boyd Park, Boyde Park, Brideport Village, Bridgeport, Brighouse, Brighouse South, Brighouse Village, British Columbia Packers, Broadmoor, Capstan Village, Central West, Dover Crossing, East Cambie, East Livingstone, East Richmond, Garden City, Gilmore, Golden Village, Granville, Hamilton, Historic Steveston Village, Ironwood, Lackner, Lansdowne Village, Laurelwood, London - Princess, McLennan, McLennan North, McLennan South, McNair, Mitchell Island, Moffatt, North Granville, Oval Village, Quilchena, Riverdale, Saunders, Sea Island, Seafair, South Arm, St Albans, Steveston North, Steveston South, Steveston Village, Sunnymeade North, Terra Nova, West Cambie, Westwind, Woodwards

  • Burnaby

    Ardingley-Sprott, Big Bend, Brentwood, Brentwood Park, Buckingham Heights, Burnaby Heights, Burnaby Lake, Capitol Hill, Cariboo, Cariboo-Armstrong, Cascade-Schou, Central Burnaby, Central Park, Clinton-Glenwood, Deer Lake, Deer Lake Place, Douglas-Gilpin, East Burnaby, Edmonds, Englewood Mews, Forest Glen, Forest Hills, Garden Village, Government Road, Highgate, Kingsway-Beresford, Lake City, Lakeview-Mayfield, Lochdale, Lougheed, Lyndhurst, Marlborough, Maywood, Metrotown, Montecito, Morley-Buckingham, North Burnaby, Oakalla, Oaklands, Parkcrest, Parkcrest-Aubrey, Richmond Park, Second Street, Simon Fraser Hills, Simon Fraser University, South Burnaby, South Slope, Sperling-Broadway, Sperling-Duthie, Stride Avenue, Stride Hill, Sullivan Heights, Suncrest, Sussex-Nelson, The Crest, Upper Deer Lake, Vancouver Heights, West Central Valley, Westridge, Willingdon Heights, Windsor

  • Langley & Langley Township

    Aldergrove, Alice Brown, Anderson Creek, Bedford Landing, Belair Estates, Bell Park, Blacklock, Brookswood, Brookswood Homes, Brookswood-Fernridge, Campbell Valley, Campvell Valley, Carvolt, Carvolth, Cedar Ridge, Cedar Ridge Estates, Civic Center District, Country Line Glen Valley, Country Woods, County Line Glen Valley, Derby Hills, Douglas, Downtown Langley, Eaglecrest, East Brookwood, Entertainment District, Fairview Estates, Fern Ridge, Fern Ridge Park, Fernridge East, Fernridge Estates, Fernridge Meadow, Fernridge North, Fernridge Place, Fernridge South, Fernridge West, Forest Hills, Forest Knolls, Fort Langley, Fraserview, Glen Valley, Glen Valley Estates, Glen Valley Farms, Glen Valley North, Glen Valley Regional Park, Glen Valley South, Glen Valley Terrace, Glen Valley Woods, Gloucester, Gloucester Industrial Estates, Gould / Poplar Grove, Grasslands, Greenwood Estates, High Point, Hopington, Jericho, Jericho Ridge, Kensington Circle, Langley City, Langley Meadows, Langley Meadows Park, Logan Creek, Manor Park, Meadowbrook, Milner, Milner Heights, Milner Village, Mossey Estates, Mount Lehman, Murray's Corner, Murrayville, Murrayville Village, Newlands, Nicomeki, Nicomekl, North Blackburn, North East Gordon, North Otter, North West Yorkson, Northwest Langley, Otter, Otter District, Park Avenue, Poppy Estate, Port Kells, Routley, Salmon River, Salmon River Area, Salmon River Estate, Salmon River Heights, Salmon River Meadows, Salmon River Place, Salmon River Ranch, Salmon River Road, Salmon River Uplands, Simonds, Smith, South East Gordon, South Langley, South Thornton, South West Murrayville, Strawberry Hills, Surrey Bend, Tall Timbers, Trinity, Trout Lake, Uplands, Uplands / Latimer Heights, Upper Murrayville, Walnut Grove, Walnut Grove Estates, Walnut Grove Park, Walnut Ridge, West Latimer, West Willoughby, Williams, Willoughby, Willoughby - Willowbrook, Willoughby Central, Willoughby East, Willoughby Heights, Willoughby Park, Willoughby West, Willow Edge, Willowbrook, Willowbrook Estates, Willowbrook Gardens, Willowbrook Gate, Yorkson

  • Aldergrove

    Aldergrove North, Aldergrove South, Alderwood Manor, Bertram Estates, Cedar Park Estates, Creekside Villas, Lions Grove Estate, Northeast Aldergrove, Parkside Village, Southwest Aldergrove, Twin Firs, Willow Creek Estates

  • Anmore

    Alder Way, Alpine Drive, Anmore Creek Way, Barber Street, Bedwell Bay Road, Birch Winde, Black Bear Way, Blackberry Drive, Buntzen Creek Road, Canterwood Court, Charlotte Crescent, Chestnut Crescent, Creekside Place, Crystal Creek Drive, Deerview Lane, Dogwood Drive, Eaglecrest Drive, East Road, Elementary Road, Evergreen Crescent, Fern Drive, Fir Court, Forestview Lane, Hemlock Drive, Heron Way, Highland Crescent, Hummingbird Drive, Lancaster Court, Lanson Crescent, Ludlow Lane, Ma Murray Lane, Madley Place, Magnolia Way, Mainland Road, Maple Court, Mountain Ayre Lane, None, Oak Court, Pondside Road, Pumphouse Road, Ravenswood Drive, Robin Way, Seymour View Road, Sparks Way, Spence Way, Strong Road, Sugar Mountain Way, Summerwood Lane, Sunnyside Road, Sunset Ridge, Thomson Road, Uplands Drive, Valley Crescent, Westridge Lane, Wollny Court, Wyndham Crescent

  • Maple Ridge

    Albion, Cottonwood, East Central Maple Ridge, East Haney, Hammond, Haney, North Maple Ridge, Northeast Maple Ridge, Northwest Maple Ridge, Port Haney, Ruskin, Silver Valley, Southwest Maple Ridge, The Ridge, Thornhill, Webster’s Corners, West Central Maple Ridge, Whonnock, Yennadon

  • Mission

    Cedar Valley, Dewdney Deroche, Downtown Mission, Hatzic, Hemlock, Lake Errock, Mission, Mission West, Silverdale, Silverhill, Squamish Nation, Stave Falls

  • Coquitlam

    Anmore, Austin Heights, Burke Mountain, Canyon Springs, Cape Horn, Central Coquitlam, Chineside, Coquitlam East, Coquitlam West, Eagle Ridge, East Coquitlam, Harbour Chines, Harbour Place, Heritage Woods, Hockaday, Laurentian Belaire, Lincoln Park, Lower Hyde Creek, Maillardville, Meadow Brook, Meadow Brooks, Mary Hill, New Horizons, North Coquitlam, Oxford Heights, Park Ridge Estates, Partington Creek, Ranch Park, River Heights, River Springs, Scott Creek, Smilling Creek, Summit View, The Foothills, Town Centre, Upper Eagle Ridge, Upper Hyde Creek, Westwood, Westwood Plateau, Westwood Summit

  • Port Coquitlam

    Birchland Manor, Central Port Coquitlam, Citadel, Glenwood, Lincoln Park, Lower Mary Hill, Mary Hill, Oxford Heights, Riverwood, Sun Valley, Woodland Acres

  • Abbotsford

    Abbotsford Centre, Abbotsford East, Abbotsford West, Aberdeen, Arnold, Auguston, Babich, Bateman, Bradner, Central Abbotsford, Clayburn, Clearbrook Centre, Downes, Eagle Mountain, East Abbotsford, East Townline, Fairfield, Huntingdon, Kilgard, Lower Ten Oaks, Matsqui, Matsqui Prairie, Matsqui Village, McMillan, Mill Lake, Mount Lehman, North Clearbrook, North Poplar, Old Clayburn, Pepin Brook, Poplar, Sandy Hill, South Clearbrook, South Poplar, Straiton, Straiton - Auguston, Sumas Mountain, Sumas Prairie, Townline Hill, University District, Upper Ten Oaks, West Abbotsford, West Clearbrook, West Townline, Whatcom

  • New Westminster

    Brow of the Hill, Brunette Creek, Connaught Heights, Downtown New Westminster, Eastburn, Glenbrooke North, Glenbrooke South, Kelvin, North Arm North, North Arm South, Queen's Park, Queensborough, Sapperton, Uptown, Victory Heights, West End

  • White Rock

    Marine Drive, Town Centre Commercial Area, Town Centre Residential Area, Lower Town Centre, West Beach Business Area, East Beach Business Area, Terry Road, Malabar, Blackburn, Coldicutt, Landcaster, Cory, North Bluff, Chestnut, Bergstrom

  • Chilliwack

    Atchelitz, Barrowtown, Bridal Falls - Popkum, Camp River, Chilliwack Lake/Radium Valley, Chilliwack Mountain, Chilliwack Proper Village West, Chilliwack River Valley, Columbia Valley, Cultus Lake, Downtown Chilliwack, East Chilliwack, East Young-Yale, Eastern Hillsides, Evans, Fairfield, Fairfield Island, Garrison Crossing, Greendale, Little Mountain, Majuba Hill, Minto Landing, North Yale-Well, Promontory, Rosedale, Rosedale Popkum, Ryder Lake, Sardis, Sardis East Vedder Road, Sardis West Vedder Road, Tzeachten, Veddar South Watson-Promontory, Vedder, Vedder Crossing, Village West, West Young-Well, Yale Road West, Yarrow

  • Furry Creek

    Collector, Howe Sound, Marina, Mountain, North East Furry Creek, North West Furry Creek, Oliver's Landing, Porteau Cove, Resort Hotel, Uplands North, Uplands South, Upper Benchlands, Village Center, Village Commercial, Waterfront

  • Squamish

    Brackendale, Brennan Center, Britannia Beach, Business Park, Central Squamish, Cheakamus, Cheekye, Crumpit Woods, Dentville, Downtown, Downtown Squamish, Eagle Run, Garibaldi Estates, Garibaldi Highlands, Hospital Hill, Kowtain, Loggers East, Minaty Bay, North Yards, Northridge, Oceanfront, Paradise Valley, Plateau, Ring Creek, Rural Squamish, Seaichem, Stawamus, Squamish Valley, Tantalus, University Heights, University Highlands, Upper Squamish, Valleycliffe, Waiwakum, Yeakwapsem

  • Whistler

    Adara, Alpenglow, Alpha Lake Village, Alpine Meadows, Alta Lake, Alta Vista, Alta Vista 2, Aspens, Athletes' Village, Bayshores, Benchlands, Black Tusk, Black Tusk Estates, Blackcomb Benchlands, Blackcomb Springs Suites, Blacktusk, Blueberry, Blueberry Hill Whistler, Brio, Callaghan, Cheakamus, Cheakamus Crossing, Creekside, Cypress, Delta Whistler, Eagle Ridge, Emerald Estates, Evolution, Four Seasons, Function Junction, Function Junction Industrial and Commercial zone, Gables, Garibaldi, Glaciers Reach, Granite Court, Green Lake Estates, Hilton Whistler, Kadenwood, Kadenwood Estates, Lagoons At Stoney Creek, Lake Placid Lodge, Le Chamois, Legends, Lost Lake Lodge, Marquise, McGuire's – Northair, Mons, Montebello, Mount Currie, Nesters, Nicklaus North, Nordic, Nordic Estates, Nordic Estates Official - Club Cabins, Nordic Estates Official - Rimrock, Northern Lights, Owl Creek, Paralympic Village, Pemberton, Pemberton Valley Lodge, Pinecrest, Pinecrest Estates, Pinnacle Ridge, Rainbow – Baxter Creek, Rainbow Estates, Rainbow Lodge, Snowy Creek, Solana, Southern Whistler, Spring Creek, Sproatt, Spruce Grove, Squamish Lillooet Regional District, Stonebridge, Tamarisk, Tamarisk Estates, Tantalus Lodge, The Benchlands Whistler, Treeline, Upper Village, Vale Inn, Wedge Woods, West Side Road, Westin Resort, Westside, Whistler Cay, Whistler Cay Estates, Whistler Cay Heights, Whistler Creek, Whistler Creekside, Whistler Highlands, Whistler Upper Village, Whistler Village, Whistler Village North, White Gold

We let our reviews do the talking.

Brands you know and trust.

Facebook has a 5 star customer rating
A google business review logo with five stars on it.
A google guaranteed logo for professionals that are licensed , pre-screened , and insured.
The homestars logo has a speech bubble with a crown on it.
The yelp logo is white and red on a black background.

Roofing Installs Designed By You

Let us help you select the right roofing material for your home.

vancouver roofing company near me

Experience The Paragon Roofing BC Difference

Perfection in roofing. Because we're different.

Your satisfaction is guaranteed. Throughout the whole process, from the initial onsite consult to the final roof install, our friendly and knowledgeable team members will work with you to maintain open communication. 

Frequently Asked Questions.

Roofing is an investment into your property. Here are some FAQs to help navigate making that choice.

  • What are signs I need roof repairs?

    Roof leaks cause stains on walls and ceilings which make them visually obvious. If your insulation is compromised, you’ll likely smell moist air that could be from water coming in through a leaky roof.  

  • How long can I expect my roof repair or new roof to last?

    A new roof will last longer than a repair or patch job. However, you might not need a completely new roof installed because some repairs are small enough to prevent larger issues from getting worse.  

  • How much do roofing services cost?

    All roofing projects are different. The scope of the roofing service will be unique to each home. If it’s a small repair or a full roof replacement, you’ll see much different bottom lines on the estimates. With Paragon Roofing BC, we always provide transparent pricing that you’ll be able to rely on.  

Here's What Our Existing Clients Think.

Home and business owners we've served across the greater Vancouver area.

Reviews

Related Services & Resources for Cedar Conversion in Vancouver

Core Vancouver Roofing Hubs

Key Vancouver Service Pages

Metal Roofing in Vancouver

Roofing Materials & Systems in Vancouver

Vancouver Climate, Weather & Roof Maintenance

Cost, Financing & Roof Replacement Decisions – Vancouver

Choosing a Vancouver Roofer & Why Paragon

Installation, Repair & General Vancouver Roofing Guides

Energy Savings & Eco Roofing in Vancouver

Metro Vancouver & North Shore Related Guides

We look forward to helping you.

For all your roofing needs, give us a call, text, or email. 604-358-3436

Paragon Res Roof #3