Commercial Roofing Safety Guide for Vancouver Projects
Managing commercial roofing projects in Vancouver means facing unpredictable weather, complex building codes, and unique site hazards. Heavy rainfall, freeze-thaw cycles, and strong winds put added stress on both roofs and those working above three metres. For property managers, Canadian Occupational Health and Safety standards require more than just the right equipment—they demand site-specific planning, clear documentation, and ongoing worker training. This guide offers step-by-step safety strategies tailored to Metro Vancouver’s commercial properties so your team can work confidently and compliantly.
Table of Contents
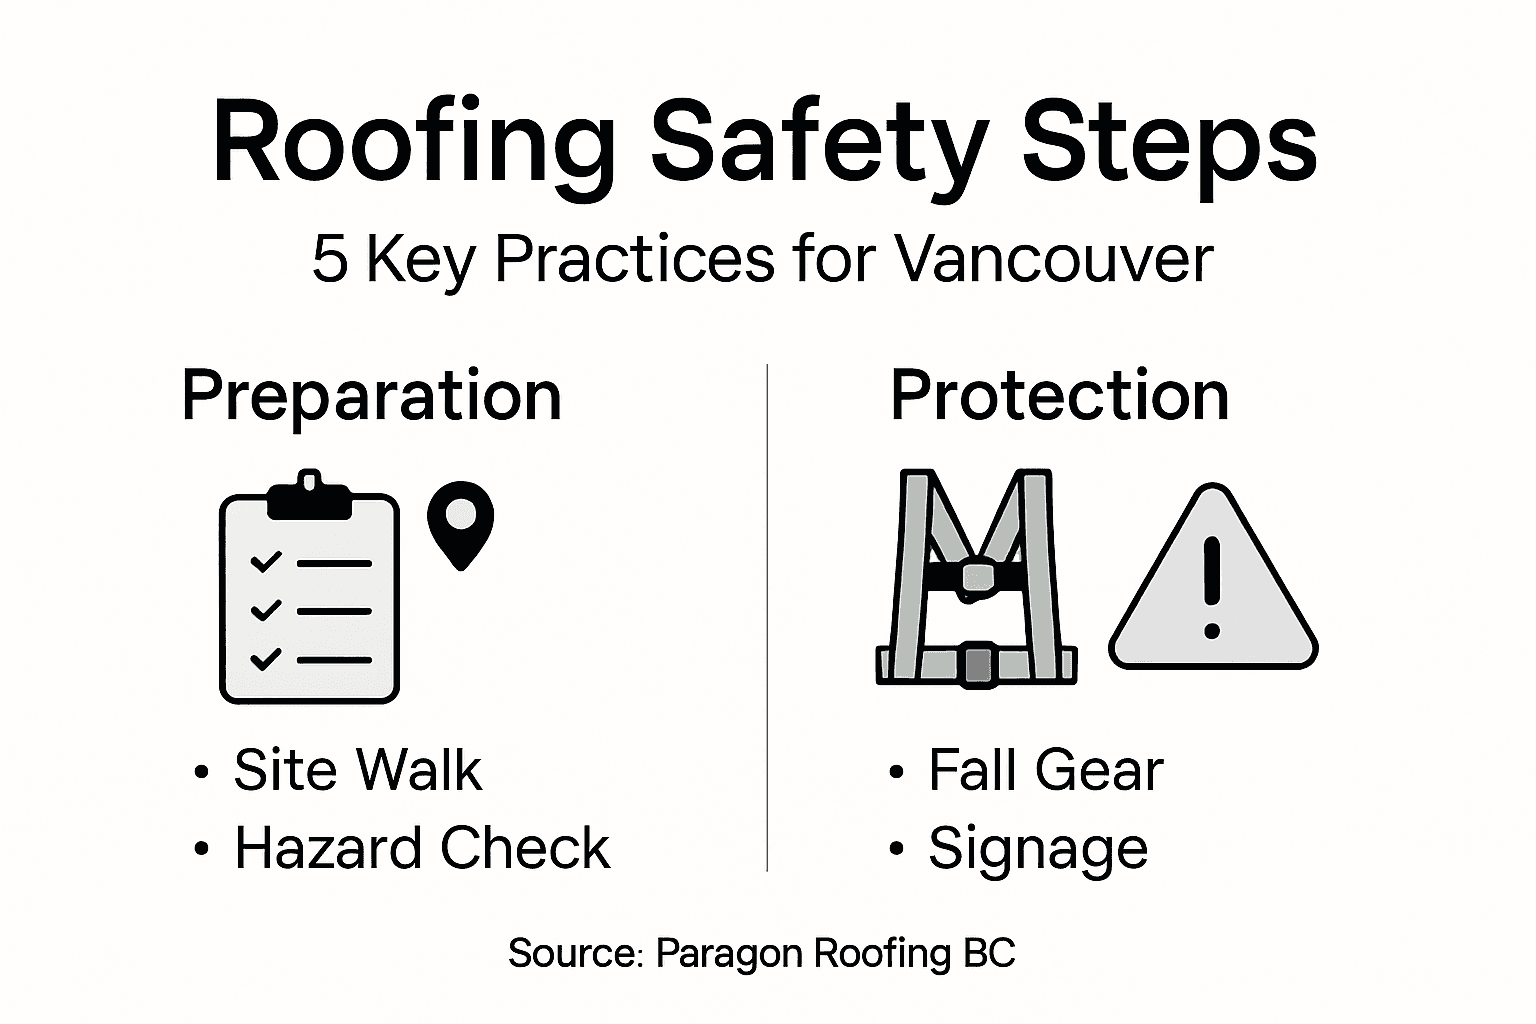
- Step 1: Assess Unique Site Conditions And Hazards
- Step 2: Select Proper Safety Equipment And Signage
- Step 3: Implement Worker Training And Procedures
- Step 4: Monitor Ongoing Safety Compliance
- Step 5: Verify Post-Project Safety And Documentation
Quick Summary
| Essential Insight | Detailed Explanation |
|---|---|
| 1. Assess Roof Conditions Before Work | Conduct a thorough assessment to identify unique hazards and site-specific challenges affecting safety before beginning roofing tasks. |
| 2. Use Proper Safety Equipment | Implement appropriate fall protection systems, personal protective gear, and weather-resistant signage to ensure worker safety on the roof. |
| 3. Emphasize Specialized Training | Provide tailored training that addresses the specific risks and procedures relevant to working on commercial roofs in Vancouver. |
| 4. Monitor Safety Compliance Regularly | Actively oversee safety practices throughout the project, correcting unsafe behaviours and ensuring adherence to safety protocols. |
| 5. Document Everything Thoroughly | Keep comprehensive records of all inspections, training, and safety logs to support compliance and future safety improvements. |
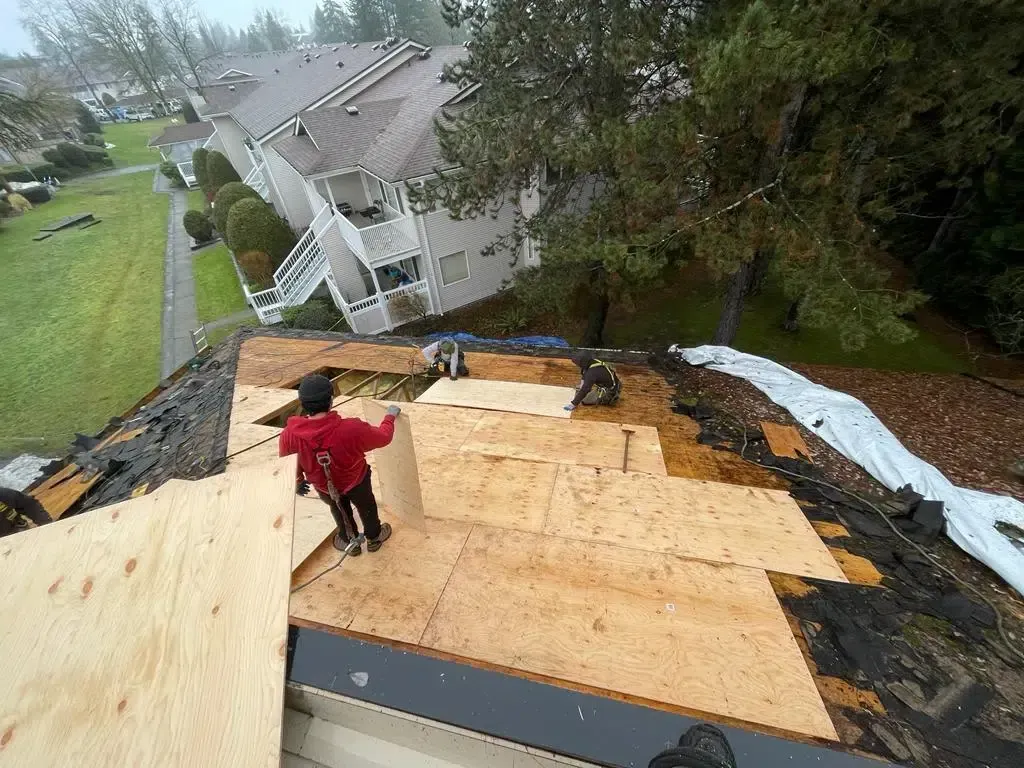
Step 1: Assess unique site conditions and hazards
Before anyone sets foot on your commercial roof in Vancouver, you need to understand exactly what you’re dealing with. Every property has its own set of challenges, and what works for one building won’t necessarily work for another. This step is about getting eyes on site, asking tough questions, and identifying anything that could trip up your team or create safety issues during the work.
Start by walking the perimeter of the building on the ground level. Look up and observe the roof from a distance. What’s the slope like? Is it a gentle pitch or nearly flat? How much of the roof is visible from where you’re standing, and what’s creating shadows or obstructions? Vancouver’s heavy rainfall means drainage is everything, so check whether gutters and downspouts are clear and directing water away from the foundation. If water is pooling on the roof or overflowing gutters, you’ve already spotted a problem that’ll affect how your team works safely.
Next, check the immediate surroundings. Are there overhead power lines crossing near the roofline? Is there a busy street or pedestrian area below where falling debris could be an issue? Look for trees that overhang the roof, loose branches, or bird nests that might complicate access. In our Lower Mainland climate, freeze-thaw cycles can loosen fasteners and create unstable areas on older roofs, so note any visible deterioration, missing shingles, or areas where the surface looks compromised. Pay attention to wind exposure too. Roofs on exposed corners or hilltops in the Vancouver area experience significantly more wind force than sheltered buildings, which changes how safely your crew can work.
Once you’re on the roof itself, the real assessment begins. Test the surface as you walk. Does it feel soft or springy underfoot? That suggests water damage underneath. Look for areas where the membrane or shingles are curling, blistering, or separating from the substrate. Check penetrations like vents, skylights, and flashing where water loves to sneak in. Feel around these areas for soft spots or evidence of previous leaks. Our persistent coastal moisture means that hidden water damage is common, and what you don’t see can create serious hazards for workers.
Document everything you find. Take photos from multiple angles, note measurements, and mark any soft spots or unstable areas with tape or chalk so your team knows where to be cautious. Create a simple site hazard map that shows traffic patterns, hazardous zones, and emergency exits. This becomes your safety reference during the actual work.
Consider seasonal factors specific to Metro Vancouver. If you’re assessing in winter or early spring, ice dams might have caused damage. In late autumn, leaves clogging drains create standing water that weakens roof structure. Snow load capacity matters too, especially for flat or low-slope commercial roofs that weren’t designed with today’s moisture-heavy snow in mind. Check whether your building has adequate structural support for the loads it might experience.
Here is a summary of key commercial roofing hazards unique to Vancouver and their impact:
| Hazard Type | Vancouver-Specific Factor | Potential Safety Impact |
|---|---|---|
| Heavy rainfall | Frequent downpours and pooling | Increased slip and fall risk |
| Wind exposure | Gusts near hilltops/corners | Possible loss of balance/equipment |
| Freeze-thaw cycles | Rapid temperature changes | Roof surface instability |
| Overhead power lines | Urban proximity to utilities | Electrocution or access issues |
| Drainage issues | Blocked gutters/drains in autumn | Structure weakening, trip hazards |
| Wildlife and vegetation | Bird nests, overhanging trees | Obstructions, unpredictable risks |
Talk to maintenance staff or building operators if possible. They often know where problems tend to occur, where water enters the building, and whether there have been previous incidents. They understand the building’s history better than anyone. Ask about any prior roof work, what failed or succeeded, and what materials were used. This information is gold for planning safe, effective work.
Finally, review the building’s structural plans if available. Understand where load-bearing walls sit, where trusses or joists run, and whether the roof can safely support equipment, workers, and materials. Some commercial roofs have lower load ratings than you’d expect, and that changes everything about how you stage materials and move people around.
Pro tip: Create a written hazard assessment document during your site visit and review it with your safety officer and team lead before any work begins. A document you’ve actually created beats a generic checklist every time, and it shows regulatory inspectors that you took conditions seriously.
Step 2: Select proper safety equipment and signage
Getting the right safety equipment on site isn’t about ticking boxes on a compliance form. It’s about making sure your team goes home the same way they arrived. Vancouver’s commercial roofing environment brings specific challenges, and your equipment needs to address those real conditions. This step covers choosing fall protection systems, personal protective equipment, and signage that actually communicates hazards to everyone on or near your job site.
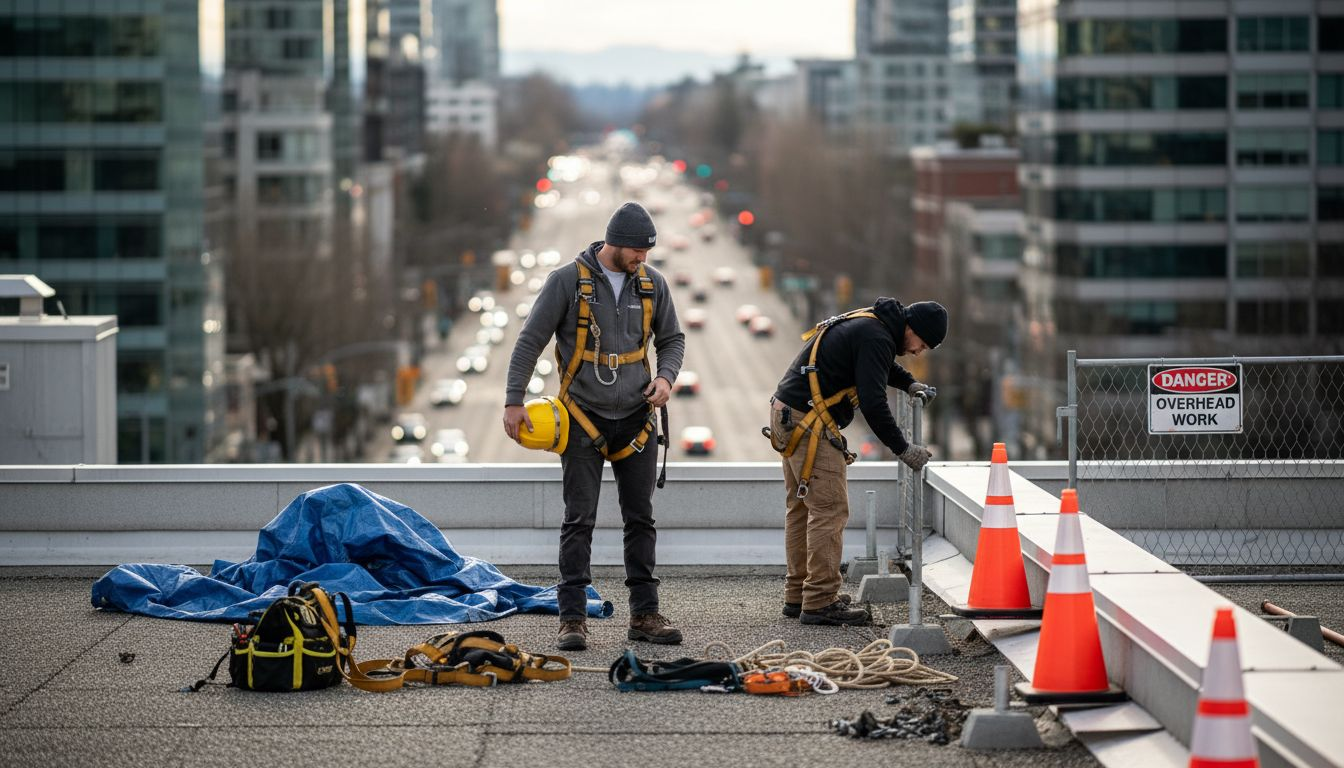
Start with fall protection, which is non-negotiable for anyone working above three metres. Your system needs to include guardrails, harnesses, and anchor points that meet Canadian Occupational Health and Safety standards. Think of it this way: a harness without a proper anchor point is like a seatbelt in a car with no attachment points. It looks like safety but doesn’t actually do anything. For flat or low-slope commercial roofs common in the Lower Mainland, this means setting up anchor points before work begins and ensuring every worker has a lanyard attached. Lanyards should limit fall distance to a maximum of two metres to prevent the worker from striking objects below or experiencing injury from swing hazards. When you’re on a sloped roof in Vancouver’s wet conditions, slip hazards increase dramatically, so your anchoring system needs to account for the fact that workers might lose their footing and need that system to catch them immediately.
Toe boards and guardrails create continuous safety barriers along roof edges. These aren’t optional on commercial properties where liability and worker protection matter. A guardrail system should be between 1.1 metres and 1.2 metres high from the walking surface, strong enough to withstand lateral pressure, and positioned so workers can’t accidentally trip over it while moving materials or equipment. In our coastal climate where wind gusts can surprise you, guardrails need solid infill panels rather than cable systems alone. They also need regular inspection because fasteners loosen over time, especially with temperature fluctuations and freeze-thaw cycles we experience in Metro Vancouver.
Personal protective equipment layers on top of your fall protection system. Hard hats protect against impacts from tools, materials, or bumps on low clearance areas. Non-slip footwear is critical on wet roofs, and in Vancouver that means most days during the year. Look for boots with aggressive tread designed for roofing, not generic work shoes. Gloves that maintain grip when wet prevent tools from slipping out of hands and becoming falling hazards. Safety glasses protect eyes from debris, UV exposure, and reflective glare off wet surfaces. High visibility clothing ensures that anyone approaching the roof area can see your workers, especially if you’re working near traffic or pedestrian areas.
Now for signage. This is where many property managers miss an opportunity. Custom safety signage communicates critical hazards through prohibition signs, mandatory signs, danger signs, and warning signs that are designed to withstand Vancouver’s weather. Your signage should clearly indicate fall hazards, restricted access areas, and emergency procedures. Place prohibition signs at all roof access points so people don’t wander onto the roof by accident. Use danger and warning signs to highlight specific hazards like skylights, roof penetrations, or areas with weak membrane. Your signage needs to be visible from a distance, resist fading from UV exposure and moisture, and remain legible in low light conditions.
Consider placement strategically. Signs on ground level should warn people about work happening overhead and the potential for falling objects. Signs at access points control who gets on the roof. Signs placed throughout the roof itself remind workers of hazards in real time. During Vancouver’s rainy seasons, water can hide beneath signage or wash it away, so secure everything properly and inspect it regularly.
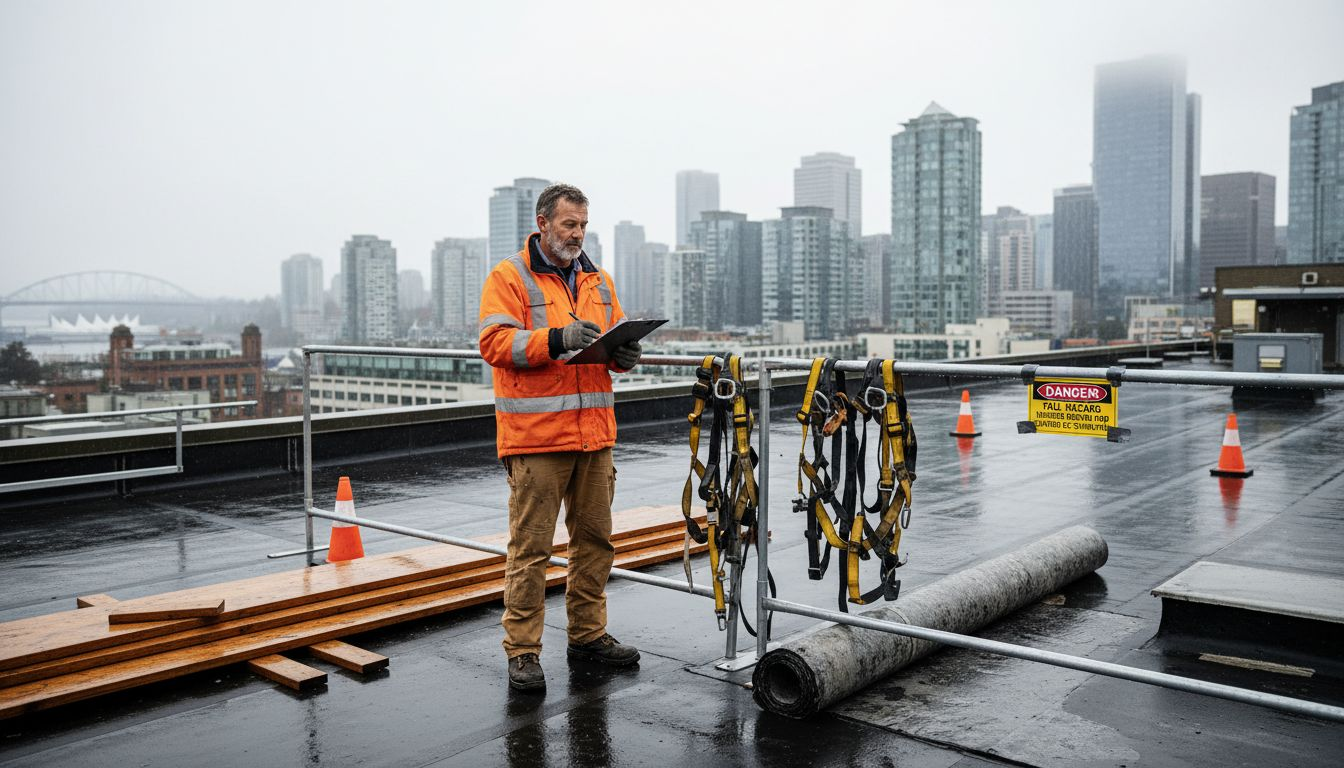
Have your equipment inspected and certified by qualified personnel before the project starts. Harnesses degrade over time and after impacts, even if you can’t see the damage. Anchors need verification that they’ll actually hold the stated load. Guardrails need structural confirmation. This inspection becomes your documentation that equipment was safety approved, which matters for regulatory compliance and liability if something does go wrong.
Compare the function and business impact of main safety equipment for Vancouver roofing jobs:
| Equipment Type | Primary Function | Unique Vancouver Benefit |
|---|---|---|
| Harness & lanyard | Fall arrest and worker security | Prevents falls in wet weather |
| Guardrail system | Physical barrier at roof edges | Withstands strong coastal winds |
| Non-slip footwear | Improves traction in slippery areas | Reduces injuries during rainfall |
| High visibility gear | Ensures worker visibility near traffic | Enhances safety in fog/rain |
| Safety signage | Communicates site dangers | Resists moisture and fading |
Professional tip: Involve your team in safety equipment selection by letting them try on harnesses and footwear before purchase, then actually use the equipment during a practice drill so they know how it feels and functions before real work begins.
Step 3: Implement worker training and procedures
Training isn’t something you do once and check off a list. It’s the foundation of everything that happens on your roof, and it directly impacts whether workers go home safely at the end of each shift. This step covers getting your team properly trained on fall protection, emergency procedures, and the specific hazards they’ll face during commercial roofing work in Vancouver.
Start by recognising that not all training is created equal. Generic online modules won’t prepare someone for the specific conditions your team will encounter. You need specialised safety training focused on fall protection through the Roofing Contractors Association of BC. This training covers fall protection systems, personal protective equipment use, emergency procedures, and safety monitor responsibilities aligned with WorkSafeBC standards. When your workers complete this accredited training, they’re not just informed, they’re competent to safely perform roofing work at heights over three metres. That certification matters legally and practically. It tells inspectors and regulators that you took training seriously, and it gives your team the confidence that comes from knowing they actually understand the systems they’re using.
Before anyone steps onto your commercial roof, conduct a site-specific toolbox talk with your entire crew. Walk through your hazard assessment from Step 1 and explain what you found. Show them on a diagram or directly on site where the hazards exist. Point out anchor points, explain how lanyards will be attached, and demonstrate how guardrails work on this particular roof. Talk about Vancouver’s weather challenges and how wet conditions change their safety procedures. If it’s winter, discuss ice hazard protocols. If it’s late autumn, explain how quickly conditions can change if rain starts mid-shift. This isn’t a lecture you deliver once. It’s a conversation where you verify that workers understand and can explain back to you what they’ll do if they slip, if a tool falls, or if an emergency happens.
Establish clear procedures for everyday situations. Designate a safety monitor who watches for hazards, stays alert to changing conditions, and has authority to stop work if something isn’t right. Create procedures for material handling so workers aren’t moving supplies in ways that compromise their balance or create trip hazards. Establish traffic patterns so multiple workers aren’t crossing paths in high-risk areas. Define what constitutes an emergency on your specific roof and what the response is. In Metro Vancouver’s weather, procedures need to address when rain intensity means stopping work, how to safely descend if conditions deteriorate suddenly, and how to secure materials if you need to clear the roof quickly.
Make training a routine, not a one-time event. When conditions change during the project, bring the team together for an updated toolbox talk. If someone is new to the site, have your safety monitor take five minutes to walk them through procedures specific to this roof. If you’re moving to a different section of the building with different hazards, talk about what changes. This repetition embeds safety into the culture of your job site rather than treating it as an inconvenience separate from the actual work.
Document your training. Keep records of who attended, what date the training occurred, and what was covered. If someone claims they weren’t aware of a hazard, or if there’s an incident, your documentation shows exactly what they were taught and when. It also helps you track whether refresher training is needed or whether the same person requires additional one-on-one coaching because they’re not following procedures.
Test your procedures before real work begins. Have workers demonstrate how they’d put on a harness, how they’d attach a lanyard, and what they’d do if they felt themselves slipping. Role-play emergency scenarios so people know where to meet, how to call for help, and what the evacuation plan is. This practice takes 30 minutes and could prevent a catastrophic mistake during actual work when adrenaline and pressure cloud judgment.
Professional tip: Have your most experienced roofer or safety monitor demonstrate proper techniques first, then require every team member to perform the action independently while someone watches and provides feedback before they’re cleared to work on the roof.
Step 4: Monitor ongoing safety compliance
Once work starts on your commercial roof, monitoring safety compliance isn’t something you delegate and forget about. It requires active, consistent oversight throughout the entire project. This step covers how to observe and enforce safety procedures in real time, respond when things drift, and maintain the safety culture you’ve established from day one.
Begin by assigning a dedicated safety monitor to the job site. This person should have authority to stop work if they observe unsafe practices, and they need to be someone the crew respects. The safety monitor isn’t there to police people, but rather to be a second set of eyes watching for hazards, equipment failures, and procedure violations that might be invisible to workers focused on their tasks. Have your safety monitor conduct a pre-shift inspection every morning before work begins. This takes 15 minutes and covers checking that all harnesses are properly secured, anchor points haven’t shifted, guardrails are intact, and signage is visible and secure. In Vancouver’s variable weather, morning inspections catch damage from overnight wind or rain that might have compromised equipment. A harness left outside can absorb moisture and degrade in the cold. Anchor points can loosen from temperature fluctuations. What was safe yesterday might not be safe today.
Walk the roof yourself periodically throughout each shift, not just at the start and end of the day. Watch how workers are actually moving, where they’re standing, and whether they’re following procedures. You’ll notice things supervisors miss. Is someone wearing their harness loosely? Are they taking shortcuts with lanyard attachments to save time? Is guardrail infill getting moved or compromised? Are materials piling up in ways that create new trip hazards? Are workers communicating clearly about changing conditions? In Metro Vancouver’s weather, conditions can shift dramatically within an hour. Rain that started as a drizzle becomes a downpour. Wind that was manageable becomes dangerous. Your presence signals that safety matters, and workers adjust their behaviour accordingly when they know you’re watching.
Document what you observe. Keep a simple daily log that notes weather conditions, who was on site, what work was completed, and any safety observations. If someone wasn’t wearing PPE correctly, note it. If equipment needed adjustment, document that. If weather forced you to modify procedures, write it down. This log becomes your evidence that you maintained oversight and responded to issues. If an incident occurs, regulators will want to see this documentation. More importantly, patterns emerge from these logs. If you’re consistently noting that one worker doesn’t secure their harness properly, you know you need a private conversation and potentially additional one-on-one training.
Create a system for workers to report hazards or concerns without fear of consequences. This might be a toolbox talk question at the start of each shift where you ask, “What safety concerns do we need to address today?” Or a simple form workers can fill out anonymously if they observe something unsafe. Often, workers see hazards before management does, and they’re hesitant to speak up if they think reporting will get someone in trouble or make them look like troublemakers. Make it clear that you want to know about problems so you can fix them, and that reporting a safety concern is always the right move.
Inspect all equipment routinely. Harnesses need visual inspection for tears, fraying, or discolouration that suggests damage. Lanyards should be checked for wear. Anchor points need verification that they’re still properly secured and that fasteners haven’t loosened. Guardrails need to be checked for bent infill or loose connections. In our wet Vancouver climate, rust and corrosion can weaken equipment faster than in drier regions. What looked fine last week might be compromised after exposure to salt air near the coast or repeated freeze-thaw cycles.
Maintain clear communication with WorkSafeBC. If you have questions about whether a procedure meets regulations, ask them. If an incident occurs, report it correctly and promptly. Regulators respect contractors who take safety seriously and communicate openly about concerns. They’re less forgiving of contractors who try to hide problems or operate in grey areas about what’s compliant.
Professional tip: Create a simple checklist that your safety monitor completes each morning and at midday, then photograph it with the date showing to build an evidence trail that demonstrates consistent monitoring and compliance throughout your project.
Step 5: Verify post-project safety and documentation
When the last worker leaves your roof and equipment comes down, the work isn’t finished. You need to verify that the project was completed safely and that all documentation is in order. This step covers the verification process and the documentation you need to close out the project properly with regulators and your client.
Start by conducting a final comprehensive inspection of the roof with your safety monitor and project lead present. Walk every section systematically. Check that all temporary safety measures like guardrails and signage have been properly removed or are in their final state. Verify that the roof surface is clean and free of debris, tools, and materials left behind. Look for any damage caused during the project, whether to the roofing surface itself or to building systems like vents, skylights, or mechanical equipment. Take photos documenting the completed work and the condition of the roof. Document any areas where repairs or follow-up work might be needed. In Vancouver’s variable weather, what looks acceptable on a dry day might reveal issues when heavy rain hits, so be thorough.
Collect all documentation from your contractor and safety personnel. This includes inspection reports from every phase of the project, training records showing who received safety training and when, daily safety logs documenting your monitoring activities, incident reports if any safety issues occurred, equipment certification showing that all fall protection systems met standards, and any modifications made to safety procedures based on site conditions. Gather photographs documenting safety measures throughout the project. These records tell the complete story of how safety was managed from start to finish.
Submit post-construction documentation required by the City of Vancouver including permits, inspection reports, and certificates verifying compliance with building code requirements. Your roofing contractor should provide a letter of assurance confirming the work was completed according to specifications and safety standards. This formal documentation protects both you and the contractor by creating a record that the work met regulatory requirements.
Follow roofing project closeout guidelines that recommend systematic documentation through all phases. Ensure your contractor submits warranty documentation so you have proof of coverage for materials and workmanship. Request compliance reports confirming that all work met safety standards and contractual obligations. This documentation becomes your evidence of accountability if issues emerge later. It also provides valuable information for future maintenance and repairs because it establishes the baseline condition of your roof after this project.
Schedule a final walkthrough with your client and your contractor together. This isn’t just a formality. It’s an opportunity to discuss what was accomplished, address any remaining questions, and establish expectations for post-project maintenance. Point out any areas that need monitoring or that might require attention in coming months. In our Lower Mainland climate, water can take months to cause visible damage, so discussing what signs to watch for helps your client catch problems early.
Archive all documentation properly. Keep your safety logs, training records, incident reports, and daily monitoring checklists in a secure location for at least seven years. In the event of a future incident or regulatory inquiry, these records demonstrate that you operated safely and professionally. They also provide valuable historical information if the same contractor or team works on future projects at the same property.
Conduct a debrief with your safety team after the project ends. What worked well? What could be improved next time? Did any safety procedures need adjustment during the project? Were there unexpected hazards that you should prepare for on similar roofs? This conversation embeds lessons learned into your safety culture and helps your team perform even better on future projects. Document this debrief as part of your permanent safety records.
Finally, confirm that all safety equipment has been properly returned or disposed of. Harnesses and lanyards shouldn’t be reused indefinitely, and equipment with damage needs to be taken out of service. Signage should be properly stored or recycled. Any temporary structures like scaffolding or guardrails need to be documented as removed. This closure ensures that temporary safety measures don’t accidentally remain in place or get reused inappropriately.
Professional tip: Create a standardised post-project safety checklist specific to your typical commercial roofing projects and have your safety monitor complete it before submitting final documentation, ensuring nothing is overlooked during project closeout.
Ensure Safety and Success on Your Vancouver Commercial Roofing Project
Addressing the unique challenges of commercial roofing safety in Vancouver requires expert knowledge and trusted solutions. From assessing site-specific hazards like heavy rainfall and wind exposure to implementing proper fall protection and rigorous training, your roofing project deserves a team committed to the highest safety standards. At Paragon Roofing BC, we understand the critical importance of safeguarding your workers and property while delivering superior roofing services tailored to Metro Vancouver’s demanding climate.
Don’t leave safety to chance on your next commercial roofing venture. Partner with Paragon Roofing BC for professional roof installation, inspection, maintenance, and repair that prioritizes comprehensive safety measures. Visit our website at Paragon Roofing BC to learn how we integrate industry-best practices with local expertise. Request your free inspection today and experience peace of mind knowing your roofing project meets all regulatory requirements and protects everyone involved. Explore our full range of commercial roofing solutions and let us help you build safely and confidently.
Frequently Asked Questions
What should I assess before starting a commercial roofing project in Vancouver?
Before beginning, conduct a thorough assessment of unique site conditions and hazards. Walk the perimeter, check for overhead power lines, drainage issues, and the overall condition of the roof to identify any potential safety concerns.
What types of safety equipment do I need for commercial roofing in Vancouver?
You need fall protection systems, including guardrails, harnesses, and toe boards, as well as personal protective equipment like hard hats and non-slip footwear. Ensure these items meet Canadian safety standards before beginning work to protect your team effectively.
How can I ensure my team receives adequate safety training for roofing work?
Organise comprehensive training sessions focused on fall protection and site-specific hazards. Regularly include toolbox talks and refresher courses to reinforce safety knowledge throughout the project, verifying understanding with practical demonstrations.
What ongoing safety compliance measures should I implement during the project?
Appoint a dedicated safety monitor to oversee compliance and conduct daily inspections. Regularly document observations, address any unsafe practices immediately, and encourage your team to report hazards to maintain a safe working environment throughout the project.
How do I verify safety documentation after completing a roofing project?
After project completion, collect all relevant documentation, including inspection reports and safety logs. Conduct a final inspection to ensure conditions are documented, and confirm compliance with safety standards before archiving all records for future reference.