
Fixing ridge cap failures in West Vancouver after wind damage
Fixing ridge cap failures in West Vancouver after wind damage
When a West Vancouver windstorm lifts or blows off ridge caps, the fix is not complicated, but it has to be done right. Remove the damaged caps completely, inspect the ridge vent and decking underneath, then install new ridge caps with a minimum 5-inch overlap, corrosion-resistant 1.25-inch nails, and exposed edges facing downwind. Seal nail heads with roofing cement or silicone sealant. Use materials rated for coastal conditions. That sequence, done correctly, is what separates a repair that holds through the next storm from one that fails again in six months.
Here is what you need to know before you climb up there, or before you call someone who will:
- Remove fully, not partially. Leaving cracked or partially lifted caps in place creates an uneven surface that prevents new caps from lying flat, which opens a leak path.
- Check the vent and decking. Ridge cap damage often coincides with vent damage. If the vent is dented or torn, replace that section before reinstalling caps.
- Nail placement matters as much as nail count. Nails must penetrate through the sheathing, not just the cap layers. Short nails are one of the most common causes of wind-driven uplift failures.
- Overlap direction is not optional. Start from the end opposite the prevailing wind so each cap’s exposed edge faces downwind, not into the storm.
- Seal every exposed nail head. On the final cap at the ridge end, and anywhere nail heads are exposed, apply silicone sealant or roofing mastic.
- Document before you repair. Photograph the damage from the ground and from inside the attic before touching anything. Your insurance claim depends on it.
- Know when to call a professional. Roofs steeper than 6/12 pitch, widespread cracking across multiple ridge sections, or any sign of decking rot all call for a licensed contractor, not a DIY fix.
Paragonroofingbc crews handle these repairs regularly across West Vancouver, and the details below reflect what actually works on coastal roofs in this climate.
Table of Contents
- How to spot ridge cap wind damage on your West Vancouver roof
- Step-by-step: repairing ridge cap failures from wind damage
- Why West Vancouver’s coastal climate makes ridge cap repairs harder
- How attic ventilation affects ridge cap longevity
- Paragonroofingbc handles West Vancouver ridge cap repairs the right way
- Key takeaways
- FAQ
How to spot ridge cap wind damage on your West Vancouver roof
West Vancouver roofs take a beating from the southeast winds that funnel through Howe Sound, and ridge caps are the first thing to go. Knowing what to look for saves you from discovering the damage through a water stain on your ceiling.
Visual signs from the ground:
- Cracked, curled, or missing ridge cap shingles along the peak
- Visible gaps or lifted edges where caps no longer lie flat
- Granule loss concentrated at the ridge, leaving dark patches of exposed asphalt
- Displaced or buckled caps after a significant windstorm
Attic inspection signs:
- Water stains on ridge boards or sheathing directly below the peak
- Daylight visible through the ridge, even a sliver
- Damp insulation near the top of the attic after rain
Pro Tip: After any storm with sustained winds, check your attic with a flashlight before going on the roof. Water staining on the ridge board tells you exactly where the cap has failed, and it is far safer than a ladder inspection in wet conditions.
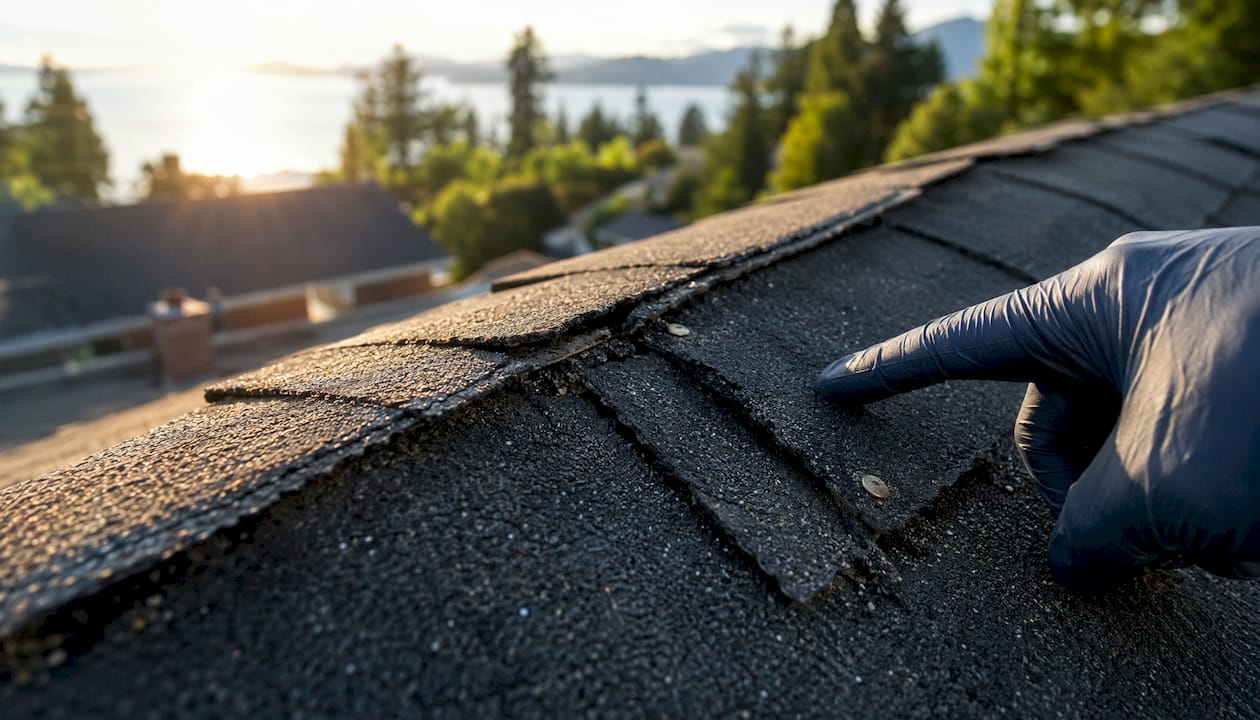
West Vancouver wind damage patterns tend to be localized, meaning a few caps on the windward end of the ridge fail while the rest look fine. That is good news for repair costs, but it does not mean you can ignore the surrounding caps. Lift the edges of adjacent caps and check whether they are still flexible and well-sealed. Brittle caps that snap when flexed are near the end of their service life, and a spot repair will not hold them for long.
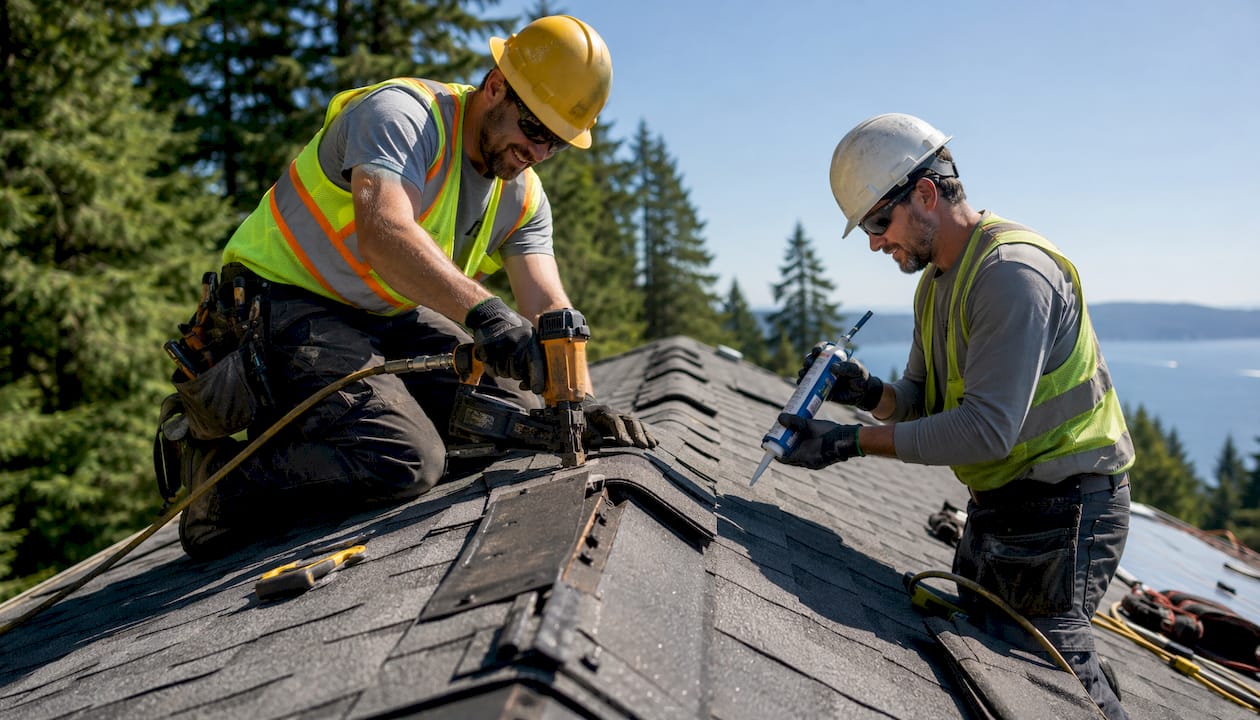
Localized damage such as a few loose or cracked caps can often be repaired with re-nailing and sealant. Widespread cracking across multiple sections, or any sign of damaged flashing near the ridge, typically means full ridge cap replacement is the smarter call.
Step-by-step: repairing ridge cap failures from wind damage
This process works for asphalt ridge cap shingles on residential roofs in West Vancouver. Work only in dry, calm conditions, and have a helper on the ground to hand up materials.
-
Set up safely. Use a stable ladder rated for your weight plus tools. Wear non-slip footwear and, on any pitch steeper than 4/12, use a roof anchor and harness. BC OHS regulations require fall protection above 3 metres.
-
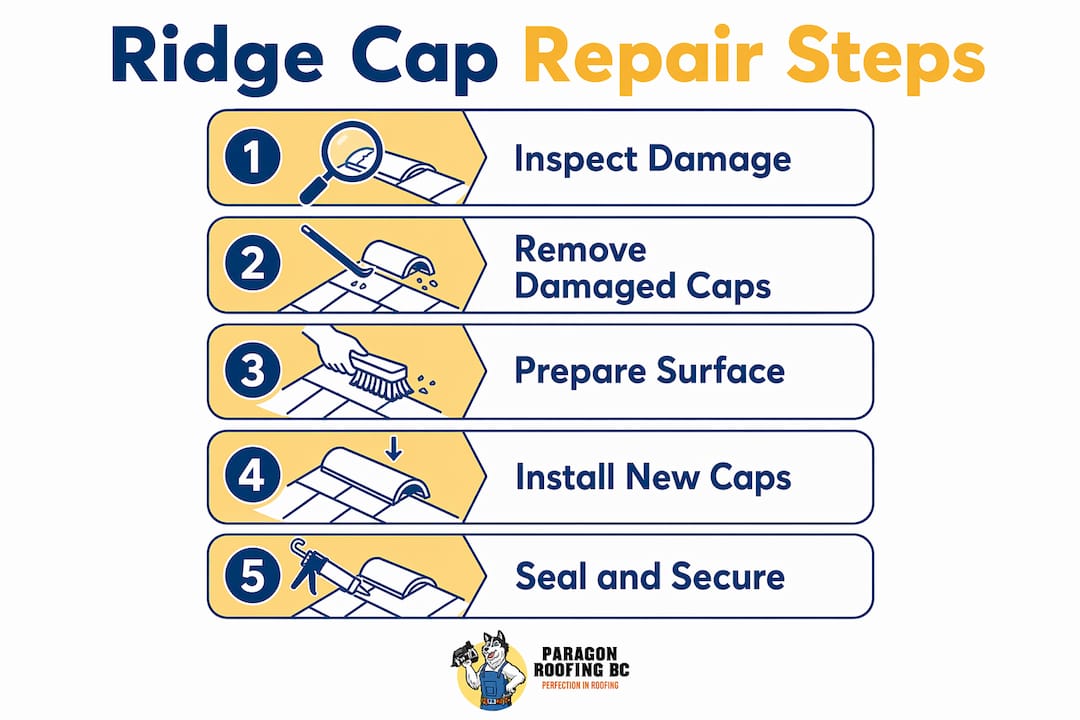
Remove damaged caps completely. Use a flat bar and hammer to lift and remove every cracked, lifted, or missing cap. Pull out all old nails. A leftover nail shank under a new cap creates a bump that prevents a flat seal and invites leaks.
-
Clear debris immediately. Old granules and broken shingle pieces on a damp roof are a slip hazard. Sweep them off the slope before moving around.
-
Inspect the ridge vent. If the vent shows dents, tears, or holes, replace that section before reinstalling caps. Seal old nail holes in a vent that is otherwise in good condition.
-
Check the decking. Press gently on the sheathing along the ridge. Soft spots or visible rot mean the decking needs repair before any new caps go on.
-
Measure the overlap. Standard overlap for ridge caps is 5 to 5.5 inches. Check the existing caps to confirm, and follow the manufacturer’s instructions on the bundle.
-
Start from the correct end. Begin at the end of the ridge opposite the prevailing wind direction. On most West Vancouver roofs, that means starting at the eastern end of an east-west ridge, since storms most often arrive from the southwest. This way, each cap’s exposed edge faces downwind and cannot be lifted like a sail.
-
Nail correctly. Drive two corrosion-resistant nails per cap shingle, placed one-half inch up from the edge. Nails must penetrate through the full thickness of the roofing layers and into the sheathing. On a standard half-inch plywood deck, the nail tip should just break through the other side.
-
Seal edges and nail heads. Apply roofing cement or silicone sealant along the edges where caps meet adjacent shingles. On the final cap at the ridge end, seal both exposed nail heads. Silicone sealant is more durable than mastic where it will be exposed to direct sunlight.
-
Apply sealant between caps in cold weather. Heat-activated adhesive on cap shingles will not bond until surface temperatures rise above roughly 10°C. If you are working in cooler conditions, place a bead of sealant between each cap and the one below it to hold everything in place until the adhesive activates.
-
Run a water test. Once the repair is complete and sealant has cured, run a garden hose along the ridge for several minutes. Have someone check the attic during the test for any active seepage.
Pro Tip: If you are replacing only one or two caps mid-ridge, carefully remove the caps on either side so you can slide the new cap into position with proper overlap. Reuse the adjacent caps if they are still flexible and undamaged, rather than cutting new ones that may not match the colour exactly.
Experienced roofers consistently point out that improper installation is the primary cause of ridge cap failure, more so than weather itself. Getting the overlap direction and nail penetration right prevents most wind damage from recurring.
Why West Vancouver’s coastal climate makes ridge cap repairs harder
West Vancouver sits in one of the most demanding roofing environments in Canada. The combination of high coastal winds, salt-laden air, heavy rain, and occasional freeze-thaw cycles puts ridge caps under stress that most inland roofing guides simply do not account for.
Salt air corrodes fasteners and degrades sealants faster than in non-coastal climates. A standard galvanised nail that might last decades in Calgary can show rust and backing-out in West Vancouver within a few years. This is why corrosion-resistant nails, specifically hot-dipped galvanised or stainless steel, are not optional here. They are the baseline.
Coastal-specific challenges for ridge cap durability:
- High winds from Howe Sound and Georgia Strait create sustained uplift pressure on exposed ridge lines
- Salt spray accelerates oxidation of fasteners and breaks down asphalt sealant strips
- Heavy rainfall drives water horizontally into any gap at the ridge
- Freeze-thaw cycles in winter months stress adhesive bonds and cause cap shingles to crack at the bend
- Debris from overhanging trees accumulates along the ridge, trapping moisture and accelerating wear
Maintenance habits that reduce coastal wear:
- Inspect ridge caps after every significant windstorm, ideally from the ground with binoculars
- Keep ridge vents clear of leaves, moss, and debris year-round
- Trim branches that overhang the ridge line
- Schedule a professional inspection every two to three years, not just when something looks wrong
Seasonal inspections after major storms catch early damage before it becomes a leak. A lifted cap edge caught in October costs far less to fix than the water damage it causes over a wet West Vancouver winter.
When selecting replacement materials, choose purpose-made hip-and-ridge cap shingles rather than cut three-tab shingles. Factory-made caps offer better wind resistance ratings and longer warranty terms. For coastal applications, SBS-modified ridge caps provide added flexibility in cold weather and better resistance to the repeated bending stress that freeze-thaw cycles create.
How attic ventilation affects ridge cap longevity
Poor attic ventilation is one of the least obvious causes of ridge cap failure, and it is surprisingly common in West Vancouver homes. When heat builds up in the attic, it bakes the underside of the ridge caps. When cold coastal air hits the exterior, the temperature swing causes the shingle material to dry out and become brittle. That brittleness is what makes caps crack and lift in the next windstorm.
Inadequate ventilation creates a thermal tug-of-war that shortens ridge cap life well before the material itself is worn out. Fixing the caps without addressing the ventilation underneath means you will be back on the roof sooner than you should be.
Signs of ventilation problems in West Vancouver attics:
- Attic feels noticeably hot in summer or damp in winter
- Frost or condensation on the underside of sheathing in cold months
- Ridge caps cracking or curling earlier than expected for their age
- Mould or mildew smell when you open the attic hatch
Steps to evaluate and improve attic ventilation:
- Confirm soffit vents are open and unobstructed by insulation
- Check that ridge vents run the full length of the ridge and are not blocked by debris
- Verify the intake-to-exhaust ratio meets the recommended 1:300 vent ratio for balanced airflow
- Look for any baffles or blocking that interrupts airflow from soffit to ridge
| Ventilation issue | Effect on ridge caps | Fix |
|---|---|---|
| Blocked soffit vents | Heat and moisture trap under sheathing | Clear insulation, install baffles |
| Debris-clogged ridge vent | No exhaust path for hot air | Clean or replace ridge vent |
| Imbalanced intake/exhaust | Condensation, brittle shingles | Add intake vents to match exhaust |
| No ridge vent at all | Severe heat buildup at peak | Install vented ridge system |
Any time you are repairing ridge caps, have a roofer assess the ventilation at the same time. Paragonroofingbc includes a ventilation check as part of every ridge cap repair in West Vancouver, because fixing one without the other is a short-term solution at best.
Paragonroofingbc handles West Vancouver ridge cap repairs the right way
West Vancouver ridge cap failures after wind damage are exactly the kind of repair where local experience makes a real difference. The pitch of the roofs, the direction of the prevailing winds, the salt air, and the specific materials that hold up in this climate are all things you learn from years of working on these roofs, not from a general roofing manual.

Paragonroofingbc is a manufacturer-certified roofing contractor serving West Vancouver, North Vancouver, Burnaby, Surrey, Coquitlam, and Delta. The crews here know the wind patterns off Howe Sound, the fastener specs that survive coastal salt exposure, and the ventilation configurations that keep ridge caps from failing prematurely. Whether you need a two-cap repair after a windstorm or a full ridge cap replacement on a steeply pitched British Properties home, the work gets done with the right materials and the right technique.
If you have noticed lifted caps, granule loss at the ridge, or water staining in your attic after a storm, do not wait for the next rain to confirm the problem. Get a professional assessment now and protect your home before the damage spreads to the decking below. Book your West Vancouver roof repair with Paragonroofingbc. Or get a full picture of what is happening on your roof with a roof leak inspection.
Key takeaways
Fixing ridge cap failures in West Vancouver requires correct overlap direction, corrosion-resistant fasteners, and a ventilation check, because installation errors and coastal conditions together cause most recurring failures.
| Point | Details |
|---|---|
| Overlap direction is critical | Install caps starting from the end opposite the prevailing wind so exposed edges face downwind. |
| Nail penetration determines hold | Nails must reach through the sheathing; short nails are a leading cause of wind uplift failures. |
| Coastal climate demands better materials | Salt air corrodes standard fasteners; use hot-dipped galvanised or stainless steel nails in West Vancouver. |
| Ventilation affects cap lifespan | A 1:300 intake-to-exhaust ratio reduces heat buildup that makes ridge caps brittle and prone to cracking. |
| Paragonroofingbc for local repairs | Manufacturer-certified crews with West Vancouver coastal experience handle ridge cap repairs and ventilation assessment together. |
FAQ
How long do ridge caps typically last in West Vancouver?
Most asphalt ridge caps last many years in typical Canadian conditions, but West Vancouver’s salt air and coastal winds can shorten their lifespan. Premium SBS-modified caps tend to hold up better in this climate with proper ventilation and maintenance.
What are the most common problems with ridge cap shingles?
Wind-driven uplift from inadequate nailing, improper overlap direction, and poor attic ventilation are the top causes of ridge cap failure. Cracking at the bend, granule loss, and lifted edges after storms are the most visible symptoms.
What should I do if wind blew off two shingles from my ridge?
Photograph the damage from the ground and from inside the attic before touching anything, then file with your insurer if the damage was storm-related. For the repair itself, remove any remaining damaged caps in the affected area, inspect the ridge vent and decking, and install new matching caps with correct overlap and corrosion-resistant nails.
Does a flapping or loose ridge cap mean I need a full replacement?
Not necessarily. Localized damage such as a few lifted or loose caps can often be repaired with re-nailing and sealant if the surrounding caps are still flexible and intact. Widespread cracking, multiple displaced sections, or signs of decking damage typically call for full ridge cap replacement.
Do I need a permit for ridge cap repairs in West Vancouver?
Minor repairs to a few cap shingles generally do not require a permit, but larger scope work involving structural changes or significant material replacement may trigger permit requirements under West Vancouver’s building bylaws. A licensed contractor can confirm what applies to your specific repair and handle any required documentation.
Recommended
Our Roofing Blog


Have more questions about roofing?
Check out our FAQs or give us a call today to speak to an expert roofer in Vancouver Lower Mainland, BC. We're here to help our neighbours make educated decisions about their roof. For our team, we value helping clients save money while making their roofs last.
