
North Vancouver attic mould: is it a roof leak?
North Vancouver attic mould: is it a roof leak?
TL;DR:
- Most attic mould in North Vancouver results from interior air leaks and poorly vented fans, not roof failure. Addressing air sealing and fixing roof or fan issues first is essential before any remediation to prevent mould from returning.
Most attic mould in North Vancouver is not caused by a failing roof. CMHC guidance points to interior air leakage, improperly vented bathroom or kitchen fans, and blocked soffit intake as the leading culprits. That said, a genuine roof failure — cracked flashing, a failed vent boot, a lifted shingle at a valley — can absolutely drive localized mould, and in North Vancouver’s wet maritime climate, the two problems often show up together.
Here is what to do right now:
- Look for localized staining. A single dark patch beneath a roof penetration (chimney, skylight, plumbing stack) points to a leak. Widespread black speckling across the sheathing points to condensation.
- Check your bathroom and kitchen fan ducts before you do anything else. If they terminate inside the attic rather than through the soffit or roof cap, that alone can explain the mould.
- Do not disturb large areas of mouldy insulation without proper PPE. A respirator rated N95 or better, gloves, and eye protection are the minimum.
- Call Paragon Roofing BC if you see localized staining, damaged flashing, or an active drip. A roof inspection will confirm whether the moisture source is exterior or interior.
BC Housing and CMHC both confirm that adding ventilation without sealing air leaks often makes attic moisture worse, not better. Get the diagnosis right before spending money on repairs.
Pro Tip: Take photos of every stained or discoloured area before your contractor arrives. Note the location relative to roof features (chimney, valley, vent). Those photos cut inspection time significantly and help the roofer quote accurately.
Table of Contents
- Why North Vancouver attics develop mould: the ranked causes
- How to tell a roof leak from condensation in your attic
- Safe DIY attic inspection checklist for North Vancouver homeowners
- When to call a professional and what a proper assessment includes
- The correct order of repairs when attic mould meets roof failure
- Practical steps to prevent attic mould from coming back
- What makes North Vancouver different from the rest of Canada
- Key takeaways
- A roofer’s perspective on North Vancouver attic mould
- Paragonroofingbc can help with North Vancouver attic mould and roof repairs
- Useful sources for North Vancouver homeowners
- FAQ
Why North Vancouver attics develop mould: the ranked causes
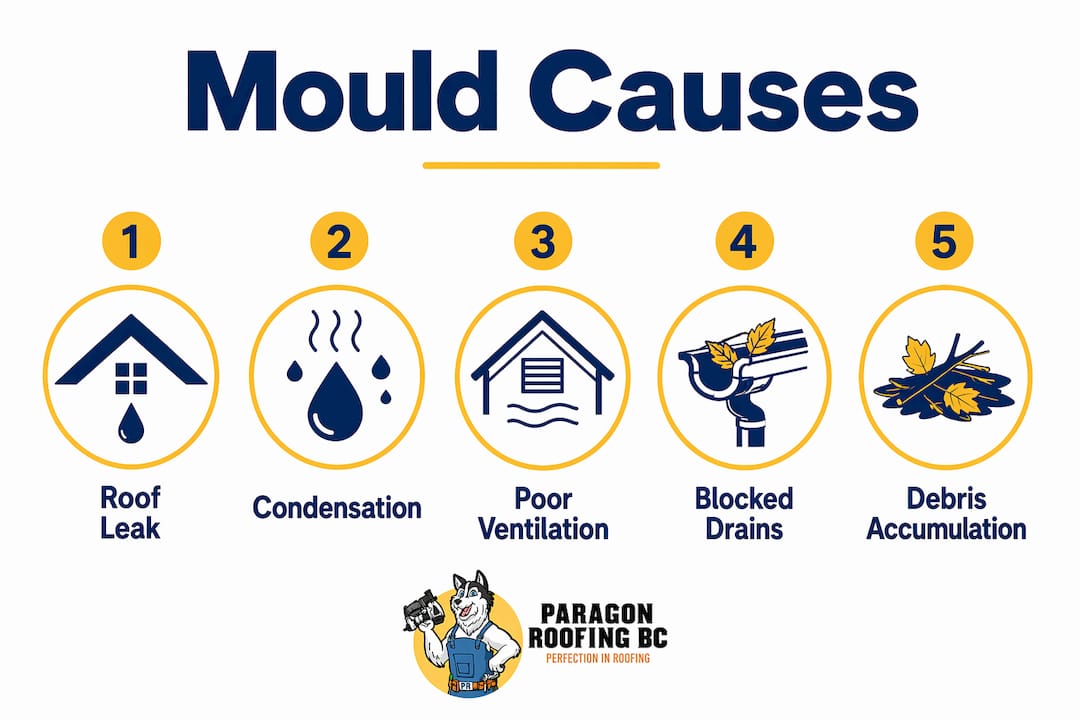
North Vancouver’s cool, wet maritime climate changes the risk profile compared to drier inland cities. Rain arrives sideways in November, moss grows year-round on north-facing slopes, and overnight temperatures drop just enough to cause condensation on cold attic sheathing even when the roof itself is intact.
The causes, ranked by frequency:
- Interior air leakage through ceiling penetrations (recessed lights, plumbing stacks, attic hatches, wiring holes). Warm, humid house air rises into the cold attic and condenses on the sheathing. CMHC identifies this as the single most common driver of attic mould in Canadian homes.
- Improperly vented fans. Bathroom and kitchen exhaust fans ducted into the attic rather than outdoors dump moisture-laden air directly onto the sheathing. This is a fixable problem that gets missed constantly.
- Blocked soffit or eave intake vents. Insulation pushed over the eaves, or debris and moss clogging soffit vents, stalls passive airflow and lets humidity stagnate.
- Roof flashing and shingle failures. Failed step flashing at a chimney, a cracked vent boot, or lifted shingles at a valley allow rain to enter. NRCan notes that typical problem areas include poor flashing at hips, valleys, and chimneys, and ice-dam leaks at the eaves.
North Vancouver adds its own wrinkles. Moss and debris accumulate on north-facing roofs and block eave drainage. Wind-driven rain during fall storms pushes water under flashing that would otherwise stay dry. Freeze-thaw cycles in January and February can crack caulking at penetrations and lift metal flashing edges. Shingle lifting from moss growth or poor fastening is a common local failure mode that opens the door to water intrusion.
Pro Tip: Check your attic during or just after a rainstorm. Active dripping or fresh wet spots confirm an exterior source. Check again on a cold, clear night in winter — frost on the sheathing confirms condensation from interior air leakage.
How to tell a roof leak from condensation in your attic
The pattern of staining tells most of the story. A roof leak is localized; condensation is widespread.
| Feature | Roof leak | Condensation / ventilation problem |
|---|---|---|
| Stain pattern | Localized, beneath a penetration or flashing | Widespread black speckling across sheathing |
| Location | Near chimney, skylight, valley, vent boot | Across entire sheathing underside |
| Nail tips | Usually clean | Rusty or streaked |
| Insulation | Wet in one spot | Damp or compressed broadly |
| Attic humidity | Normal or slightly elevated | Persistently high |
| Evidence | Drip line, active water, tide marks | Evaporative patterns, frost in winter |
Government of Canada guidance describes condensation-driven mould as widespread black speckling on sheathing with rusty nail tips, while NRCan confirms that roof leaks typically present as a localized stain or active drip beneath a penetration or at a flashing or valley location.
Watch for these warning signs that need urgent attention:
- Active dripping during or after rain — call a roofer the same day.
- Sagging or soft sheathing — structural damage may already be underway.
- Electrical fixtures in the attic that are wet or stained — a safety hazard requiring immediate action.
- Strong musty odour at the attic hatch combined with visible black growth — health risk; limit exposure and get a professional assessment.
Safe DIY attic inspection checklist for North Vancouver homeowners
Before you call anyone, a quick, safe look gives you useful information. Do this on a dry day, at least 24 hours after rain.
Prepare first:
- Wear an N95 respirator, safety glasses, and disposable gloves. Mould spores become airborne when disturbed.
- Bring a bright flashlight or headlamp. Attic lighting is rarely adequate.
- Walk only on joists or a board laid across them. Never step on insulation or unsupported drywall.
- Do not remove large areas of insulation. Lift the edge carefully to look underneath if you suspect air leakage staining.
What to inspect:
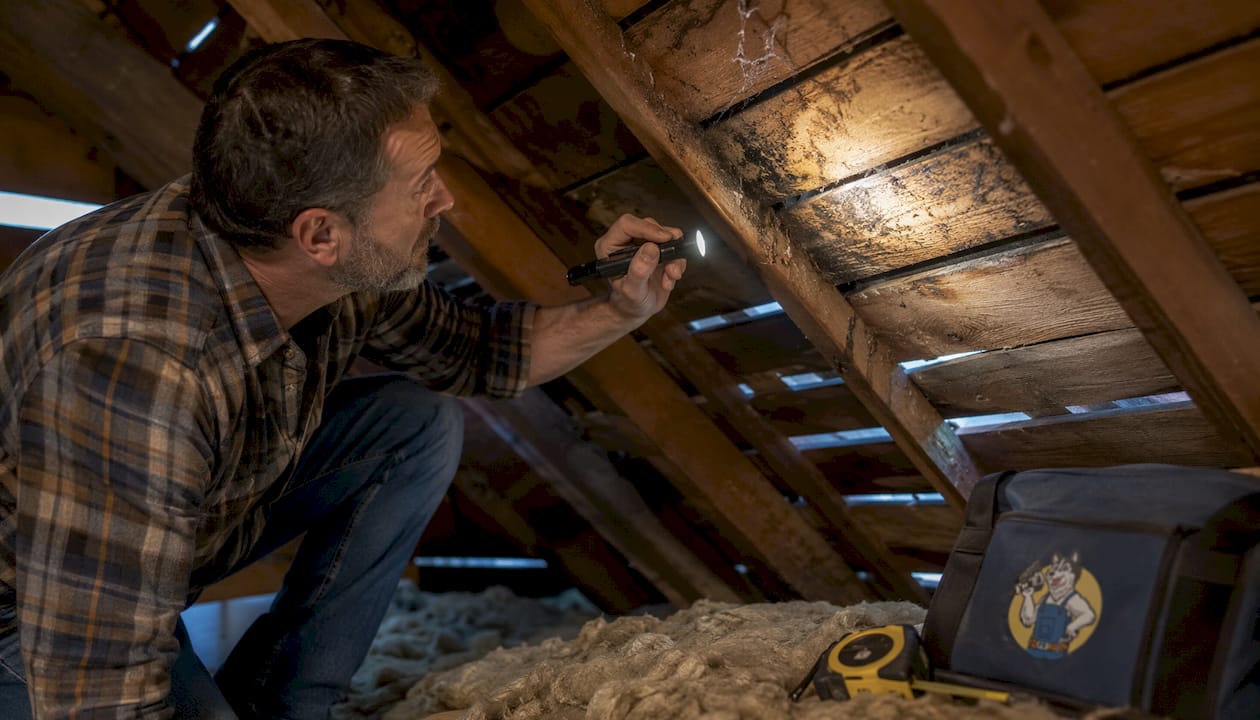
- Roof sheathing underside. Look for black speckling, dark staining, or soft spots. Note whether staining is localized or widespread.
- Rafter and truss surfaces. Rusty nail tips and streaked wood grain indicate condensation history.
- Insulation condition. Wet, compressed, or discoloured insulation signals a moisture problem, either from above or below.
- Soffit and eave vents. Are they clear of insulation and debris? Blocked intake is a top cause of stagnant attic air.
- Fan duct terminations. Trace bathroom and kitchen fan ducts. Canadian home inspection guidance flags ducts terminating inside the attic as a common, fixable moisture source.
- Attic hatch perimeter. Check for staining around the hatch frame — a common air-leakage point.
- Electrical fixtures. Recessed lights penetrating the ceiling are frequent air-leakage paths. Look for discolouration of insulation around them.
Document everything:
- Photograph each stained area with a reference object for scale.
- Note the location relative to roof features: “stain is 60 cm north of the chimney base” is far more useful than “near the chimney.”
- Record the approximate roof age and any recent storm events.
Pro Tip: A simple hygrometer (under $30 at most hardware stores) placed in the attic for 24 hours gives you a humidity reading to share with your contractor. Elevated attic relative humidity over extended periods confirms a moisture management problem, not just a one-time leak.
When to call a professional and what a proper assessment includes
If your inspection turns up localized staining, damaged flashing, or any active moisture, a certified roofing contractor is the right first call. If you find widespread mould covering a large area, or if anyone in the home is experiencing respiratory symptoms, an indoor environmental specialist or certified mould assessor should be involved alongside the roofer.
A thorough professional assessment for North Vancouver attic mould should include:
- Roof exterior inspection: flashing at all penetrations (chimney, skylights, plumbing vents), valley condition, shingle integrity, eave and gutter condition, and moss coverage.
- Moisture meter readings on sheathing and framing. CMHC identifies moisture meters and infrared scans as standard tools for distinguishing active leaks from historic damage.
- Infrared thermal scan of the ceiling below, which can reveal hidden wet areas and air-leakage paths invisible to the naked eye.
- Ductwork check: confirm all bathroom, kitchen, and dryer fan ducts terminate outdoors.
- Visible mould assessment: extent, location, and whether lab testing is warranted. Health Canada recommends specialist remediation when visible mould covers a large area.
The contractor should deliver a written scope of repairs, moisture readings with locations noted, photos, a remediation plan, and a timeline with a cost estimate. If you receive a quote with none of those elements, ask for them before signing anything.
The correct order of repairs when attic mould meets roof failure
Cleaning mould before fixing the moisture source is money wasted. The mould will return within weeks. CMHC is clear: fix the source first, dry the space, then remediate.
- Stop the moisture source. Repair flashing, replace failed vent boots, fix valley leaks, re-route fan ducts to the exterior, and seal ceiling air-leakage points (recessed lights, plumbing stacks, attic hatch perimeter). This step is non-negotiable.
- Dry and dehumidify. Allow the attic to dry naturally with restored ventilation, or use a dehumidifier for faster results. Do not proceed until moisture readings confirm the wood is dry.
- Remove and replace contaminated materials. Wet or mould-saturated insulation must come out. Sheathing with deep mould penetration may need replacement rather than surface treatment.
- Clean and treat surfaces. Visible mould on structurally sound sheathing can be cleaned and treated by a qualified remediation contractor. For areas under 3 m², Health Canada guidance allows careful DIY cleaning with appropriate PPE; larger areas warrant a professional.
- Verify and re-inspect. A follow-up moisture reading and visual check confirms the repair held. This step is what separates a lasting fix from a temporary patch.
Common North Vancouver repair tasks in this sequence include flashing replacement at chimneys and skylights, valley repairs, soffit repair and intake restoration, fan duct re-routing, and attic air-sealing at ceiling penetrations. For roof leak detection and repair, getting the source confirmed before remediation begins saves significant cost.
Pro Tip: Lab mould testing is rarely needed unless hidden mould is suspected behind finished surfaces, or a tenant or occupant has a documented health condition. Health Canada notes that air sampling is usually unnecessary when visible mould is present and the source is known.
Practical steps to prevent attic mould from coming back
Prevention in North Vancouver is not about adding more vents. BC Housing is direct: ventilation alone does not solve condensation in well-insulated homes, and over-ventilating in a maritime climate can actually increase moisture problems. Air-sealing comes first.
Priority order:
- Seal ceiling penetrations. Recessed lights, plumbing stacks, wiring holes, and the attic hatch perimeter are the biggest air-leakage paths. Use spray foam or rigid foam board with acoustic sealant.
- Confirm all fans vent outdoors. Bathroom, kitchen, and dryer exhaust must terminate through the soffit or roof cap with a proper damper, not just into the attic space.
- Restore continuous soffit intake. Clear blocked soffit vents and install baffles to keep insulation from covering the eave openings. Pair with ridge or box venting where appropriate.
Ongoing maintenance checklist:
- Clean gutters twice a year (spring and fall) to prevent overflow and eave saturation.
- Apply moss treatment on north-facing slopes every two to three years. Moss lifts shingles and blocks drainage at the eaves.
- Inspect flashing at chimneys, skylights, and valleys after major wind or rain events.
- Schedule a professional roof inspection every three to five years, or after any significant storm.
Pro Tip: After a freeze-thaw event in January or February, check the attic hatch seal. Temperature cycling causes caulking to crack and hatch covers to warp, opening new air-leakage paths right when outdoor conditions are most likely to cause condensation.
What makes North Vancouver different from the rest of Canada
The CMHC attic moisture simulation research for Vancouver’s west coast maritime climate found something counterintuitive: increasing ventilation above the standard code ratio actually raised sheathing moisture content and increased the frequency of condensation periods throughout the year. In drier prairie climates, more venting helps. On the North Shore, it can hurt.
NRCan adds that electric attic exhaust fans are generally a bad idea because they create negative pressure and draw moist living-space air upward into the attic, worsening the condensation problem they were meant to solve.
Local failure modes worth knowing:
- Moss and debris blocking soffits. North-facing roofs in North Vancouver accumulate moss quickly. When it bridges the soffit vents, passive intake stops entirely.
- Wind-driven rain damaging flashing. Fall and winter storms push water horizontally under step flashing and around chimney caps. Flashing that performs fine in summer fails in November.
- Fan ducts terminating inside the attic. This is still common in homes built before the mid-1990s and even in some later renovations where the duct was shortened for convenience.
- Radiation cooling. On clear nights, attic sheathing can drop below the ambient outdoor air temperature, producing condensation even in a vented attic. This explains why some North Shore homes develop mould despite adequate ventilation ratios.
For attic insulation and ventilation in Vancouver’s climate, the balance between air-sealing and ventilation is more nuanced than most online guides suggest.
Key takeaways
Attic mould in North Vancouver is most often a moisture management failure, not a roof failure — but a roof leak can trigger or worsen it, and the correct fix always starts with identifying and stopping the moisture source before any remediation begins.
| Point | Details |
|---|---|
| Diagnose before you remediate | Identify whether mould is from a roof leak (localized) or condensation (widespread) before spending on cleanup. |
| Air-sealing beats added venting | BC Housing confirms that sealing ceiling penetrations is more effective than adding vents in North Vancouver’s maritime climate. |
| Fix the source first | CMHC is clear: mould returns if the moisture source is not repaired before remediation begins. |
| Fan ducts are a common culprit | Bathroom and kitchen fans ducted into the attic rather than outdoors are a frequent, fixable cause of attic mould. |
| Paragonroofingbc for local inspection | Paragonroofingbc provides roof leak detection, flashing repair, and post-repair verification for North Vancouver homeowners and property managers. |
A roofer’s perspective on North Vancouver attic mould
The job that sticks with me most from the North Shore was a Lynn Valley home where the owner had already paid for mould remediation twice. The remediation company did solid work both times. The mould came back within a year each time. When we got on the roof, the step flashing at the chimney had separated at the top course, and there was a bathroom fan duct that had been disconnected from its cap and was blowing directly into the attic. Neither issue was obvious from inside the house.
What I keep telling homeowners is this: the mould is a symptom, not the problem. Treating the symptom without finding the source is like mopping the floor while the tap is still running. The two questions that matter are where the moisture is coming from and whether it is exterior or interior. Everything else follows from the answer to those two questions.
Before your contractor arrives, document what you can see. A photo of the stained sheathing with the chimney visible in the same frame tells a roofer more than a verbal description ever will. Note when you first noticed it, whether it got worse after a specific storm, and whether your bathroom fans have always been noisy or recently started sounding different. That context shapes the inspection and often cuts the diagnostic time in half.
Paragonroofingbc can help with North Vancouver attic mould and roof repairs
When attic mould in North Vancouver traces back to a roof problem, the repair needs to start on the roof, not in the attic. Paragonroofingbc handles the full sequence: roof leak detection and repair, flashing replacement at chimneys and skylights, soffit and eave vent restoration, moss control, attic air-sealing, and post-repair verification to confirm the moisture source is gone.

Property managers and homeowners can speed up the quoting process significantly by sending photos of the attic staining, the approximate roof age, and a note on any recent storms before the call. That information lets the team arrive with the right materials and a focused inspection plan rather than starting from scratch on site.
To book a roof inspection or get a written repair scope for your North Vancouver property, visit Paragonroofingbc’s residential roofing services page or reach out directly. The inspection includes moisture readings, exterior roof assessment, and a written report with photos.
Useful sources for North Vancouver homeowners
These are the primary Canadian references used throughout this article. All are publicly available and free to access.
- CMHC — Mould in Housing: Guidance on attic mould causes, repair sequencing, and when to replace shingles and flashings.
- BC Housing — Attic Ventilation and Moisture: Explains why ventilation-only fixes often fail in BC’s maritime climate and why air-sealing is the priority.
- Natural Resources Canada — Keeping the Heat In, Chapter 5: Covers roof and attic moisture inspection, ice dams, and the risks of electric attic exhaust fans.
- Health Canada — Residential Indoor Air Quality Guideline: Moulds: Health risks of mould exposure and when air testing is warranted.
- Health Canada — Addressing Moisture and Mould in Your Home: Remediation scope guidance, including the 3 m² threshold for professional remediation.
When visible mould covers a large area, when it is hidden behind finished surfaces, or when occupants have respiratory symptoms, an indoor environmental specialist or certified industrial hygienist should assess the space before remediation begins. Lab testing of air samples is generally not needed when the source and extent of visible mould are already known.
FAQ
Does home insurance cover attic mould from a roof leak?
In Canada, home insurance typically covers sudden and accidental water damage, including mould that results from an unexpected roof leak. Gradual leaks or maintenance failures are usually excluded, so reporting damage promptly and documenting the cause matters.
How serious is mould in an attic?
Attic mould poses real health risks, particularly for people with asthma, allergies, or compromised immune systems. Health Canada links indoor dampness and mould to asthma exacerbation and other respiratory effects, and structural damage worsens the longer the moisture source goes unaddressed.
Can a leaking roof cause black mould in the attic?
Yes. A roof leak that introduces sustained moisture creates exactly the conditions black mould needs to grow. The staining from a leak is usually localized beneath the penetration or flashing failure, which distinguishes it from the widespread speckling typical of condensation-driven mould.
Why does attic mould keep coming back after remediation?
Mould returns when the moisture source was not fully resolved before cleanup. CMHC guidance is explicit: the correct sequence is fix the source, dry the space, then remediate. Skipping or rushing the first two steps guarantees recurrence.
What does attic mould from a roof failure look like?
Roof-failure mould typically appears as a dark stain concentrated in one area, directly beneath a roof penetration, valley, or flashing failure. Widespread black speckling across most of the sheathing, combined with rusty nail tips, points to condensation rather than a localized leak.
Recommended
Our Roofing Blog


Have more questions about roofing?
Check out our FAQs or give us a call today to speak to an expert roofer in Vancouver Lower Mainland, BC. We're here to help our neighbours make educated decisions about their roof. For our team, we value helping clients save money while making their roofs last.
