
Preventative roofing process: extend your roof's life
Preventative roofing process: extend your roof’s life

TL;DR:
- A preventative roofing process involves scheduled inspections, maintenance, and repairs to prolong roof lifespan and prevent costly damages. In Metro Vancouver’s wet climate, regular focus on drainage, flashings, and membrane conditions, combined with timely storm assessments, ensures reliable roof performance. Proper documentation and budgeting are essential for effective asset management and insurance support.
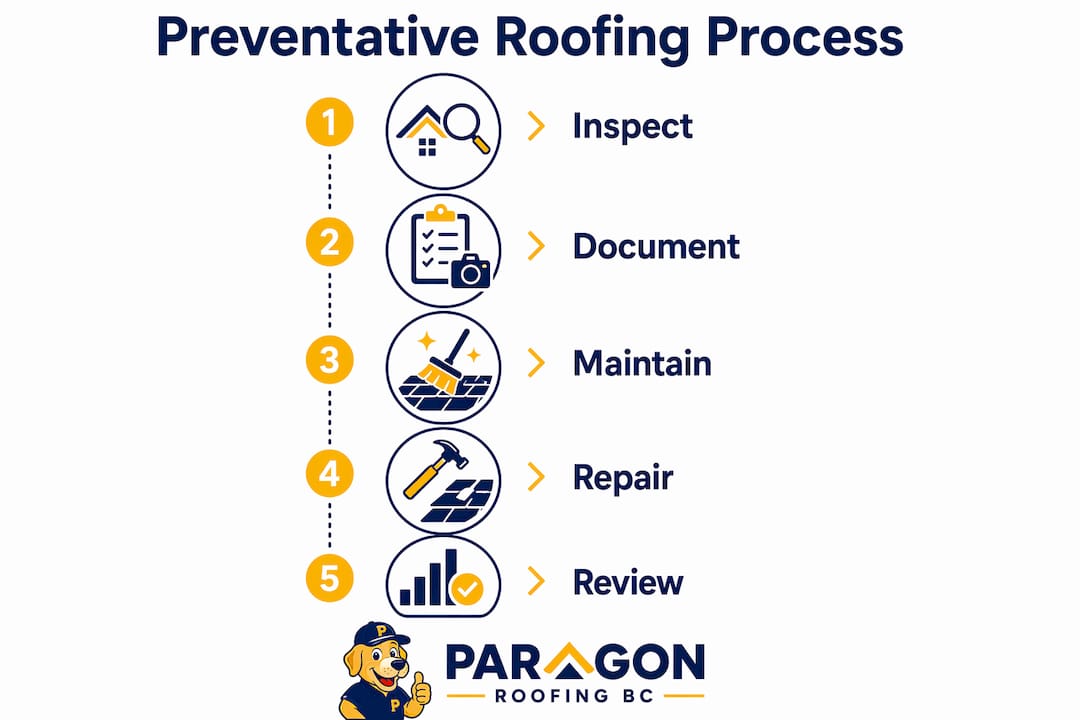
A preventative roofing process is a structured cycle of scheduled inspections, targeted maintenance, and timely repairs designed to keep your roof performing at full capacity and extend its service life well beyond the industry average. For property owners and facility managers in Metro Vancouver, this is not optional upkeep. It is the difference between a roof that lasts 25 years and one that fails at 14. The Lower Mainland’s combination of heavy rainfall, freeze-thaw cycles, coastal moisture, and occasional snow load creates conditions that punish neglected roofs fast. A systematic approach to roof upkeep, often called preventive maintenance in formal building management contexts, catches small problems before they become full-on waterfalls through your ceiling. This guide walks you through every stage of that process, from inspection tools to seasonal timing to post-storm response.
What are the key steps in a preventative roofing process?
The preventative roofing process starts with the right tools and a clear protocol before anyone sets foot on the roof. Skipping this preparation is like sending someone to diagnose an engine without a diagnostic scanner. You will miss what matters most.
Essential inspection tools and equipment
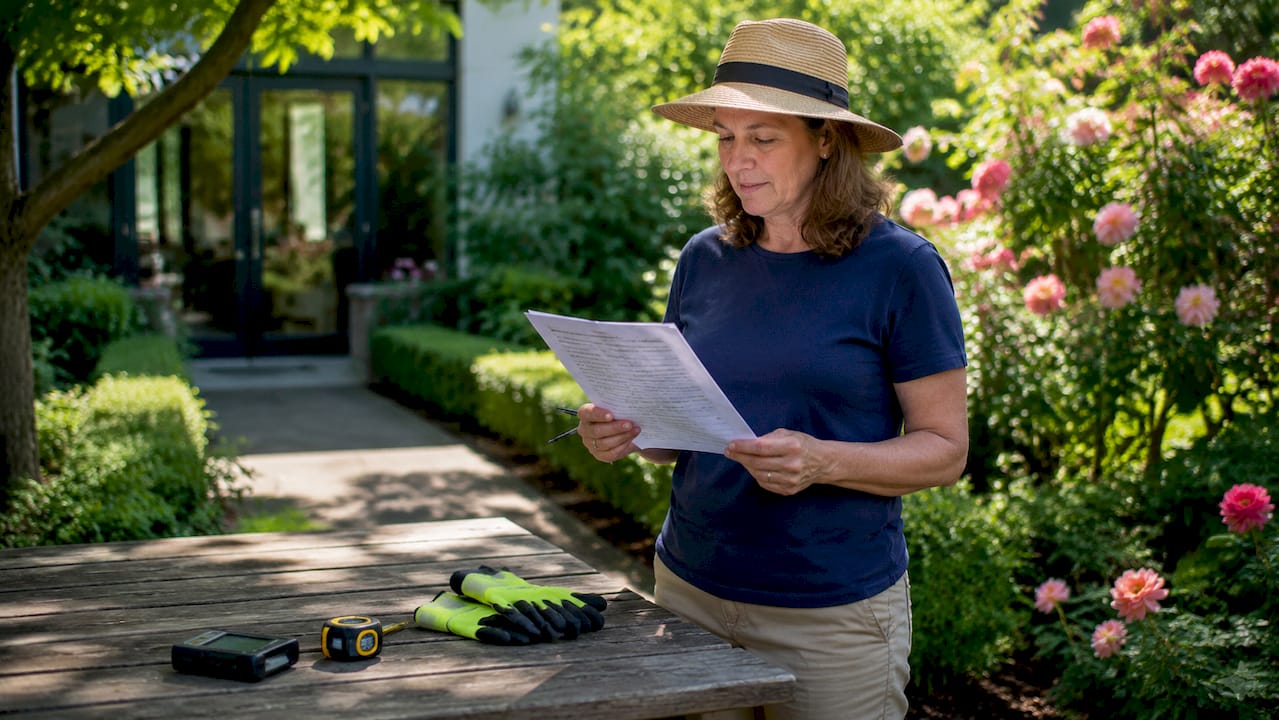
A thorough preventive roof inspection requires more than a ladder and a good eye. Here is what a proper inspection kit looks like for Metro Vancouver conditions:
- Moisture metre: Detects trapped moisture beneath membranes and insulation layers before it causes rot or mould. This is non-negotiable on flat and low-slope roofs common in Vancouver commercial buildings.
- Infrared camera: Infrared moisture surveys detect hidden trapped moisture beneath membranes that is invisible to the naked eye, allowing proactive repairs before leaks occur. On a wet Coast, this tool pays for itself on the first inspection.
- Drone or binoculars: For initial ground-level assessment of steep-slope residential roofs. Reduces unnecessary foot traffic that can damage membranes.
- Sealant probe and caulking gun: For on-the-spot minor repairs to flashing and penetration seals during the inspection.
- Camera with date-stamp: Documents current condition for warranty compliance, insurance purposes, and contractor accountability.
Documentation and record-keeping
Every inspection must generate a written record. This means noting the date, weather conditions, inspector name, areas examined, deficiencies found, and repairs completed. Detailed documentation supports insurance claims, warranty compliance, and data-driven maintenance planning. A simple spreadsheet or a dedicated property management platform works well. The goal is a running history of your roof’s condition so you can spot patterns, like a flashing that keeps failing every two years, and address the root cause.
Pro Tip: Photograph every deficiency with a tape measure in frame for scale. When you call a contractor six months later, those photos eliminate guesswork and speed up quoting.
| Inspection tool | Primary purpose |
|---|---|
| Moisture metre | Detects subsurface water infiltration |
| Infrared camera | Identifies hidden moisture beneath membranes |
| Date-stamped camera | Creates defensible inspection records |
| Sealant probe | Tests flashing and seal integrity on-site |
Safety protocols for BC weather conditions
Never inspect a roof alone in wet or icy conditions. Metro Vancouver roofs are wet for a large part of the year, and a slip on a low-slope membrane is a serious injury risk. Use non-slip footwear, a roof anchor and harness on any pitch above 4:12, and always check the forecast before scheduling an inspection. The commercial roofing safety guide for Vancouver projects covers the specific fall-protection requirements for BC worksites.
How does seasonality affect roof inspections in Metro Vancouver?
Metro Vancouver’s climate runs on a predictable cycle, and your inspection schedule should match it. Commercial roofs require at least two annual inspections, typically in spring and fall, plus additional checks after major storms and any rooftop work by non-roofing trades.
Here is how to structure those inspections around local conditions:
-
Spring inspection (March to April): This is your post-winter damage assessment. Look for membrane blistering or cracking from freeze-thaw cycles, ice dam residue along eaves and valleys, any displacement from snow load, and debris accumulation in drains and gutters. The freeze-thaw cycle in the Fraser Valley and higher-elevation properties in North Vancouver and Coquitlam is particularly aggressive on flashing seals.
-
Fall inspection (September to October): This is your pre-winter readiness check. Clear all drainage points, reseal any flashing that showed movement over summer, check penetrations around HVAC units and skylights, and confirm that the membrane surface is free of standing water after a test rain. Getting this done before November means you are not scrambling during the first major storm.
-
Post-storm inspection: After any significant weather event, a targeted check is warranted. Seasonal inspections aligned with Metro Vancouver’s weather cycles maximise early detection of winter damage and improve roof readiness for wet seasons.
-
Post-trade inspection: Any time a plumber, HVAC technician, or electrician works on your roof, schedule a follow-up inspection. Trades who are not roofers regularly damage membranes and flashings without realising it.
-
Annual interior check: Inspect the attic or ceiling space below the roof deck for staining, mould, or daylight penetration. Interior signs often appear before exterior damage is visible.
Pro Tip: Book your fall inspection in late September, not November. By the time the heavy rains arrive in Metro Vancouver, you want all repairs completed and cured, not scheduled.
Which roof components need the most attention during maintenance?
Not all parts of a roof wear at the same rate. In Metro Vancouver’s wet climate, three areas fail first and most often: drainage systems, flashings, and membrane surfaces. Understanding why each one matters helps you prioritise your maintenance budget.
Drainage systems: gutters, scuppers, and downspouts
Drainage system blockages cause water pooling, which accelerates membrane deterioration. Standing water after rain is a clear sign of deficient drainage requiring immediate attention. On flat commercial roofs in Vancouver, a blocked scupper can hold hundreds of litres of water, adding structural load and saturating insulation. Clean all gutters, scuppers, and downspouts at minimum twice per year. In areas with heavy tree cover, such as properties near Pacific Spirit Park or along the North Shore, quarterly cleaning is more realistic.
Flashings and penetrations
Flashings are the most failure-prone roof component. Separation, cracking, and deteriorated sealant at flashings account for the majority of leak calls we receive. Every penetration through the roof deck, whether a vent pipe, skylight curb, or HVAC unit, is a potential entry point for water. Regular resealing and repair of flashing vulnerabilities extends roof service life significantly. Check the sealant condition at every penetration during each inspection and replace any sealant that is cracking, pulling away, or has lost its bond.
Surface care and membrane condition
Debris left on a roof is not just unsightly. Wet leaves and organic matter hold moisture against the membrane surface, accelerating breakdown. Overhanging branches drop debris constantly and can physically puncture membranes during windstorms. Trim any branches within two metres of the roof surface. For TPO, EPDM, and modified bitumen membranes common on Metro Vancouver commercial buildings, check for blistering, splitting at seams, and any areas where the membrane has lifted from the substrate.
| Component | Common failure mode | Maintenance action |
|---|---|---|
| Gutters and scuppers | Blockage causing ponding | Clean twice yearly, quarterly near trees |
| Flashings | Sealant cracking, separation | Reseal at every inspection |
| Membrane surface | Blistering, seam splitting | Annual surface check, debris removal |
| Penetrations | Water ingress around curbs | Inspect and reseal all penetrations |
How should facility managers document and budget for roof maintenance?
Preventative maintenance costs less than 3% annually compared to full replacement costs. That is a compelling number. A roof that costs $80,000 to replace should have a maintenance reserve of roughly $800 to $2,000 per year. Deferred maintenance, skipping that annual spend, leads to accelerated deterioration and a replacement bill that arrives years ahead of schedule.
Here is a practical budgeting and documentation framework for facility managers:
-
Establish a maintenance reserve: Recommended budgets range from $0.10 to $0.25 per square foot annually, increasing as the roof ages. A 10-year-old roof needs more reserve than a 2-year-old one. Build this into your annual operating budget as a fixed line item, not a discretionary expense.
-
Create a roof asset register: Record the roof installation date, material type, warranty terms, and contractor details. This register becomes your reference point for every future decision, from scheduling inspections to evaluating repair versus replacement.
-
Log every repair with cost and scope: A running repair log reveals patterns. If you are spending $1,500 per year patching the same flashing, a $400 permanent repair is the smarter call. The roof maintenance checklist designed for Surrey property managers is a good starting template for this kind of structured record-keeping.
-
Hold contractors accountable with written scope: Every repair should have a written work order specifying the area, materials used, and warranty on the repair. Verbal agreements create disputes. Written records protect you.
-
Review the programme annually: At the end of each year, compare planned maintenance against actual spend and condition changes. Adjust your reserve and schedule accordingly.
Pro Tip: Attach your roof asset register to your building’s insurance file. When a claim arises, documented maintenance history is your strongest evidence that the damage was storm-related, not the result of neglect.
What should you do after a major storm damages your roof?
After a significant storm, the instinct is to get up on the roof immediately. Resist that. Avoid climbing wet or damaged roofs for safety reasons. A safe post-storm evaluation starts from the ground.
Follow this sequence:
- Ground-level visual check first: Walk the perimeter and look for displaced shingles, debris on the roof surface, damaged fascia, or granule accumulation in gutters. Binoculars help on taller buildings.
- Document everything before touching anything: Take date-stamped photos and video from ground level. Visible ground-level inspections miss subtle damage like seal loss or hail impacts, but your documentation establishes the timeline for an insurance claim.
- Know the trigger thresholds: After hail larger than 1 inch, winds above 55 mph, or heavy snow exceeding design loads, an inspection within 48 hours is recommended. Insurance policies often have strict reporting windows of 30 to 60 days, so speed matters.
- Call a qualified roofer for the physical inspection: A trained professional will identify hail spatter marks, membrane punctures, and flashing displacement that a property manager walking the roof would miss.
A storm inspection is not just about finding damage. It is about creating a defensible record of when that damage occurred and what caused it. That record is what gets your claim approved.
Key takeaways
A structured preventative roofing process, applied consistently across seasonal inspections, drainage maintenance, flashing care, and post-storm response, is the single most cost-effective way to extend your roof’s service life in Metro Vancouver’s demanding climate.
| Point | Details |
|---|---|
| Schedule two inspections per year | Spring and fall inspections catch the damage most likely to cause leaks in BC’s climate. |
| Prioritise flashings and drainage | These two components fail most often and are the most cost-effective to maintain proactively. |
| Budget $0.10 to $0.25 per square foot | Annual maintenance reserves prevent deferred repair cycles that accelerate premature replacement. |
| Document every inspection and repair | Written records support insurance claims, warranty compliance, and smarter contractor management. |
| Respond to storms within 48 hours | Post-storm inspections within the insurance reporting window protect your claim and your roof. |
What I have learned from years of roofing in BC’s climate
Hey, it’s Harman here. After years of inspecting and maintaining roofs across Metro Vancouver, Burnaby, Coquitlam, and the North Shore, the pattern I see most often is not dramatic storm damage. It is slow, quiet neglect. A flashing that was resealed poorly three years ago. A scupper that has been partially blocked since the last tenant moved out. A membrane seam that started lifting and nobody noticed because the last inspection was four years ago.
The property owners who get the most life out of their roofs are not the ones with the most expensive materials. They are the ones with a consistent schedule and a contractor they trust to tell them the truth. I have seen $15,000 flat roofs last 30 years because someone cleaned the drains every spring and caught the small stuff early. I have also seen premium installations fail at 12 years because nobody looked at them after the warranty card was filed.
One thing I would push back on: the idea that a facility manager can handle preventive inspections without professional support. You can absolutely do the ground-level checks, the gutter cleaning, and the interior moisture scans yourself. But the detailed membrane assessment, the flashing probe, the infrared survey. those need a trained eye. The aging roof maintenance guide for Coquitlam properties covers this distinction well. Know what you can manage in-house and know when to call someone who does this every day.
— Harman
How Paragonroofingbc supports your preventative roofing programme
If you are ready to put a real maintenance schedule in place, Paragonroofingbc works with property owners and facility managers across Metro Vancouver to deliver structured inspection programmes, detailed written reports, and seasonal maintenance services tailored to BC’s climate. Whether you need a roof inspection in Burnaby or a full maintenance plan for a multi-unit residential building, the team brings the tools, the documentation, and the local knowledge to back it up.

From post-storm assessments to annual preventive checks, Paragonroofingbc handles the full cycle so you are never caught off guard by a repair bill that should have been a maintenance call. If your roof is approaching the 10-year mark or has not had a professional inspection in the last 18 months, now is the right time to act. Reach out through the website to book your inspection or ask about roof installation in Vancouver if your current roof is past the point of maintenance.
FAQ
What is a preventative roofing process?
A preventative roofing process is a scheduled programme of inspections, maintenance tasks, and minor repairs designed to identify and address roof deficiencies before they cause leaks or structural damage. It typically includes spring and fall inspections, drainage cleaning, flashing resealing, and post-storm assessments.
How often should a commercial roof be inspected in Metro Vancouver?
Commercial roofs in Metro Vancouver should receive at least two professional inspections per year, in spring and fall, plus additional inspections after major storms or any rooftop trade work. BC’s heavy rainfall and freeze-thaw cycles make this frequency the minimum, not the ideal.
What does a preventive roof inspection cover?
A thorough preventive roof inspection covers membrane condition, flashing integrity, drainage system function, penetration seals, roof slope and ponding risk, and the interior attic or ceiling space below the deck. Infrared moisture surveys add a deeper layer of detection for hidden water infiltration.
How much should I budget for annual roof maintenance?
Budget between $0.10 and $0.25 per square foot annually for roof maintenance reserves, increasing that figure as the roof ages. This range covers routine inspections, minor repairs, and drainage maintenance without deferring work that leads to premature replacement.
When should I call a professional roofer after a storm?
Call a professional roofer within 48 hours of any storm involving hail larger than 1 inch, winds above 55 mph, or snow loads exceeding your roof’s design capacity. Insurance policies typically require damage reporting within 30 to 60 days, so prompt professional documentation protects your claim.
Recommended
Our Roofing Blog

Have more questions about roofing?
Check out our FAQs or give us a call today to speak to an expert roofer in Vancouver Lower Mainland, BC. We're here to help our neighbours make educated decisions about their roof. For our team, we value helping clients save money while making their roofs last.
