
Delta scupper leaks: diagnosis and repair for property managers
Delta scupper leaks: diagnosis and repair for property managers

A leaking scupper on a Delta, BC flat roof is almost always caused by one of three things: a blocked or undersized scupper throat, a failed membrane termination at the scupper flange, or a corroded scupper sleeve that has shifted away from the parapet wall. The immediate next step is a focused roof-edge inspection combined with a short controlled water test to confirm exactly where water is entering before you spend anything on repairs.
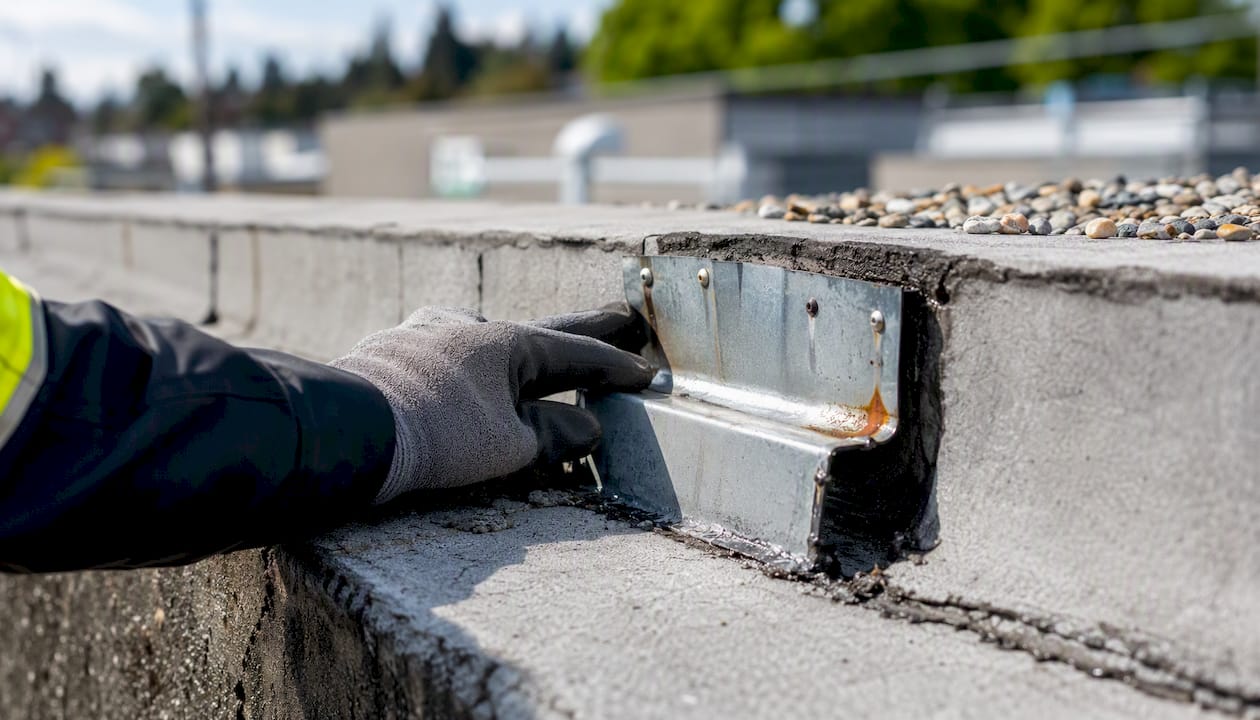
Clear any visible debris from the scupper opening first, if it is safe to do so from roof level. Then take photos of every interior stain, ceiling tile, and wall mark you can see from inside. Those stain patterns are your map. Inspecting drains every 90 days is a widely recommended minimum cadence for flat roofs in climates with heavy rainfall and freeze-thaw cycles, and Delta’s coastal weather makes that schedule worth taking seriously.
Do this now:
- Secure the area below any active drip or stain inside the building
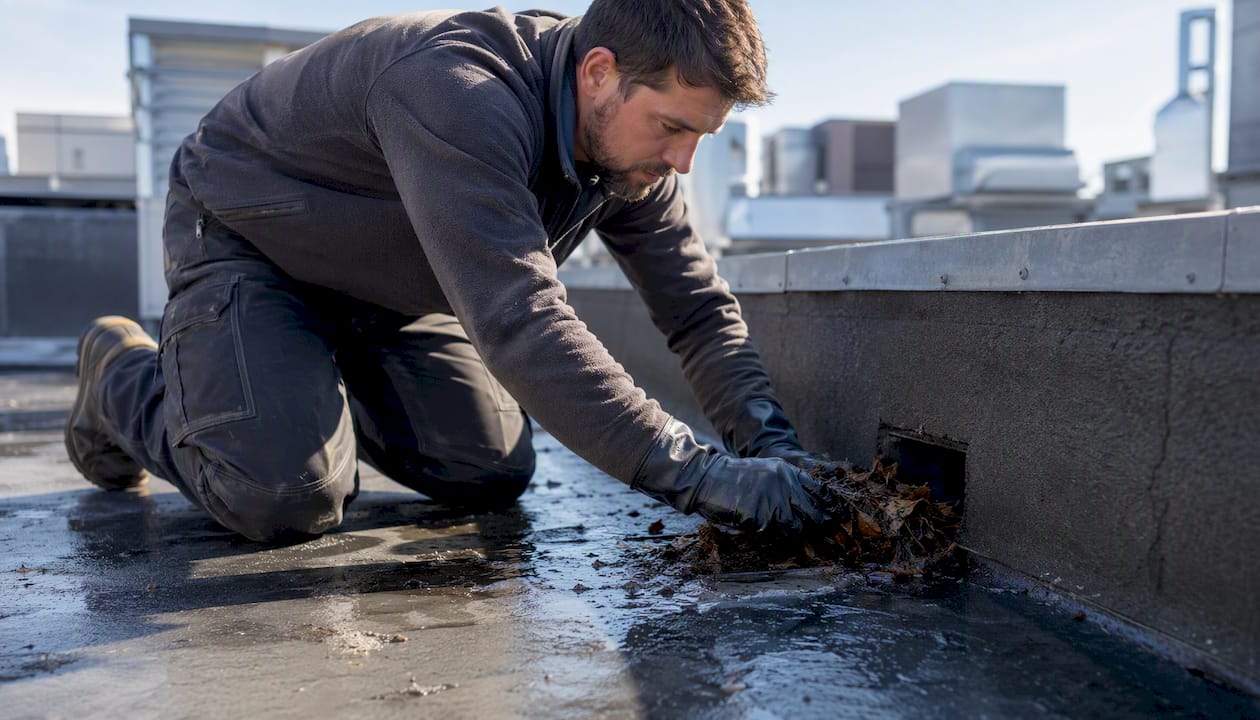
- Clear leaves and debris from the scupper throat if you can reach it safely from roof level
- Photograph ceiling stains, wall discolouration, and the scupper opening from both the roof face and the exterior wall
- Note when the leak appears (heavy rain only, constant drip, or after a freeze-thaw event)
- Contact Paragonroofingbc or a qualified roofer to run a controlled water test and confirm the source before patching
Building codes require overflow scuppers or secondary drains wherever primary drainage exists, as outlined in drainage and overflow requirements. If your building lacks overflow scuppers, that gap alone can turn a minor blockage into a full interior flood.
Table of Contents
- Why do delta scuppers leak? Root causes explained
- How to inspect and diagnose a scupper leak step by step
- Repair options: temporary patches versus permanent fixes
- Routine maintenance to prevent scupper leaks from recurring
- When should you call a professional roofer?
- Delta, BC specific factors you need to know
- Paragonroofingbc can fix your Delta scupper leak properly
- Sources
- FAQ
Why do delta scuppers leak? Root causes explained
Understanding which cause matches your situation saves you from patching the wrong thing twice. Here are the most common culprits, and the leak pattern each one produces.
- Clogged scupper or conductor head. Leaves, grit, and debris accumulate at the scupper opening and inside the conductor head below it. Water backs up, ponds against the parapet, and eventually forces its way through any weak point in the membrane or flashing. This typically shows up as leaks during or immediately after heavy rain.
- Membrane termination failure at the scupper flange. The roofing membrane must wrap into and bond with the scupper sleeve. When that termination lifts, separates, or was never properly adhered, water travels under the membrane and into the wall cavity. You may see staining well away from the scupper itself because water travels horizontally in the assembly before it drops.
- Corroded or thinned scupper sleeve. Galvanised steel scupper sleeves in older Delta buildings corrode from the inside out. Pinhole rust leaks are easy to miss until the sleeve fails completely. Scupper sleeves and their flashing integration are critical waterproofing elements; once corrosion compromises the sleeve, replacement and re-flashing are the correct course, not surface sealing.
- Raised dam from previous patching. Every layer of sealant or peel-and-stick patch applied over the scupper throat raises the effective dam height slightly. Eventually water pools behind that raised edge and finds a new path through the wall.
- Undersized scupper or blocked conductor head. A scupper sized for a smaller roof area, or a conductor head choked with debris, creates chronic ponding at the parapet. Overflow scuppers are required where primary drains exist precisely because undersized primary drainage is a known failure mode.
- Ponding and insufficient slope. If the roof deck does not drain toward the scupper, water sits against the parapet wall for days after a storm. That sustained hydrostatic pressure accelerates membrane and flashing failure even when the scupper itself is clear.
A leaking scupper is often a symptom rather than the root cause. Experts note that undersized drains and ponding elsewhere on the deck are frequently the real driver, and sealing the scupper throat without fixing drainage capacity just moves the problem.
Pro Tip: Look for rust staining on the exterior wall below the scupper and for multiple layers of old sealant around the throat. Either sign tells you the scupper sleeve is the symptom of a longer-running problem, not a one-time fix.
How to inspect and diagnose a scupper leak step by step
A methodical inspection takes less than an hour and saves you from guessing. Work through this sequence before committing to any repair.
Pre-inspection safety and photo documentation
Never step onto a wet flat roof without fall restraint. In Delta, roofs stay wet for days after a storm, and parapet edges are slip hazards. Photograph interior stains before you go up, noting the location relative to exterior walls and scupper positions. That interior map tells you which scupper zone to test first.
On-roof inspection checklist
- Clear the scupper throat and conductor head of all debris. Note how much debris was present and whether the conductor head was fully blocked.
- Inspect the membrane termination at the scupper flange. Press the membrane edge with your fingers. Any lift, bubbling, or separation is a confirmed failure point.
- Check for lifted laps and fastener back-out in the membrane within 600 mm of the scupper on all sides.
- Probe the scupper sleeve with a screwdriver tip. Soft spots or flaking metal indicate corrosion.
- Look at the exterior wall face below the scupper for rust streaks, efflorescence, or paint bubbling.
- Check the conductor head connection at the top of the downspout for gaps or missing sealant.
Controlled water test (zoned approach)
A commercial scupper leak detection workflow starts by mapping interior stains, then uses controlled water tests zone by zone to pinpoint the breach. Run each zone for 10–15 minutes while a second person watches inside.
- Zone 1: Run water directly into the scupper throat and conductor head. An immediate interior drip confirms the sleeve or conductor head connection.
- Zone 2: Run water along the membrane termination at the scupper flange and the immediate perimeter. A delayed interior stain (appearing 5–10 minutes in) points to water travelling under the membrane.
- Zone 3: Run water upslope of the scupper across any seams or laps. A stain that appears only in this zone indicates a membrane lap failure unrelated to the scupper itself.
Interpreting results
Immediate leaking during Zone 1 implicates the sleeve or conductor head. Delayed staining during Zone 2 points to membrane termination failure. Staining that only appears during Zone 3 means the scupper is not the primary entry point at all, and the repair scope shifts to the membrane field. Flat roof drainage repairs and inspections confirm that clogged drains and freeze-thaw cycling can loosen connections and cause leaks that mimic other failure modes, so ruling out blockage first avoids misdiagnosis.
Safety note: If the roof is higher than one storey or lacks a safe parapet to work against, hire a professional to run the water test. Working at height without fall restraint is not worth the risk.
Repair options: temporary patches versus permanent fixes
Match the repair to the confirmed cause. Sealing the throat when the real problem is ponding or an undersized scupper just delays the next call.
Temporary emergency measures
These buy time while you arrange a proper repair. Expect 3–12 months of service life at best.
- Lap sealant or urethane caulk applied to a clean, dry scupper throat seals minor gaps temporarily. It will not hold if the sleeve is corroded or the membrane is lifting.
- Peel-and-stick flashing tape over a lifted membrane termination can stop active water entry for one season, provided the surface is primed and dry.
- Hydraulic cement on the interior wall face stops active seepage while you wait for dry weather to do the roof-side repair.
None of these are permanent. Patching without repairing the flashing or replacing a corroded sleeve leads to repeat leaks; most scupper failures recur at the membrane-to-metal termination when only the surface is addressed.
Long-term and permanent repairs
| Repair type | Best suited for | Expected durability |
|---|---|---|
| Membrane termination restoration | Lifted or unbonded membrane at flange | 10 years with compatible membrane |
| Scupper sleeve removal and replacement | Corroded, thinned, or shifted sleeve | 15 years with stainless or copper sleeve |
| Full re-flashing with prefabricated scupper | Failed flashing, raised dam from old patches | 15 years |
| Tapered insulation and drainage upgrade | Chronic ponding, undersized scupper | Life of roof system |
| Overflow scupper addition | Missing secondary drainage | Permanent code compliance |
A lifted membrane at a scupper is one of the most common entry points for flat roof leaks; removing the failing section and installing heat-welded or fully adhered laps at the scupper is the repair that stops recurrence. For flat roof drainage upgrades in the Metro Vancouver area, including converting to larger scuppers or adding tapered insulation, the scope typically requires a roofer with flat-roof membrane experience.
Roof coatings are acceptable as a maintenance layer over an intact membrane, but they are not a substitute for re-flashing a failed termination. Applying a coating over a corroded sleeve or a lifted lap traps moisture and accelerates the failure underneath.
Routine maintenance to prevent scupper leaks from recurring
Staying ahead of blockages and seasonal stress is far cheaper than emergency repairs. Here is a practical schedule for Delta properties.
| Inspection type | Frequency | Trigger events |
|---|---|---|
| Visual debris check | After every major storm | Any heavy rainfall |
| Formal scupper and drain inspection | Every 90 days minimum | After freeze-thaw events or rapid melt |
| Full clearing and membrane check | Twice yearly (spring and autumn) | After hail, windstorm, or heavy grit fall |
This cadence aligns with guidance for flat roof drain and scupper maintenance, which recommends a 90-day minimum inspection interval with immediate clearing after severe events.
Seasonal actions
- Autumn: Clear leaves and organic debris before the November rain season begins. Delta’s proximity to the Fraser River means cottonwood fluff and leaf debris accumulate quickly in scupper throats.
- Winter: Monitor for ice plugging at the scupper throat during freeze-thaw cycles. Delta sits in a coastal microclimate where temperatures can swing above and below freezing within 24 hours, especially during Chinook-like rapid warming events off the Strait of Georgia.
- Spring: Inspect for hail damage, grit accumulation, and any membrane movement caused by winter thermal cycling.
Preventive hardware worth installing
- Scupper strainers or leaf guards at the throat reduce debris entry without restricting flow significantly.
- Easy-access conductor heads with removable cleanout covers make quarterly clearing a five-minute job instead of a ladder operation.
- Overflow scuppers set 50 mm above the primary scupper provide a code-compliant safety release if the primary drain blocks.
- Removable plugs on interior drain systems allow annual flood testing without permanent modification.
Pro Tip: Avoid heat tape on scupper throats unless the tape is specifically rated for roofing applications and the manufacturer approves it for your membrane type. Unapproved heat tape voids membrane warranties and can cause localized overheating that accelerates membrane degradation.
For a broader look at managing rainwater on Vancouver-area flat roofs, including ponding thresholds and drainage slope requirements, that resource covers the local context in detail.
When should you call a professional roofer?
Some situations are beyond a property manager’s safe reach. Here are the red flags that mean it is time to pick up the phone.
Call a professional when you see:
- A leak that returns within one season of a temporary patch
- Interior staining that is expanding in area or moving to new rooms
- A scupper sleeve that is visibly rusted, crushed, or inaccessible without removing parapet cladding
- Evidence of deck or insulation saturation (soft spots underfoot, bubbling membrane, or a moisture meter reading above ambient)
- Leaks that appear only during wind-driven rain, which suggests the entry point is higher on the wall or at a flashing lap, not the scupper throat itself
What a professional inspection includes
- Full on-roof water test using the zoned approach described above, with timed observations and interior monitoring
- Infrared or electronic moisture scan to map hidden saturation in the insulation and deck
- Camera inspection of internal drain piping where accessible, to rule out cracked or disconnected underground conductors
- Scupper sleeve assessment including probing for corrosion, checking sleeve-to-wall integration, and measuring throat dimensions against drainage area requirements
- Written report with photos, moisture readings, and repair recommendations
Timeframes and cost ranges
A professional inspection typically takes 1–3 hours. A targeted repair such as re-flashing a single scupper termination is usually completable same-day to within a few days, depending on weather and material availability. A full scupper sleeve replacement with re-flashing and membrane restoration generally runs 1–3 days depending on parapet height, access, and the number of scuppers involved.
Cost ranges vary significantly by scope. Emergency patching to stop active water entry sits at the lower end. Targeted re-flashing of one or two scuppers is a mid-range repair. Full scupper replacement with tapered insulation or drainage upgrades is the higher end. Always request a written quote with itemised labour and materials before work begins.
Pro Tip: Ask for a labour warranty and a flashings warranty separately. A contractor who warranties the flashing work for five years and the membrane termination for ten is telling you they stand behind the installation quality, not just the materials.
For roof inspection services that include moisture scanning and written documentation, Paragonroofingbc covers Delta and the broader Metro Vancouver area.
Delta, BC specific factors you need to know
Delta’s geography creates a specific set of roofing stressors that are different from what you see in Burnaby or Coquitlam.
- Heavy and sustained rainfall. Delta receives some of the highest annual rainfall totals in Metro Vancouver. Scuppers that are marginal in size or partially blocked fail faster here than on drier sites.
- Marine humidity and corrosion. Proximity to the Strait of Georgia and the Fraser River estuary means salt-laden air accelerates corrosion in galvanised scupper sleeves. Stainless steel or copper sleeves last significantly longer in this microclimate.
- Freeze-thaw cycles. Delta does not get prolonged freezing winters, but rapid temperature swings in January and February can ice-plug a scupper overnight and then thaw by noon. That repeated expansion and contraction loosens membrane terminations and cracks sealant joints faster than a steady cold climate would.
- Older parapet details. Many commercial and strata buildings in Ladner and North Delta were built in the 1980s and 1990s with parapet details that predate current membrane integration standards. Scupper sleeves in these buildings were often installed without proper membrane wrap-in, relying on sealant alone.
Scheduling advice for Delta property managers
Schedule formal inspections in late spring (May) and late autumn (October or early November), before the heavy rain season begins. After any major storm or rapid melt event, do a visual check within 48 hours. For multi-tenant strata buildings, coordinate roof access with the strata council at least two weeks in advance to avoid conflicts with occupied units below.
Interior drains in some retrofit designs are a separate risk. If your building was converted from exterior scuppers to interior drains at some point, the drain body and piping can freeze and crack in a hard cold snap. That failure mode is different from a scupper leak but produces similar interior staining.
Pro Tip: If your building is in Ladner or Tsawwassen and the scupper sleeves are original galvanised steel from the 1980s or 1990s, budget for sleeve replacement in your next capital plan regardless of whether they are currently leaking. Corrosion in this microclimate is a when, not an if.
How Paragonroofingbc diagnoses scupper leaks: tests and trust signals
When Paragonroofingbc inspects a scupper leak, the process follows a structured sequence designed to produce documented evidence, not just a verbal opinion.
On-roof tests performed:
- Zoned hose test (scupper throat, flange perimeter, upslope seams) with timed observations
- Membrane lift inspection using hand probing and visual assessment of lap edges
- Flashings probe to check for separation, corrosion, and fastener back-out
- Visual inspection of conductor head and downspout connection
Diagnostic tools used:
- Infrared (IR) thermal scan to identify moisture-laden insulation that does not show on the surface
- Electronic moisture meter readings at the deck and parapet base
- Camera inspection for internal drain lines where accessible
Trust signals to request from any roofer:
- Before-and-after photos of the scupper throat, membrane termination, and conductor head
- Water-test log noting zone, duration, and observed result
- Moisture map showing meter readings across the affected area
- Written recommendations with repair options ranked by urgency and durability
A field note from a Paragonroofingbc inspector on a typical Delta scupper job
The pattern on a typical Delta scupper call goes like this: the property manager reports a stain on a second-floor ceiling that appeared after a heavy November rain. Interior mapping puts the stain about 1.2 metres from the exterior wall, which is further than you would expect if the scupper throat itself were the entry point.
On the roof, the scupper throat is clear. The membrane termination at the flange corner, though, shows a 150 mm lift on the upslope side. Water is entering there, running under the membrane, and travelling along the vapour barrier before it drops through a fastener hole in the deck. The Zone 2 water test confirms it within eight minutes.
The repair scope changes immediately. What looked like a simple scupper seal turns into a membrane termination restoration and a moisture scan of the surrounding insulation. The scan finds a 600 mm zone of saturated insulation at the parapet base that would have caused ongoing damage through the winter if it had been left. That kind of hidden saturation is the most common surprise on Delta flat roofs, and it is exactly why a water test and moisture scan together give you a complete picture that a visual inspection alone never will.
Paragonroofingbc can fix your Delta scupper leak properly
If your scupper leak has come back after a patch, or you have never had a proper water test done, Paragonroofingbc offers the full diagnostic and repair service Delta property managers and strata councils need.

Services include on-roof water testing with documented zone results, infrared moisture scanning, scupper sleeve replacement and re-flashing, membrane termination restoration, tapered insulation and drainage upgrades, and overflow scupper installation for buildings that lack secondary drainage. Paragonroofingbc serves Delta, BC and the broader Metro Vancouver area, including Burnaby, Coquitlam, Surrey, North Vancouver, and West Vancouver, with fast response for commercial and property manager calls.
Every completed job includes before-and-after photos, a moisture map, and a written warranty covering both labour and flashings. Request a roof inspection or get a written quote by contacting Paragonroofingbc directly. For flat roof membrane and re-flashing work specifically, the flat roofing service page covers the full scope of what is included.
Key takeaways
Delta scupper leaks most often trace back to membrane termination failure or a corroded sleeve, and a zoned water test is the only reliable way to confirm the source before committing to a repair.
| Point | Details |
|---|---|
| Inspect every 90 days | A formal inspection every 90 days minimum reduces the risk of blockage-driven ponding and membrane failure. |
| Run a zoned water test | Test scupper throat, flange perimeter, and upslope seams separately to confirm the exact entry point. |
| Match repair to cause | Temporary sealant buys time; corroded sleeves and lifted membrane terminations require replacement and re-flashing. |
| Delta climate accelerates failure | Marine humidity, freeze-thaw swings, and heavy rainfall make sleeve corrosion and membrane lift faster here than in drier Metro Vancouver areas. |
| Paragonroofingbc for permanent repairs | Paragonroofingbc provides water testing, moisture scanning, re-flashing, and sleeve replacement across Delta and Metro Vancouver with documented warranties. |
Sources
FAQ
How do you stop a scupper from leaking?
Clear the scupper throat and conductor head first, then run a zoned water test to confirm whether the leak is at the sleeve, the membrane termination, or an upslope seam. Temporary sealant can stop active water entry, but a lasting repair requires re-flashing the membrane termination or replacing a corroded sleeve.
How do you seal a scupper properly?
Surface sealant alone is rarely sufficient for more than one season. A proper seal involves removing the old membrane termination, priming the scupper flange, and installing a fully adhered or heat-welded membrane wrap-in that bonds the roofing membrane to the scupper sleeve, as described in scupper sleeve and flashing guidance.
What is the difference between an overflow scupper and a primary scupper?
A primary scupper handles normal roof drainage and connects to a downspout or conductor head. An overflow scupper sits 50 mm higher and has no downspout connection; it activates only when the primary drain is blocked, releasing water to the exterior before it can back up into the building. Building codes require overflow scuppers wherever primary drainage exists.
What are perimeter edge drains called?
Perimeter edge drains on flat roofs are called scuppers. They are openings cut through the parapet wall or roof edge that allow water to exit the roof surface to the exterior, typically connecting to a conductor head and downspout below.
How often should scuppers be inspected in Delta, BC?
A formal inspection every 90 days is the recommended minimum, with a visual check after any storm delivering significant rainfall and a full clearing twice yearly in spring and autumn. Delta’s marine humidity and freeze-thaw cycles make that cadence worth following closely.
Recommended
Our Roofing Blog


Have more questions about roofing?
Check out our FAQs or give us a call today to speak to an expert roofer in Vancouver Lower Mainland, BC. We're here to help our neighbours make educated decisions about their roof. For our team, we value helping clients save money while making their roofs last.
