
North Vancouver deck tie-ins: what homeowners must know
North Vancouver deck tie-ins: what homeowners must know
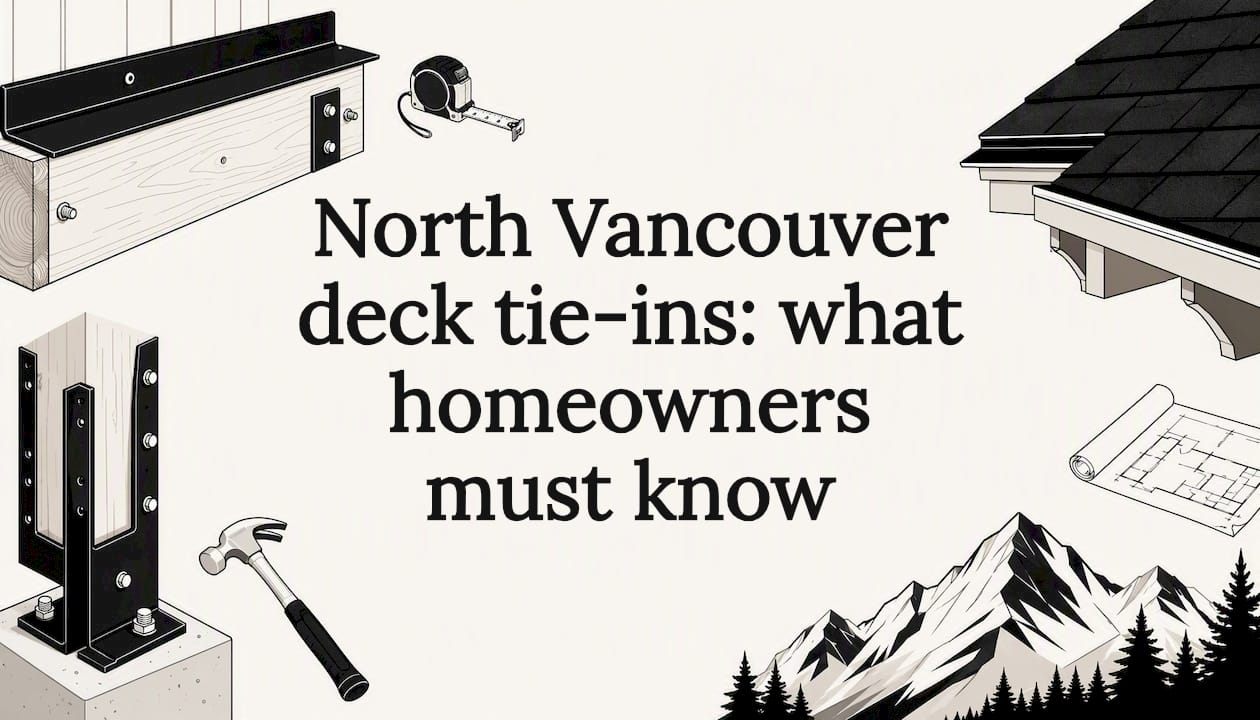
If your deck surface sits more than 600 mm (24 inches) above grade and ties into the house, you need a building permit in North Vancouver before a single board goes down. That is the rule under both the City of North Vancouver and the District of North Vancouver, and it is not a grey area. The single most important structural step is ensuring lateral support at the connection point, which means either a properly flashed ledger tied to the house rim joist or engineered hold-down devices where ledger capacity alone is not enough.
Here is what you need to know before you start:
- Permit threshold: 600 mm (24 in) above grade triggers a building permit for most decks in both the City and the District.
- Lateral support is mandatory for any deck over that height, per the BC Housing illustrated guide on safe wood decks and balconies.
- Key municipal pages: City of North Vancouver permits and inspections and District of North Vancouver deck guidance.
- P.Eng drawings are required for decks over living space, large cantilevers, or non-standard load cases.
- Paragonroofingbc regularly works on ledger flashings and roof-to-deck intersections across the North Shore, and the moisture details at that connection are where most problems start.
Key takeaways
A deck tied to a house in North Vancouver requires a building permit when the deck surface exceeds 600 mm above grade, and the ledger connection must be laterally supported, properly flashed, and detailed to BC Building Code standards.
| Point | Details |
|---|---|
| Permit threshold | A building permit is required when the deck surface is more than 600 mm (24 in) above grade, or when the deck is attached to the house or over living space. |
| Lateral support is mandatory | Decks over 600 mm must resist racking via a tied ledger, braced posts, or engineered hold-down devices. |
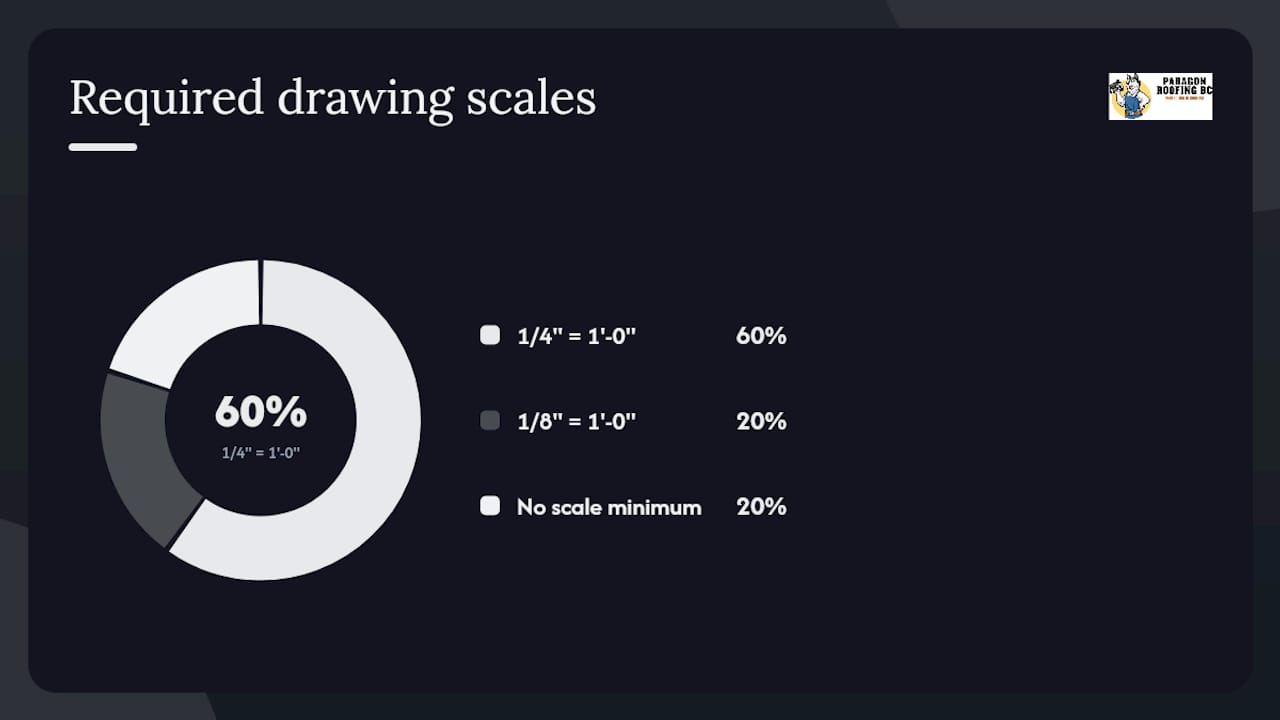
| Drawing scales matter | Site plans must be at 1/8" = 1’-0" and foundation plans at 1/4" = 1’-0" per the City of North Vancouver checklist. |
| P.Eng required in key scenarios | Decks over living space, large cantilevers, hot tub loads, and non-standard connections require P.Eng-stamped drawings. |
| Paragonroofingbc | Handles ledger flashing, roof-edge integration, and moisture management where deck tie-ins intersect with the roofing system on North Shore homes. |
Table of Contents
- When does a North Vancouver deck tie-in require a building permit?
- What your permit application must include
- How to tie in a deck structurally: ledger, hold-downs, and flashing
- When do you need a P.Eng for your deck?
- Questions to ask your contractor and engineer before work starts
- Common mistakes that cause failed inspections
- What to expect from the inspection process and timeline
- What drives the cost of a deck tie-in in North Vancouver?
- Where to submit your permit application in North Vancouver
- Technical note: lateral loads, design loads, and what engineers specify
- A trades perspective on ledger flashings in North Vancouver
- Paragonroofingbc’s role when your deck tie-in meets the roof
- Sources
- FAQ
When does a North Vancouver deck tie-in require a building permit?
The threshold of more than 600 mm above grade is a key rule triggering permit requirements, but there are other factors that also require permits. Under the City of North Vancouver’s Construction Regulation Bylaw No. 7390, a permit is required before proceeding with construction, additions, or alterations to structures exceeding a small size threshold. A deck tied to the house almost always crosses one of these triggers:
- Height above grade: deck surface more than 600 mm (24 in) above the ground at any point.
- Deck over living space: any deck built above a habitable room, garage, or crawlspace requires a permit regardless of height.
- Structural loads: decks designed to support a hot tub, roof structure, or concentrated loads need a permit and usually a P.Eng.
- Attached to the house: a deck physically connected to the building affects the structure and the building envelope, triggering permit review even if the deck itself sits low.
- Zoning and lot coverage: a new deck can push total lot coverage over the permitted maximum, which requires a separate zoning review.
- Change of occupancy or use: converting an existing platform to an accessible deck or adding guards and railings to a previously unguarded surface can trigger a permit.
The District of North Vancouver is explicit that a deck under 600 mm may not require a building permit on its own, but attachment to the house or location over living space still requires review. Do not assume a low deck is automatically permit-free.
A building permit is not just a bureaucratic hurdle. In North Vancouver’s wet coastal climate, the permit process forces a review of flashing, load paths, and moisture management at the ledger connection — the exact details that prevent structural failure and rot behind your cladding. Skipping the permit means skipping that quality-assurance check entirely.
What your permit application must include
The City of North Vancouver deck permit checklist is specific about what drawings are required and at what scale. Missing even one item is the fastest way to get your application bounced back for resubmission. Here is the full checklist:
- Site plan at 1/8" = 1’-0" showing the property lines, existing structures, proposed deck footprint, setbacks, and total lot coverage calculation.
- Foundation/footing plan at 1/4" = 1’-0" showing footing sizes, depths, and locations; include soil bearing assumptions if non-standard.
- Floor framing plan at 1/4" = 1’-0" showing joist sizes, spans, beam sizes, post locations, and ledger position.
- Elevation drawings showing deck height above grade at all corners, guard/railing height, and stair configuration.
- Ledger and attachment details showing fastener type, size, spacing, and flashing configuration at the house connection.
- Footing and post anchor details showing how posts connect to footings and how footings are sized for the load.
- Deck square footage clearly labelled on the plan.
- Lot coverage calculation showing existing and proposed coverage as a percentage of the lot area.
- Vented deck details if the deck is over living space (show the air gap, drainage plane, and ventilation path).
- P.Eng-stamped drawings for any engineered components (hold-downs, non-standard connections, decks over living space).
- Completed residential project application form with scope of work, dwelling type, and contact information.
- Permit fee payment (confirm current fee schedule with the City or District directly, as fees are updated periodically).
The District of North Vancouver’s single-family zone deck document adds local specifics on permitted heights, separation distances, and railing requirements that affect what you show on your plans.
| Drawing | Minimum Scale | Key Content |
|---|---|---|
| Site plan | 1/8" = 1’-0" | Property lines, setbacks, deck footprint, lot coverage |
| Foundation plan | 1/4" = 1’-0" | Footing sizes, depths, post locations |
| Framing plan | 1/4" = 1’-0" | Joist/beam sizes, spans, ledger position |
| Elevation | 1/4" = 1’-0" | Height above grade, guard height, stair layout |
| Ledger detail | No scale minimum | Fastener type/spacing, flashing configuration |
Pro Tip: When uploading to the BC Building Permit Hub, name each PDF file to match the drawing type exactly (e.g., “Site-Plan,” “Foundation-Plan,” “Ledger-Detail”). Reviewers process dozens of applications; clearly named files reduce back-and-forth and can shave days off your review time.
How to tie in a deck structurally: ledger, hold-downs, and flashing
Most North Vancouver deck tie-ins use a ledger board fastened directly to the house rim joist or band joist. That connection is where the deck transfers both vertical loads (people, furniture, snow) and lateral loads (racking, wind) into the building structure. Get it wrong and the whole deck can pull away from the house.
Ledger vs. freestanding decks
A freestanding deck uses its own posts and beams without attaching to the house. It sidesteps ledger flashing issues but requires more posts and footings, and it still needs a permit above 600 mm. Most homeowners choose a tied ledger because it uses the house structure for support and reduces the post count. The trade-off is that the ledger connection must be detailed and flashed correctly, or you will have north vancouver deck leaks behind your cladding within a few seasons.
Acceptable tie-in hardware (generic categories)
- Through-bolts: large-diameter bolts passing through the ledger and rim joist, with washers and nuts on the interior face. Strong in shear and withdrawal.
- Structural ledger screws: code-listed screws (typically 1/4" or larger diameter, engineered for ledger applications) used in patterns specified by the manufacturer’s load tables.
- Strap connectors: galvanised or stainless steel straps connecting the ledger to the rim joist or blocking, useful for supplementing shear capacity.
- Engineered hold-down/tension devices: proprietary tension hardware specified by a P.Eng when the ledger alone cannot resist lateral or uplift loads. The BC Housing guide notes that two or more hold-downs are commonly used when ledger capacity is insufficient.
Flashing and moisture management
This is where roofing experience matters. The ledger sits against the house wall, and without proper flashing, every rain event drives water behind the cladding and into the rim joist. The standard practice is to leave approximately 13 mm between the ledger and the house sheathing for drainage and drying. Continuous Z-flashing or purpose-made ledger flashing goes over the top of the ledger and tucks behind the cladding above. Every fastener penetration through the flashing needs to be sealed.
Common ledger failure modes to watch for:
- Ledger installed tight to the rim joist with no gap and no flashing.
- Flashing lapped the wrong direction (water directed into the wall, not away from it).
- Caulk used as a substitute for proper flashing (caulk fails; flashing does not).
- Fasteners too small or spaced too far apart for the joist span and load.
- Rim joist already rotted before the new ledger was attached.
Pro Tip: Before the permit inspector arrives for the ledger inspection, photograph the flashing installation from multiple angles: top of ledger, each end, and any penetrations. These photos protect you if a question arises later and demonstrate to the inspector that the work was done correctly before cladding covered it.
When do you need a P.Eng for your deck?
The BC Building Code (BCBC) 2024 is objective-based, which means standard decks can follow “acceptable solutions” without an engineer. Non-standard or large decks require an “alternative solution” that demonstrates equivalent performance, and that almost always means a P.Eng.
Typical triggers for P.Eng involvement:
- Deck over living space: any deck above a habitable room, garage, or conditioned crawlspace. The City of North Vancouver checklist explicitly requires P.Eng sign-off for engineered components in these cases.
- Large cantilevers: joists cantilevering beyond standard span tables require an engineer to verify deflection and connection loads.
- Tall posts or elevated decks: posts exceeding typical height-to-width ratios need a buckling check and engineered post-base connections.
- Hot tubs or concentrated loads: a hot tub adds a point load that standard joist tables do not cover. An engineer sizes the beams, posts, and footings for that specific load.
- Non-standard connection geometry: angled ledgers, connections to steel or concrete, or situations where the rim joist is inaccessible or compromised.
- Altered load paths: any deck that changes how loads travel through the existing structure (e.g., removing a wall to extend the deck opening) needs engineering review.
Three example scenarios
- A second-storey deck over a garage with a hot tub: P.Eng required for the hot tub load, the elevated framing, and the connection to the house above the garage door header.
- A ground-level deck (under 600 mm) attached to the house with standard joist spans: no P.Eng required, acceptable solutions apply, but a permit may still be needed depending on attachment and lot coverage.
- A rooftop deck on a flat-roof addition: P.Eng required for the waterproofing assembly, structural loading on the roof deck, and the parapet/guard connection.
When the City or District refers to “engineered components,” they mean any element that cannot be sized using standard span tables or prescriptive code tables. “P.Eng sign-off” means a licensed Professional Engineer in BC stamps and signs the drawings, taking professional responsibility for the design.
Questions to ask your contractor and engineer before work starts
Hiring the wrong contractor for a deck tie-in is an expensive mistake. The permit process, the flashing details, and the structural connection all require specific experience. Here is what to ask before you sign anything.
Contractor checklist
- Have you pulled deck permits in the City or District of North Vancouver before? Ask for the permit numbers.
- Can you show me photos of previous ledger tie-ins, including the flashing before cladding was reinstalled?
- What flashing system do you use at the ledger, and how do you handle the gap between the ledger and the rim joist?
- Do you carry WCB (WorkSafeBC) coverage and general liability insurance? Ask for certificates.
- What warranty do you provide on the connection and the flashing work?
- Will you coordinate the required inspections, or is that left to me?
Engineer checklist
- What does your scope of work cover? (Connection design only, or full structural review including footings and posts?)
- Will your stamp cover the ledger connection detail and the hold-down specification?
- Do you provide on-site inspections during construction, or only a desktop review?
- What are your expectations for as-built documentation?
Red flags to walk away from
- A contractor who says you do not need a permit for a deck that clearly exceeds 600 mm.
- Refusal to discuss flashing details or dismissal of the ledger gap as unnecessary.
- No portfolio of previous tie-in work or inability to provide references from North Vancouver or Burnaby deck tie-in projects.
- An engineer who will not provide connection detail notes on the stamped drawings, only a generic structural note.
- Anyone who asks you to start work before the permit is issued.
Common mistakes that cause failed inspections
Most failed deck inspections in North Vancouver come down to a handful of recurring problems. Knowing them ahead of time means your contractor has no excuse for repeating them.
- Unflashed ledger: the single most common failure. The inspector will look for continuous flashing over the top of the ledger and will reject the work if it is missing or improperly lapped.
- Ledger installed tight to the rim joist: no drainage gap means trapped moisture and rot. The BC Housing guide specifically identifies this as a leading cause of ledger failure.
- Undersized fasteners: using standard construction screws instead of code-listed ledger screws or through-bolts. Inspectors check fastener type and spacing against the approved drawings.
- No hold-downs where specified: if the engineer called for hold-down devices and they are not installed, the inspection fails. Period.
- Inadequate post anchorage: posts sitting in a cup anchor that is not rated for uplift, or posts set directly in concrete without an approved standoff base.
- Missing or incorrect guards: guard height, baluster spacing, and connection to the framing are all inspected at the final stage.
- Drawings not matching the built work: if the inspector sees a beam size or fastener pattern that differs from the approved drawings, the work stops until it is reconciled.
The most significant risk in any deck-to-house connection is not the deck itself failing under load — it is the connection pulling away from the house. A ledger that looks solid from the outside can be completely rotted at the rim joist behind it. That is why inspectors look at the connection before the decking goes down, not after.
What to expect from the inspection process and timeline
Understanding the inspection milestones helps you schedule your contractor and avoid costly delays. Here is how the process typically runs for a standard deck tie-in in North Vancouver.
Inspection milestones
- Footing/underground inspection: before concrete is poured. Inspector verifies footing size, depth below frost, and bearing on undisturbed soil.
- Framing/ledger inspection: before decking is installed. Inspector checks ledger connection, fastener type and spacing, flashing installation, joist hangers, beam-to-post connections, and hold-down hardware.
- Mid-construction inspection (if required): for complex decks with engineered components, a mid-point inspection may be required to verify hold-down installation and connection details before they are covered.
- Final inspection: after decking, guards, railings, and stairs are complete. Inspector checks guard height (minimum 900 mm for decks under 1.8 m above grade, 1,070 mm above that), baluster spacing (maximum 100 mm opening), stair rise and run, and overall compliance with the approved drawings.
Realistic timeline
For a straightforward deck tie-in with complete drawings submitted electronically through the BC Building Permit Hub, expect:
- Application review: 2–4 weeks for a standard residential deck in North Vancouver (longer during peak spring/summer season).
- Permit issuance: typically within a week of approval.
- Inspection scheduling: 1–3 business days’ notice required in most cases.
- Common delays: incomplete drawings (missing ledger detail or lot coverage), absent P.Eng seal where required, or discrepancies between the site plan and the actual property.
What inspectors check at each stage
- Footings: size, depth, bearing, and any required reinforcing.
- Framing/ledger: fastener type, pattern, spacing; flashing installation; hold-down hardware; joist hanger nailing.
- Final: guard height and attachment, baluster spacing, stair geometry, decking fastening, and overall match to approved drawings.
What drives the cost of a deck tie-in in North Vancouver?
Deck tie-in costs in the Lower Mainland vary widely depending on the complexity of the connection, the condition of the existing house framing, and whether engineering is required. Rather than quoting a single number that will be wrong for your specific situation, here are the main cost drivers to budget for.
- Engineered drawings: when a P.Eng is required, expect a professional fee for the structural drawings and stamp. The scope (connection detail only vs. full structural review) affects the cost significantly.
- Site access and excavation: footing excavation in North Vancouver’s rocky or clay-heavy soils can add unexpected cost, particularly on steep North Shore lots.
- Hold-down hardware and through-bolts: engineered hold-down devices cost more than standard hardware, and the quantity specified by the engineer affects the total.
- Flashing and ledger repairs: if the existing rim joist or sheathing shows rot or moisture damage when the ledger is removed, those repairs must happen before the new connection is made. Budget for this as a contingency.
- Structural repairs to existing framing: older North Shore homes sometimes have undersized rim joists or non-standard framing that needs reinforcing before a ledger can be attached.
- Labour rates: Lower Mainland trades rates are among the highest in Canada, and North Vancouver’s access challenges (steep lots, limited parking, older neighbourhoods) add time to most jobs.
- Permit fees: confirm current fee schedules directly with the City or District, as fees are updated and vary by project value.
A practical approach is to get three itemised quotes and compare them line by line rather than comparing totals. A quote that omits flashing repairs or engineering is not cheaper; it is incomplete.
The most common surprise is rot or moisture damage behind the existing cladding at the ledger location. You will not know it is there until the wall is opened up, and fixing it is not optional.*
Where to submit your permit application in North Vancouver
Getting the right application to the right office saves time. Here is where to go depending on your property’s jurisdiction.
City of North Vancouver
- Online submissions go through the BC Building Permit Hub, which the City accepts for all construction permit applications.
- The City’s permits and inspections page lists current contact information for permit enquiries and inspection booking.
- Download the residential project application form and the deck permit checklist before you start assembling your package.
District of North Vancouver
- The District’s deck, fence, and retaining wall page outlines permit requirements and links to District-specific guidance.
- The District also accepts electronic submissions; confirm the current submission portal on the District’s website, as processes are updated periodically.
City vs. District: key procedural difference
If your property address starts with a North Vancouver street that falls within the City of North Vancouver boundaries (roughly the area between the Capilano River and the Second Narrows), you apply to the City. Properties in the broader North Shore area outside those boundaries fall under the District. When in doubt, check your property tax notice or call the respective building department directly. Submitting to the wrong office adds weeks to your timeline.
Technical note: lateral loads, design loads, and what engineers specify
This section is for contractors, engineers, and homeowners who want to understand what is actually happening structurally at the tie-in connection.
Lateral loads and racking
A deck over 600 mm above grade must be laterally supported to resist racking, per BC Housing guidance. Racking is the tendency of the deck frame to parallelogram under horizontal loads (wind, seismic, people moving). Acceptable strategies include:
- A tied ledger connection that transfers lateral loads into the house diaphragm.
- Braced posts with knee braces or X-bracing between posts.
- Multiple engineered hold-down devices spaced across the connection, with uplift and withdrawal capacities called out on the stamped drawings.
Design loads
The BCBC 2024 requires designers to meet code load requirements. Practitioners commonly apply combined snow and occupancy design loads when sizing deck connections for accessible platforms in the Lower Mainland. The BOABC deck design guidance (February 2025) confirms that decks, balconies, and verandas are treated as parts of buildings, meaning footing and foundation requirements of the code apply fully, and columns and posts must be anchored to resist both uplift and lateral movement. A combined snow and occupancy reference load of 1.9 kPa is commonly applied to accessible platforms in Lower Mainland practice when sizing deck connections.
What to look for on stamped engineering drawings
- Connection detail notes specifying fastener type, diameter, length, and spacing.
- Load path diagram showing how vertical and lateral loads travel from the deck surface to the footings.
- Anchor capacities listed for hold-down devices (withdrawal and shear values).
- Specified hardware with generic performance requirements (not just a brand name).
- Footing size and depth tied to the calculated load, not a generic “standard footing.”
Pro Tip: When reviewing a P.Eng stamp, check that the scope note on the drawing matches what was actually designed. A stamp that covers “connection details only” does not cover the footing design. If the scope is narrow, ask the engineer explicitly whether the footings are within their scope or whether you need a separate review.
Local snow load considerations on the North Shore are real: North Vancouver’s elevation range means some properties see significantly more snow accumulation than the Lower Mainland average, and that affects deck connection sizing.
A trades perspective on ledger flashings in North Vancouver
Working on North Shore homes, you see the same problem over and over: a deck that looks perfectly solid from the outside, with rot hiding behind the ledger where nobody thought to look. The ledger is pressed tight against the house wrap or building paper, there is no drainage gap, and the cladding above was never properly cut back to allow flashing to tuck in. Water has been sitting in that joint for years.
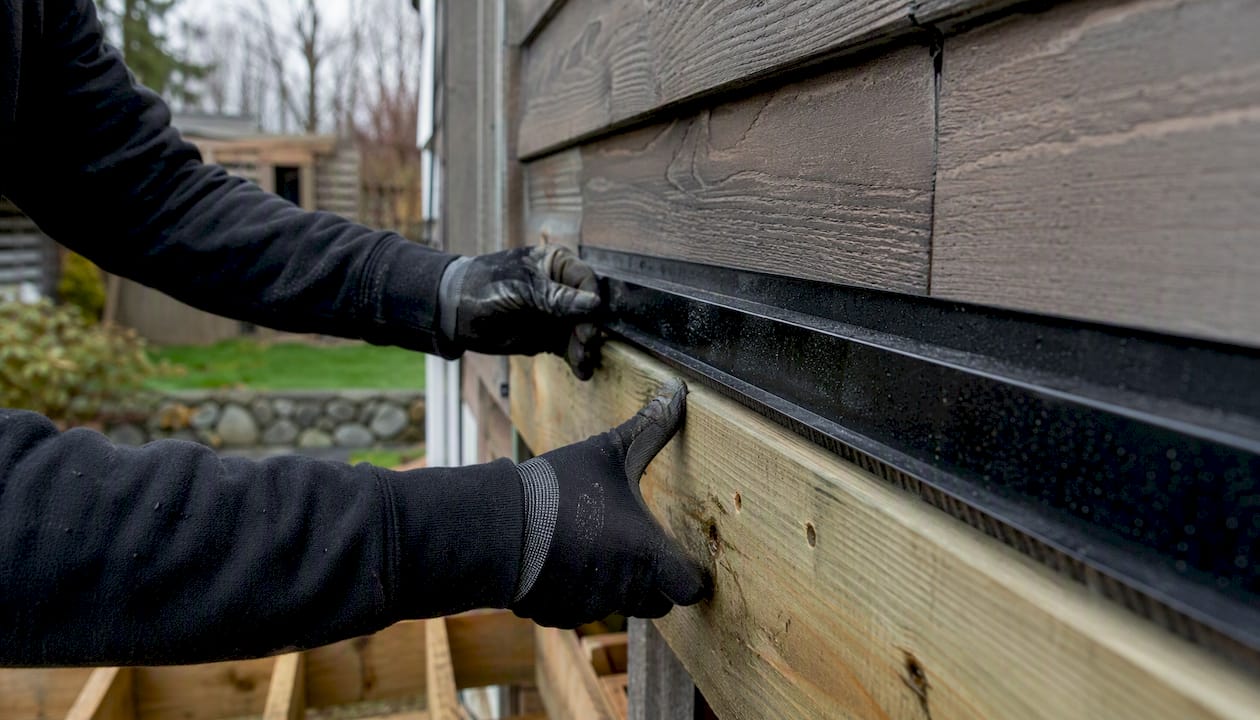
What makes North Vancouver particularly unforgiving is the combination of heavy winter rain, freeze-thaw cycles in the shoulder seasons, and the way many North Shore lots face north or northeast, keeping the ledger zone in shade for most of the day. That moisture never fully dries out. When we open up a ledger connection on a home that was built in the 1980s or 1990s without proper flashing, the rim joist behind it is often soft enough to push a finger through.
The fix is not complicated, but it has to be done right: a proper drainage gap, continuous flashing that integrates with the wall assembly above, and fasteners that do not create new penetration points without sealing. This is exactly where roofing experience and deck construction overlap. The same principles that govern roof flashing and underlayment apply at the ledger: water moves downhill, laps must shed water outward, and every penetration is a potential entry point.
If you are planning a deck tie-in on the North Shore, treat the ledger flashing with the same seriousness you would give a roof penetration. It is not a finishing detail. It is the detail that determines whether your deck lasts 30 years or 10.
Paragonroofingbc’s role when your deck tie-in meets the roof
When a deck tie-in sits below a roof edge, intersects with a roof slope, or requires flashing that integrates with the existing roofing system, the roofing work and the deck work cannot be treated as separate scopes. That is where Paragonroofingbc comes in.

Paragonroofingbc handles the flashing, roof-edge, and moisture-management work that deck contractors often leave incomplete on North Shore homes. If your deck tie-in requires new or repaired flashing at the wall-to-roof intersection, a ledger that ties into the house below a soffit or roof overhang, or repairs to the existing residential roofing system where the deck meets the building envelope, Paragonroofingbc can assess the full scope and complete the roofing side of the project to a standard that will pass inspection and hold up in North Vancouver’s coastal climate. Get in touch with Paragonroofingbc to schedule a site assessment before your deck permit application goes in, so the roofing and flashing details are sorted before construction starts.
Sources
- Illustrated guide - Building safe and durable wood decks and balconies (BC Housing)
- Decks - New and Renovations (City of North Vancouver permit checklist)
- BC Building Code (BCBC) 2024 (provincial code document)
- BOABC – Deck design guidance (February 2025)
- Permits & Inspections | City of North Vancouver
- Build a deck, fence, or retaining wall (District of North Vancouver)
FAQ
Do I need a permit for a deck in North Vancouver?
Yes, in most cases. Both the City and the District of North Vancouver require a building permit for decks with a surface more than 600 mm (24 in) above grade, decks attached to the house, or decks over living space.
What are the BC Building Code guidelines for deck connections?
The BCBC 2024 requires decks over 600 mm to be laterally supported to resist racking; standard decks can follow acceptable solutions, while non-standard or large platforms require an engineered alternative solution with P.Eng sign-off.
What drawings do I need to submit for a deck permit in North Vancouver?
At minimum: a site plan at 1/8" = 1’-0", a foundation plan at 1/4" = 1’-0", framing and elevation drawings, and ledger/attachment details. Engineered components require P.Eng-stamped drawings per the City of North Vancouver deck checklist.
How much does a deck tie-in cost in North Vancouver?
Costs vary based on engineering requirements, site access, condition of existing framing, and flashing repairs needed.
What is the 3-4-5 rule for decks?
The 3-4-5 rule is a basic squaring method used during layout: measure 3 feet along one side, 4 feet along the adjacent side, and confirm the diagonal is 5 feet to verify a right angle corner. It is a framing layout technique, not a code requirement, and does not substitute for the structural and permit requirements that govern deck tie-ins in North Vancouver.
Recommended
Our Roofing Blog

Have more questions about roofing?
Check out our FAQs or give us a call today to speak to an expert roofer in Vancouver Lower Mainland, BC. We're here to help our neighbours make educated decisions about their roof. For our team, we value helping clients save money while making their roofs last.
