
Surrey bathroom vent leaks: condensation or roof failure?
Surrey bathroom vent leaks: condensation or roof failure?

Most bathroom vent drips in Surrey homes come from duct condensation, not a failed roof. If water only shows up during or right after a rainstorm, though, you’re likely looking at a roof penetration or flashing failure that needs a roofer, not a caulking gun.
Here’s what to do in the first 24 hours, before you touch anything permanent:
- Catch the drip with a bucket or towel to stop drywall and insulation damage.
- Run the bathroom fan and watch whether the drip changes or stops.
- Note the weather. Was it raining? Was the shower just used?
- Photograph the stain now, with a date, so you can track if it spreads.
- Do not paint or patch over the stain until the source is confirmed.
Under BC Building Code Section 9.32, your bathroom exhaust has to terminate outdoors, never into an attic. If yours dumps into the attic space, that’s a code problem on top of whatever is causing the drip.
Pro Tip: Keep a small notebook or your phone notes app going for a week. Log every time you see or hear water, along with the weather. That log will save a roofer or ventilation tech an hour of guesswork.
Key Takeaways
Correlating a bathroom vent drip with weather and shower timing is the fastest way to tell condensation from a roof leak, and it decides everything that follows.
| Point | Details |
|---|---|
| Time the drip first | Rain-only drips point to roof or flashing failure; shower or cold-night drips point to duct condensation. |
| Insulate and shorten ducts | Foil-faced insulation and shorter, sloped runs stop most condensation drips within days. |
| Check the roof cap and flashing | Debris, granules, or rain-timed drips mean the cap or flashing needs a roofer’s inspection. |
| Meet BC code minimums | Bathroom exhaust must terminate outdoors at 23 L/s intermittent or 9 L/s continuous airflow. |
| Call Paragon Roofing BC for roof-side leaks | Paragon traces the duct and inspects flashing before recommending cap, flashing, or deck repair. |
Table of Contents
- What are the signs of a Surrey bathroom vent leak?
- How do you run a quick vent leak diagnostic checklist?
- How do you fix bathroom vent condensation problems?
- When is a Surrey bathroom vent leak actually a roof problem?
- How do you prevent bathroom vent leaks year-round?
- How Paragon Roofing BC diagnoses vent leaks in the field
- What the diagnostics actually tell you
- Get a proper vent and roof inspection in Surrey
- Sources
- FAQ
What are the signs of a Surrey bathroom vent leak?
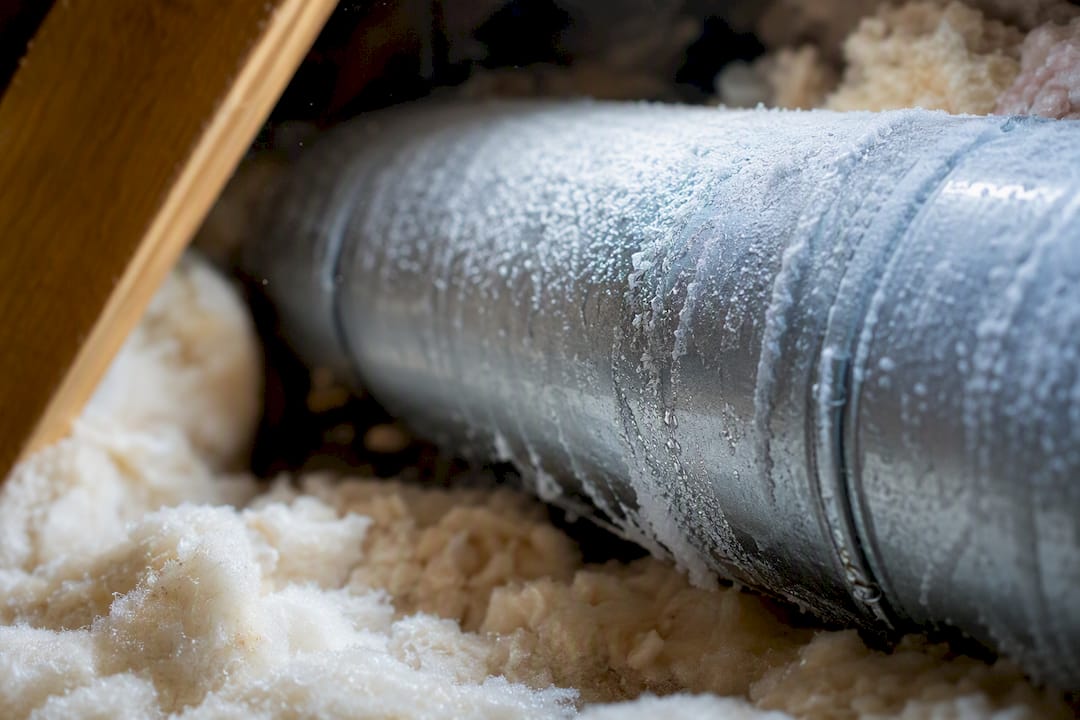
Every stain tells a story if you know how to read it. Brown or yellow rings on the ceiling near the fan usually mean water has been sitting in the insulation above for a while, dripping down through the drywall. Frost on the metal duct in the attic during a cold January morning is condensation, plain and simple. Wet or matted insulation directly under the duct run points the same direction.
Mechanical clues matter too. A damper that won’t move, a grille rattling in the wind, or a fan that sounds like it’s straining are all warning signs that airflow isn’t doing what it should, which lets moisture linger instead of exiting the house.
Here’s how I map symptoms to causes on a typical Surrey inspection:
- Frost or ice on the duct, worse in cold snaps — condensation from warm bathroom air hitting a cold, uninsulated duct.
- Stain that appears only after rain, sometimes within an hour of a downpour — likely roof penetration or flashing failure around the vent cap.
- Constant or worsening drip regardless of weather — check for a disconnected duct joint dumping moist air straight into the attic.
- Debris or granules mixed with the water — that’s a strong signal the roof cap or surrounding shingles are compromised.
- Musty smell with no visible stain yet — mould is forming in saturated insulation, often before drywall staining shows.
The timing clue is the one homeowners skip, and it’s the most useful. Correlating a drip with weather patterns is the single fastest way to sort a duct problem from a roof problem: post shower or cold night drips point to condensation inside the ductwork, while drips tied to rainfall point outside, to the roof.
How do you run a quick vent leak diagnostic checklist?
You don’t need to open drywall to get real answers. Work through this in order, and you’ll usually know which direction to head before you finish.
- Log the timing first. Does the drip start during a shower, right after, only overnight in winter, or specifically when it’s raining outside? This one observation eliminates half the possible causes.
- Run the fan and time it. Place a small container under the drip, turn the fan on, and watch for 15 to 20 minutes. If the drip slows or stops while the fan runs, airflow and condensation are involved. If it continues unchanged during a storm, suspect the roof.
- Go into the attic and follow the duct. Walk the run from the fan housing to the roof cap. Look for disconnected joints, sagging sections that pool condensation, insulation that’s damp or matted, and frost buildup on cold mornings.
- Check the exterior cap and flashing. From a ladder or through binoculars if you’re not comfortable climbing, look at the vent cap for cracks, a stuck or missing damper flap, and any lifted or curling shingles around the base.
- Pull the interior grille and test the damper. A stuck damper flap can trap humid air right at the ceiling line, and a weak fan motor won’t move enough air to clear moisture even with everything else working.
Pro Tip: If the drip only ever happens during heavy rain and you see wet insulation directly below the vent cap rather than along the duct run, stop testing and call a roofer. Poking at flashing yourself on a wet roof is how a small leak turns into a fall.
How do you fix bathroom vent condensation problems?
Condensation is a plumbing-for-air problem: warm, moist bathroom air hits a cold surface inside the duct and turns to liquid before it ever reaches outside. Fixing it means keeping that air warm and moving until it’s gone.
Start with insulation. An uninsulated flex duct running through a cold Surrey attic in January is basically a condensation machine. Wrapping it in a foil-faced insulation sleeve, or switching to pre-insulated flex duct, keeps the duct’s interior surface closer to room temperature so moisture stays as vapour until it clears the roof.
Duct length and shape matter almost as much as insulation. A long, sagging flex run gives condensation somewhere to pool and drip back toward the fan. Where possible:
- Replace long or looping flex runs with the shortest practical straight path to the roof.
- Switch to smooth rigid or semi-rigid metal duct, which sheds condensation faster than corrugated flex.
- Maintain a steady downward slope toward the exterior, never uphill or sagging, so any moisture that does form drains outward instead of back into the housing.
- Seal every joint with foil tape rated for HVAC use, not cloth duct tape, which dries out and peels within a couple of seasons.
- Add a small drip loop or condensation trap at the low point of any exposed run so stray moisture collects somewhere serviceable instead of your ceiling.
Behaviour fixes cost nothing and help immediately. Insulating and shortening the duct run resolves most condensation drips within days, but running the fan longer speeds that up. Leave it going 20 to 30 minutes after every shower, and consider a timer switch or humidistat control so it happens automatically even when nobody remembers.
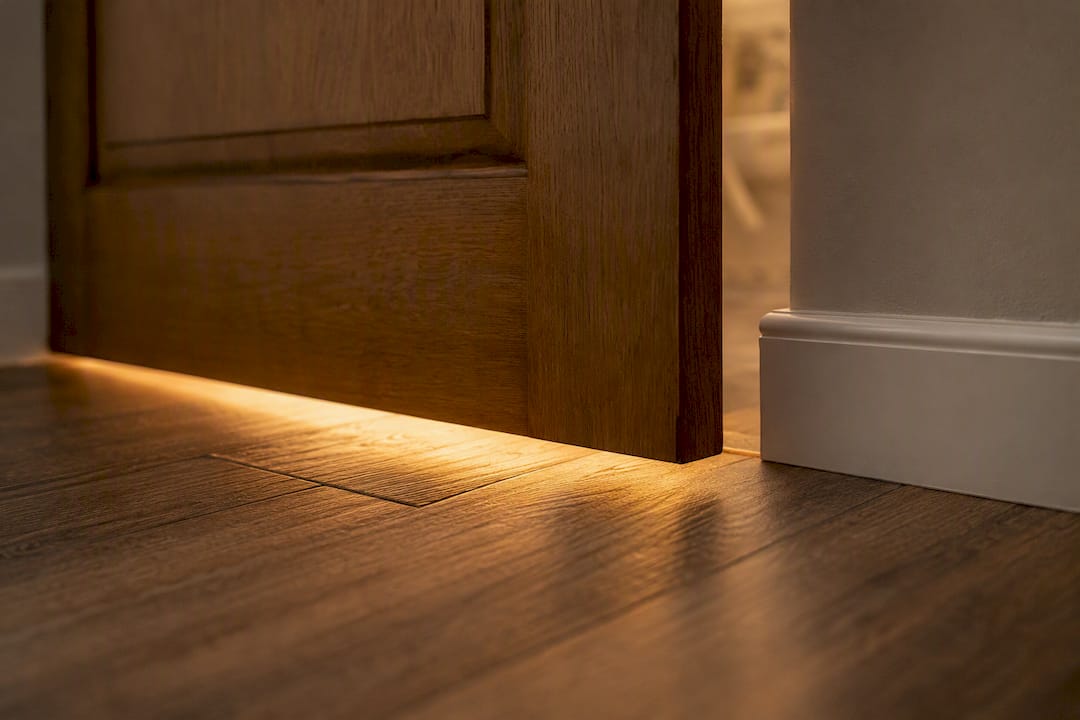
A fan can only exhaust air that’s allowed to come in. If your bathroom door seals tight against the floor, the fan is starving for make-up air and working harder than it should. A door with a proper undercut lets replacement air flow in from the hallway, which improves fan performance without any duct work at all.
Call a ventilation or roofing pro when the attic is inaccessible, when you’ve insulated and shortened the run and the condensation keeps coming back, or when the duct needs to be rerouted through a different part of the roof entirely. That last one is roof work, not duct work, and it needs someone who does both.
When is a Surrey bathroom vent leak actually a roof problem?
Rain is the tell. If water shows up during or immediately after a storm, and especially if you find grit, granules, or debris mixed into the water, the culprit is almost always the roof penetration itself: a cracked cap, failed flashing, or degraded sealant around where the vent pipe passes through the roof deck.
Here’s what a roofer actually does differently than a homeowner poking around with a flashlight:
- Remove the cap to check for cracks, UV damage, or a stuck damper flap letting wind-driven rain push straight in.
- Lift the surrounding shingles to inspect the flashing collar, since a cap can look fine while the flashing underneath has pulled away or rusted through.
- Check the sealant around the base. Roofing cement dries and cracks over 8 to 12 years in our climate, and a bead that looks intact from the ground often has hairline splits up close.
- Probe the deck beneath the penetration if the leak has been going on for a while. Saturated plywood needs to be cut out and replaced, not just covered over.
Ballpark expectations for the Lower Mainland: a diagnostic roof visit typically runs a few hundred dollars, a straightforward cap replacement is often in a similar range, and flashing repair usually lands somewhere in the low to mid hundreds depending on access and roof pitch. If the underlayment or deck has rotted, you’re into a more significant repair, sometimes running into four figures once decking replacement and re-shingling around the area are factored in. Every roof and every access situation is different, so treat these as a starting point for a conversation, not a quote.
Surrey’s mix of wind-driven rain off the Fraser and repeated freeze-thaw cycles through the winter is exactly why penetrations fail here faster than in drier climates. Water gets pushed uphill under shingles by wind, then that same water freezes and expands overnight, widening any gap it found. DIY roof cutting or resealing without pulling shingles first is one of the more common ways homeowners turn a $300 fix into a full deck replacement, because they seal the surface without checking what’s happening underneath it.
Pro Tip: If you can see the vent cap from the ground and it looks tilted, cracked, or missing its damper flap entirely, that’s often visible before you ever climb a ladder. Binoculars from the yard are a free first diagnostic step.
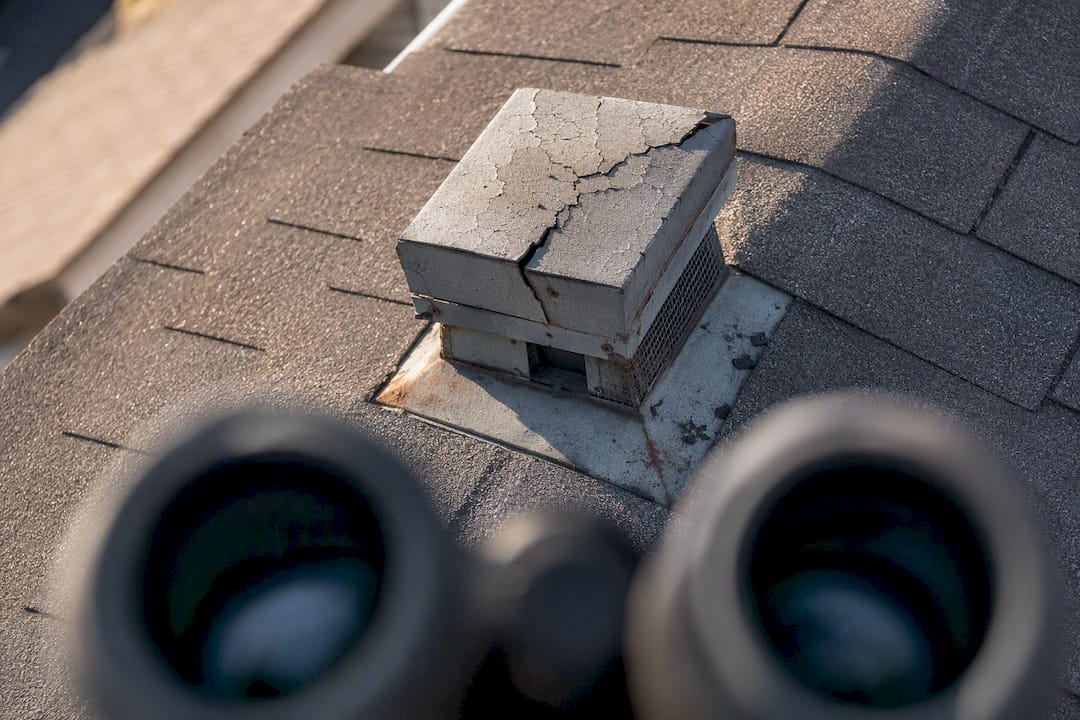
When Paragon Roofing BC gets called for a vent leak in Surrey, the inspection covers the cap, flashing, surrounding shingles, and a check inside the attic for the source and extent of moisture before any repair is recommended.
How do you prevent bathroom vent leaks year-round?
Prevention here is mostly about catching small problems before a wet winter turns them into ceiling stains. Run through this once a year, ideally in early fall before the rainy season sets in:
- Inspect the attic. Look for disconnected duct joints, damp or compressed insulation, and any daylight visible around the roof penetration.
- Check duct seams. Foil tape degrades over years of temperature swings; re-tape any seam that’s lifting.
- Test the cap and damper. The flap should move freely and close on its own when the fan shuts off.
- Confirm insulation coverage. Any exposed section of duct in a cold attic space is a future condensation point.
- Match fan capacity to the room. BC Building Code sets minimum exhaust airflow at 23 L/s intermittent or 9 L/s continuous for a bathroom, so an undersized fan simply can’t keep up regardless of how well the duct is insulated.
- Replace ageing fans. Motors typically last 5 to 10 years; weak airflow is often the fan, not the ductwork.
Strata councils and property managers should treat this as a building-wide item, not a unit-by-unit fix, since one poorly routed duct in a townhouse complex often signals the same builder shortcut repeated across several units.
How Paragon Roofing BC diagnoses vent leaks in the field
On a typical Surrey call, the workflow starts in the attic. We trace the duct from the fan housing to the roof cap, checking every joint and looking for saturated insulation or frost patterns that point to condensation rather than an exterior leak. From there, we move outside and pull the cap to inspect the flashing and shingles directly around the penetration, because a cap can look fine while the collar underneath has failed.
That sequence, attic first, then exterior, is what separates a plumbing or ventilation issue from an actual roofing repair. Isolating the cause before recommending work means you’re not paying for flashing repair when a $40 length of insulation would have solved it, or vice versa.
Related reading if you want to go deeper before booking anything: our roof leak detection guide walks through the same tracing process in more detail, and our ventilation repair page covers duct rerouting options when insulation alone won’t cut it.
| Diagnostic step | What it tells you |
|---|---|
| Attic duct trace | Whether joints are disconnected or insulation is saturated |
| Weather correlation log | Whether the drip is condensation (shower/cold) or rain intrusion |
| Cap and flashing removal | Whether the roof penetration itself has failed |
An inspection report should tell you plainly which of those three it is, along with immediate mitigation steps like a temporary tarp or duct disconnection, before any permanent repair starts.
What the diagnostics actually tell you
The conventional advice on vent leaks jumps straight to “call a roofer,” and that’s backwards for most Surrey homes. Condensation causes the majority of bathroom fan drips, and it’s a duct and airflow problem you can often confirm yourself with a fan test and an attic flashlight check. Sending a roofer up to inspect flashing that was never the problem wastes a service call and delays the actual fix.
Where the conventional advice does fall short is the opposite direction: homeowners who assume every drip is condensation and re-insulate a duct three times while a cracked flashing collar keeps letting rain in every storm. The weather correlation test settles this in a week of paying attention, not months of guessing.
Prioritize the timing log first, always. It costs nothing, takes no tools, and points you toward the right fix before you spend a dollar. Everything else, insulation, duct replacement, flashing repair, follows from that one piece of evidence.
— Harman
Get a proper vent and roof inspection in Surrey
Paragon Roofing BC gives Surrey homeowners something a general handyman can’t: a single inspection that checks both the duct system and the roof penetration together, so you get one answer instead of guessing between a ventilation tech and a roofer. That matters when a drip could be either cause, because paying for two separate call outs to find one answer is money most homeowners would rather spend on the actual repair.

Whether the issue turns out to be a duct that needs insulating or a roof cap and flashing that need replacing, our Surrey residential roofing team traces the problem from the attic to the exterior before recommending any work. If you’ve already run through the diagnostic checklist above and suspect the roof side, book a diagnostic visit through our roof leak detection and repair page and we’ll confirm the source before quoting a fix.
Sources
The claims above draw on the BC Building Code Section 9.32 for termination and airflow rules, and Family Handyman’s condensation guidance for duct fixes.
FAQ
Is it normal for a bathroom vent to leak?
It’s common but never something to ignore. Most leaks trace back to duct condensation from a long, uninsulated run, though rain-timed drips usually mean a roof penetration or flashing problem instead.
What are the code requirements for a bathroom exhaust fan in Canada?
Under BC Building Code Section 9.32, bathroom exhaust must terminate outdoors, never into an attic, with a minimum airflow of 23 L/s intermittent or 9 L/s continuous.
How much does it cost to repair a bathroom vent leak?
Costs vary with the cause: duct insulation and sealing is typically the least expensive fix, while a roof cap replacement or flashing repair runs higher, and deck-level repairs after a long-term leak cost the most.
Why is my bathroom exhaust fan leaking water when it rains?
Rain-timed leaks almost always point to a failed roof penetration, such as a cracked vent cap, degraded sealant, or flashing that’s lifted away from the roofing material around it.
Recommended
Our Roofing Blog



Have more questions about roofing?
Check out our FAQs or give us a call today to speak to an expert roofer in Vancouver Lower Mainland, BC. We're here to help our neighbours make educated decisions about their roof. For our team, we value helping clients save money while making their roofs last.
