
Repairing parapet wall cracks on Burnaby rooftops
Repairing parapet wall cracks on Burnaby rooftops
TL;DR:
- Proper parapet wall crack repair requires forensic leak detection and correct flashing methods to prevent recurring leaks. Visual inspection, thermal imaging, and moisture mapping identify hidden leak pathways before repairs, with step or raglet flashing providing longer-lasting protection. Regular annual inspections help maintain waterproofing and avoid costly repairs.
Parapet wall crack repair is the process of restoring waterproofing continuity along the raised walls at the edge of a flat or low-slope roof, and on Burnaby rooftops, it is one of the most mishandled repairs in the industry. Repairing parapet wall cracks on a Burnaby rooftop requires more than filling visible gaps with caulk. Burnaby’s coastal moisture, freeze-thaw cycles, and heavy winter rainfall drive water into hairline cracks, where it travels laterally under membranes and surfaces far from the original entry point. The right approach combines forensic leak detection using thermal imaging and moisture mapping, proper flashing integration, and materials that accommodate building movement. Get it wrong and you will be back on that roof within a few years.
What tools and inspection methods identify parapet wall cracks and hidden leaks?
Effective repair starts with knowing exactly where water is entering, not just where it is dripping. Visual inspection combined with moisture mapping and thermal imaging identifies hidden leak pathways that a simple walk-around will miss entirely. Water travels laterally under membranes, so the wet ceiling stain inside your building may be two metres away from the actual crack.
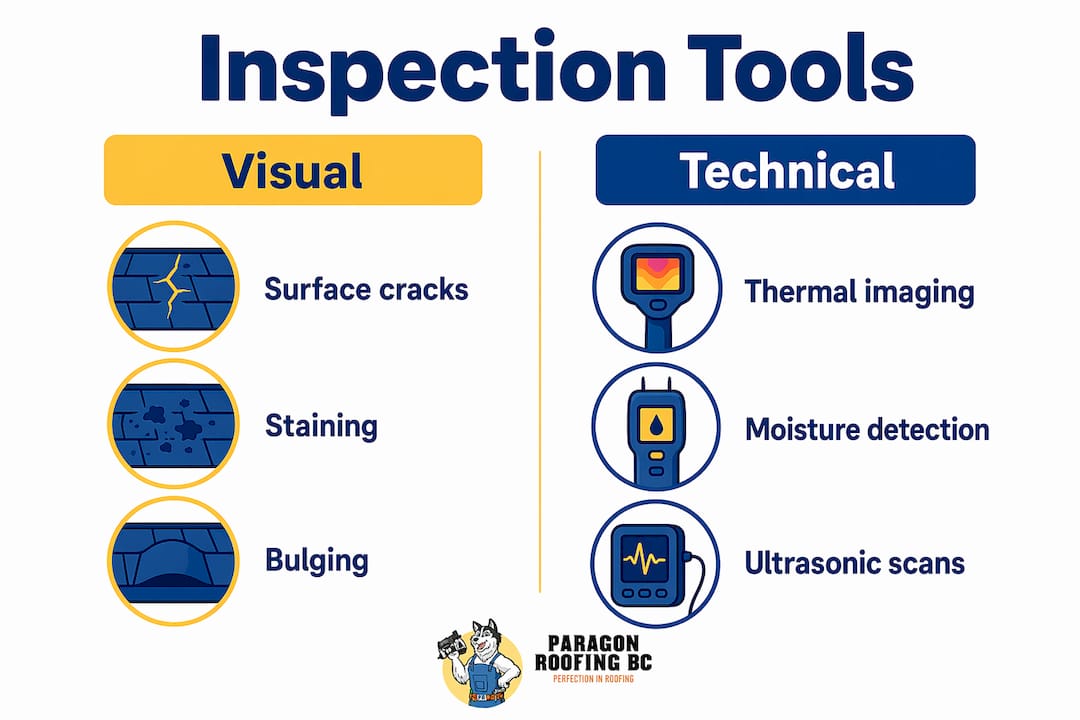
The most reliable inspection uses three tools together:
- Visual inspection: Look for staining, efflorescence (white salt deposits), bulging stucco, and loose or cracked coping caps along the parapet top.
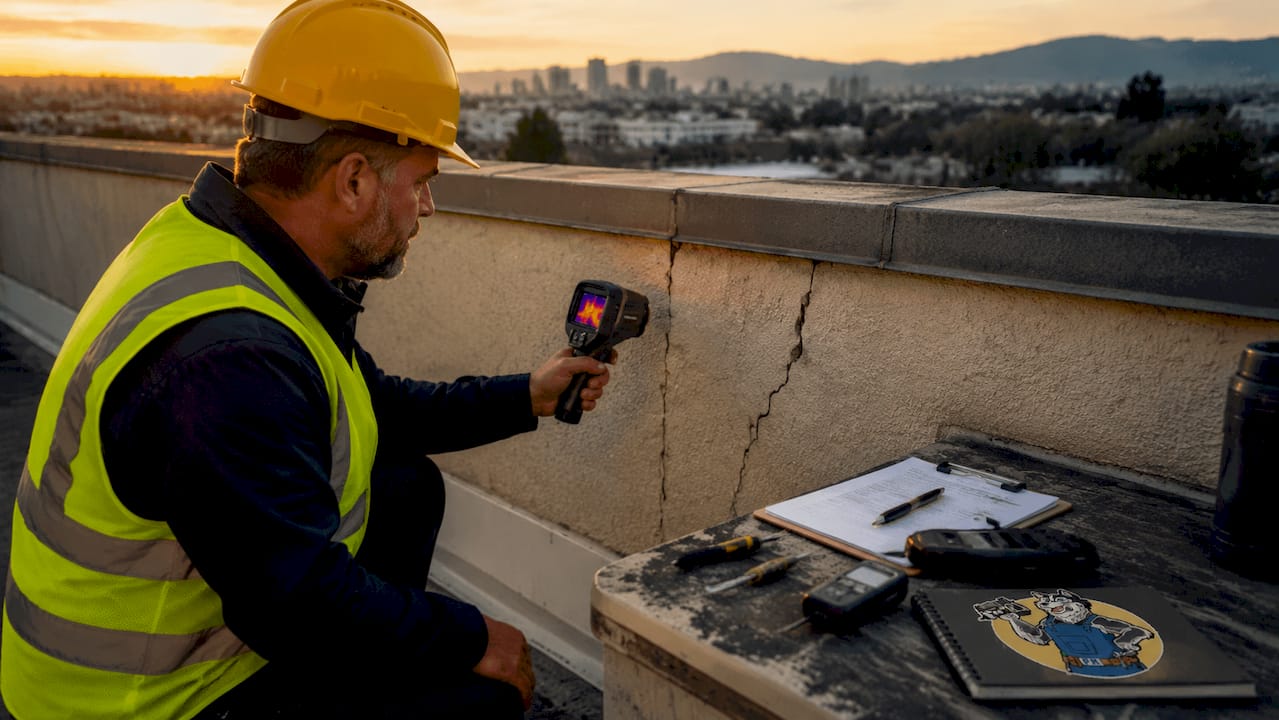
- Thermal imaging: A thermal camera detects temperature differences caused by trapped moisture beneath the membrane surface, revealing wet areas invisible to the eye.
- Moisture mapping: A specialist uses a non-destructive moisture metre to map the extent of saturation before any cutting or patching begins.
Visible stucco perimeter cracks, staining, or bulging indicate moisture intrusion that warrants early professional inspection. Delaying that inspection increases the risk of mold growth, rot in wood blocking, and costly structural remediation.
Pro Tip: Book a Burnaby roof inspection before any repair work begins. Scoping after inspection is far more reliable than patching after sighting a crack.
| Inspection tool | What it detects | Best used for |
|---|---|---|
| Visual inspection | Surface cracks, staining, loose coping | First pass, all parapet types |
| Thermal imaging | Subsurface moisture, wet insulation | Flat and low-slope roofs |
| Moisture mapping | Extent of saturation under membrane | Pre-repair scope definition |
| Probe testing | Depth of moisture in substrate | Confirming thermal findings |
How do flashing and membrane integration prevent recurring parapet leaks?
Surface crack filling alone does not stop parapet leaks from coming back. Sealant degradation and poor flashing overlap are the primary causes of parapet leaks, and exposed sealants break down under UV radiation and thermal movement within a few seasons.
The industry distinguishes between two flashing termination methods, and the difference matters enormously for longevity:
- Surface-fixed flashing: Metal or membrane flashing is adhered or mechanically fastened directly to the face of the parapet wall. It is faster and cheaper to install, but surface-fixed flashing fails after 3–5 years due to thermal expansion and building settlement.
- Raglet or step flashing: The flashing is terminated into a cut groove (raglet) or stepped into mortar joints in the masonry. This method locks the flashing termination against movement and dramatically extends service life.
Continuous membrane integration is the third piece of the puzzle. The waterproofing membrane at the base of the parapet must run up the wall face and tie into the flashing without gaps or bridging. Any discontinuity at that transition becomes a leak point.
Pro Tip: When replacing coping caps on a Burnaby parapet, specify aluminium or galvanised steel with a minimum 75 mm overhang on each side. Undersized coping caps allow wind-driven rain to blow directly onto the flashing termination, which is a very common failure point in this climate.
| Flashing method | Typical lifespan | Best application |
|---|---|---|
| Caulk only | 1–3 years | Temporary patch only |
| Surface-fixed with mastic | 3–5 years | Low-movement walls |
| Raglet or step flashing | 15–25 years | Masonry and stucco parapets |
| Continuous membrane tie-in | 20+ years | Full waterproofing restoration |
Termination method significantly affects parapet flashing lifespan, and raglet or step flashing integration consistently outperforms surface-fixed methods in the Lower Mainland’s wet climate.
Step-by-step approach to repairing parapet wall cracks on Burnaby rooftops
A proper repair follows a clear sequence. Skipping steps is how you end up with the same leak six months later.
-
Clear the work area and set up safety. Remove debris, moss, and loose material from the parapet top and face. On commercial buildings, set up edge protection or anchor points before anyone steps near the parapet. Wet moss on a parapet cap is a slip hazard.
-
Route and clean the cracks. Use an angle grinder or oscillating tool to open hairline cracks to a minimum 6 mm width. This gives the filler material enough depth to bond properly. Blow out dust and debris with compressed air, then prime the crack walls.
-
Fill cracks with a movement-accommodating material. Rigid fillers like standard cement mortar crack again as the building moves. Use a polyurethane or modified polymer filler rated for exterior masonry. Pack the filler in layers rather than one deep fill to prevent shrinkage cracking.
-
Reflash the parapet base. Strip back the existing membrane flashing at the wall base. Install new base flashing that runs a minimum 200 mm up the parapet face, bonded with compatible adhesive and mechanically fastened at the top termination. Tie the new flashing into the existing roof membrane with a proper overlap.
-
Address scupper sleeves if present. Scupper sleeve corrosion or flashing integration failure requires membrane removal and new sleeve installation to stop leaks. If the sleeve is corroded or the membrane around it is lifting, replace the sleeve completely. Do not caulk around a corroded scupper and call it done.
-
Install or replace coping caps. Bed new coping caps in sealant and fasten mechanically. Lap joints in the coping should be sealed with a compatible polyurethane sealant, not silicone. Silicone does not accept paint and is difficult to bond over if future repairs are needed.
-
Verify membrane continuity before closing finishes. Confirm continuous membrane at the parapet base and check all drainage features before applying any stucco or paint finish. A flood test or electronic leak detection scan at this stage confirms the repair is watertight.
| Repair type | Scope | Typical triggers |
|---|---|---|
| Minor crack repair | Routing, filling, reseal coping | Hairline cracks, no membrane damage |
| Major repair | Reflashing, membrane tie-in, scupper replacement | Active leaks, corrosion, membrane lifting |
| Full parapet restoration | New coping, full reflash, stucco remediation | Widespread cracking, rot in blocking |
Pro Tip: After completing any parapet repair, run a Burnaby flat roof inspection six weeks later. Burnaby’s autumn rains will stress-test the repair quickly, and catching a small gap early costs far less than reopening finished work.
Common mistakes when fixing rooftop wall cracks in Burnaby
Most parapet repairs fail not because of bad materials, but because of incomplete diagnosis and shortcuts in the repair sequence.
- Sealing only the visible crack. Water intrusion through cracks worsens over time, causing mold, rot, and structural deterioration. Filling the surface crack without inspecting the membrane underneath leaves the real leak path open.
- Ignoring scupper sleeve condition. Scupper sleeve corrosion is a frequent hidden cause of parapet dripping. Property managers often spend years patching the wall face while the actual leak is coming through a corroded scupper sleeve behind the stucco.
- Using silicone caulk as the primary sealant. Silicone does not bond to damp or contaminated surfaces, and it cannot be painted or overlapped reliably. Polyurethane sealants perform better in Burnaby’s wet conditions.
- Skipping the post-repair membrane check. Parapet-related leaks recur after spot fixes when membrane integrity at transitions is not restored. Always verify continuity before closing up finishes.
- Delaying action on stucco cracks. Stucco perimeter cracks that sit open through a Burnaby winter allow freeze-thaw cycling to widen them rapidly. What starts as a cosmetic crack becomes a structural moisture problem within one or two seasons.
“A caulk-only fix on a parapet is like putting a bandage on a broken pipe. It might slow the drip, but the pressure is still building behind it.”
Pro Tip: Schedule a post-repair inspection every 12 months. Burnaby’s climate is hard on sealants and flashing terminations. Catching early sealant shrinkage before it opens into a gap is the most cost-effective maintenance habit a property manager can build.
Key takeaways
Repairing parapet wall cracks on Burnaby rooftops requires forensic inspection first, then flashing integration and movement-accommodating materials to prevent leaks from recurring.
| Point | Details |
|---|---|
| Inspect before you repair | Use thermal imaging and moisture mapping to locate all hidden leak pathways before cutting or patching. |
| Flashing method determines longevity | Raglet or step flashing integration outlasts surface-fixed methods by a decade or more in Burnaby’s climate. |
| Scuppers are a hidden leak source | Corroded scupper sleeves must be replaced, not caulked, to stop recurring parapet drips. |
| Caulk-only fixes fail fast | Surface sealant repairs without membrane tie-in typically fail within 1–3 years due to thermal movement. |
| Post-repair verification is non-negotiable | Confirm membrane continuity before closing finishes to avoid reopening completed work after the next rainstorm. |
What I have learned from years of parapet repairs in Burnaby
Hey, it’s Harman here. After inspecting and repairing parapets on Burnaby commercial buildings, strata complexes, and older residential flat roofs, the pattern I see most often is this: the property manager called someone who patched the crack, painted over it, and handed back an invoice. Then the leak came back the following november.
The uncomfortable truth is that most parapet repairs fail because the person doing the work never found the actual leak source. They found a crack. Those are not the same thing. Water in Burnaby moves sideways under membranes for a long way before it finds a way in. If you are not using thermal imaging or moisture mapping, you are guessing.
The other thing I push back on with clients is the idea that a parapet repair is a one-time event. In this climate, flashing terminations and sealants need to be checked annually. The buildings that stay dry are the ones where someone is on the roof every year looking at the coping caps, the scupper sleeves, and the membrane base flashing. That is not expensive maintenance. It is cheap insurance against a $30,000 remediation job.
If your building has had the same parapet crack repaired more than once, that is a signal the repair method is wrong, not that the wall is unusually problematic. Get a proper forensic inspection and scope the work correctly the first time.
— Harman
Paragonroofingbc parapet wall repair services in Burnaby
Paragonroofingbc works with Burnaby property managers and homeowners on parapet wall repairs that go beyond surface fixes. The team uses forensic leak detection, thermal imaging, and proper flashing integration to find the real source of the problem before any repair work begins.

Whether you are dealing with a stucco crack that keeps coming back, a corroded scupper sleeve, or a membrane that has lifted at the parapet base, Paragonroofingbc has the local experience to scope and repair it correctly. The team handles everything from minor Burnaby roof repairs to full parapet restorations on flat and low-slope roofs. For leak detection and waterproofing work across the Lower Mainland, visit the roof leak detection service page or the residential roofing services page to book an assessment.
FAQ
What causes parapet wall cracks on Burnaby rooftops?
Burnaby’s freeze-thaw cycles, coastal moisture, and thermal movement cause masonry and stucco parapets to crack over time. Sealant degradation and poor flashing integration accelerate the damage by allowing water to enter and worsen existing gaps.
Can I repair a parapet wall crack myself?
Minor surface cracks can be filled with a polyurethane masonry filler, but any repair that involves the membrane, flashing, or scupper sleeves requires a professional. Incorrect membrane work creates new leak pathways that are expensive to find and fix.
How long does a proper parapet wall repair last?
A repair using raglet or step flashing integration with continuous membrane tie-in typically lasts 15–25 years. Surface-fixed flashing with mastic fails after 3–5 years due to thermal movement and settlement.
Why does my parapet leak keep coming back after repairs?
Parapet leaks recur after spot fixes when membrane continuity at transitions is not restored. The repair addressed the visible crack but left the underlying leak pathway open.
How often should parapet walls be inspected in Burnaby?
Parapet walls should be inspected at least once a year, ideally in early autumn before the heavy rain season begins. Annual inspections catch sealant shrinkage and flashing movement before they open into active leaks.
Recommended
Our Roofing Blog


Have more questions about roofing?
Check out our FAQs or give us a call today to speak to an expert roofer in Vancouver Lower Mainland, BC. We're here to help our neighbours make educated decisions about their roof. For our team, we value helping clients save money while making their roofs last.
